In this step, you will:
Create a report to show in the web browser the data published by TPX.
In this step, you will:
Create a report to show in the web browser the data published by TPX.
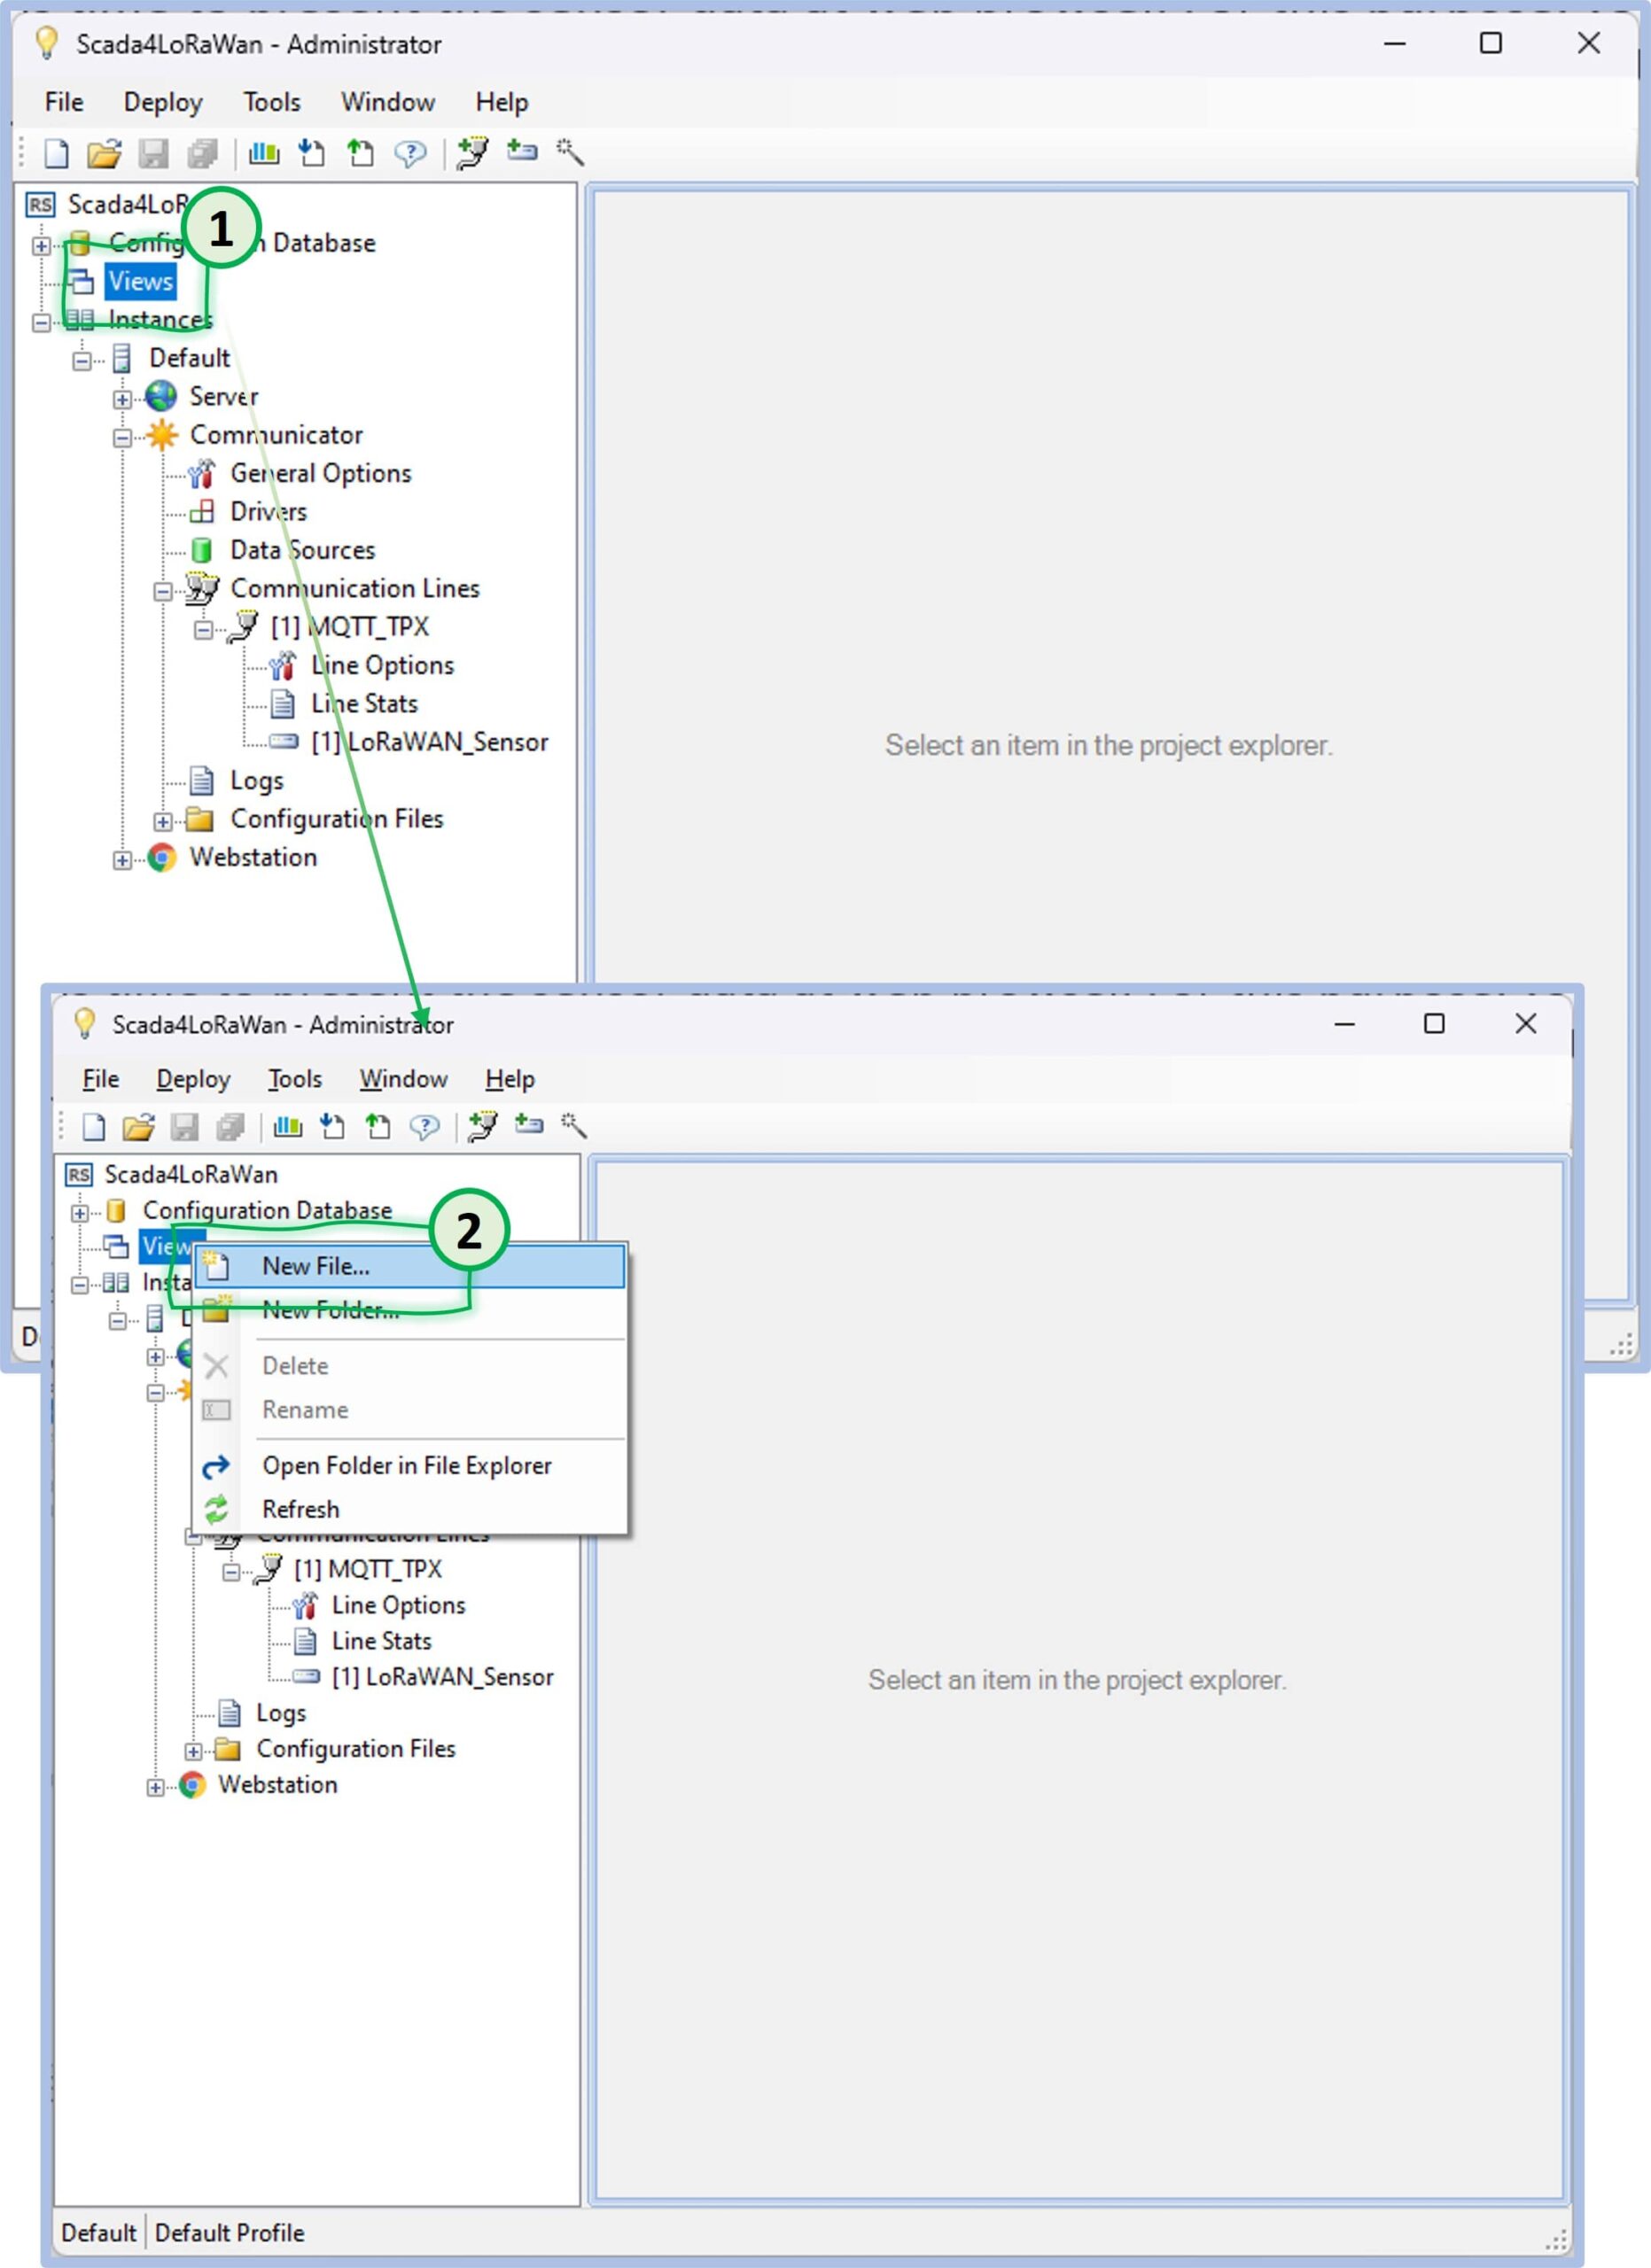
Now, it is time to present the sensor data to the end users in the web browser. For this purpose, you are going to create a table view in the Administration application, and then you will be able to view a simple report in Rapid SCADA’s web application.
Right-click on the Views menu item to access the submenu of the views.
Click on New File to create a report.
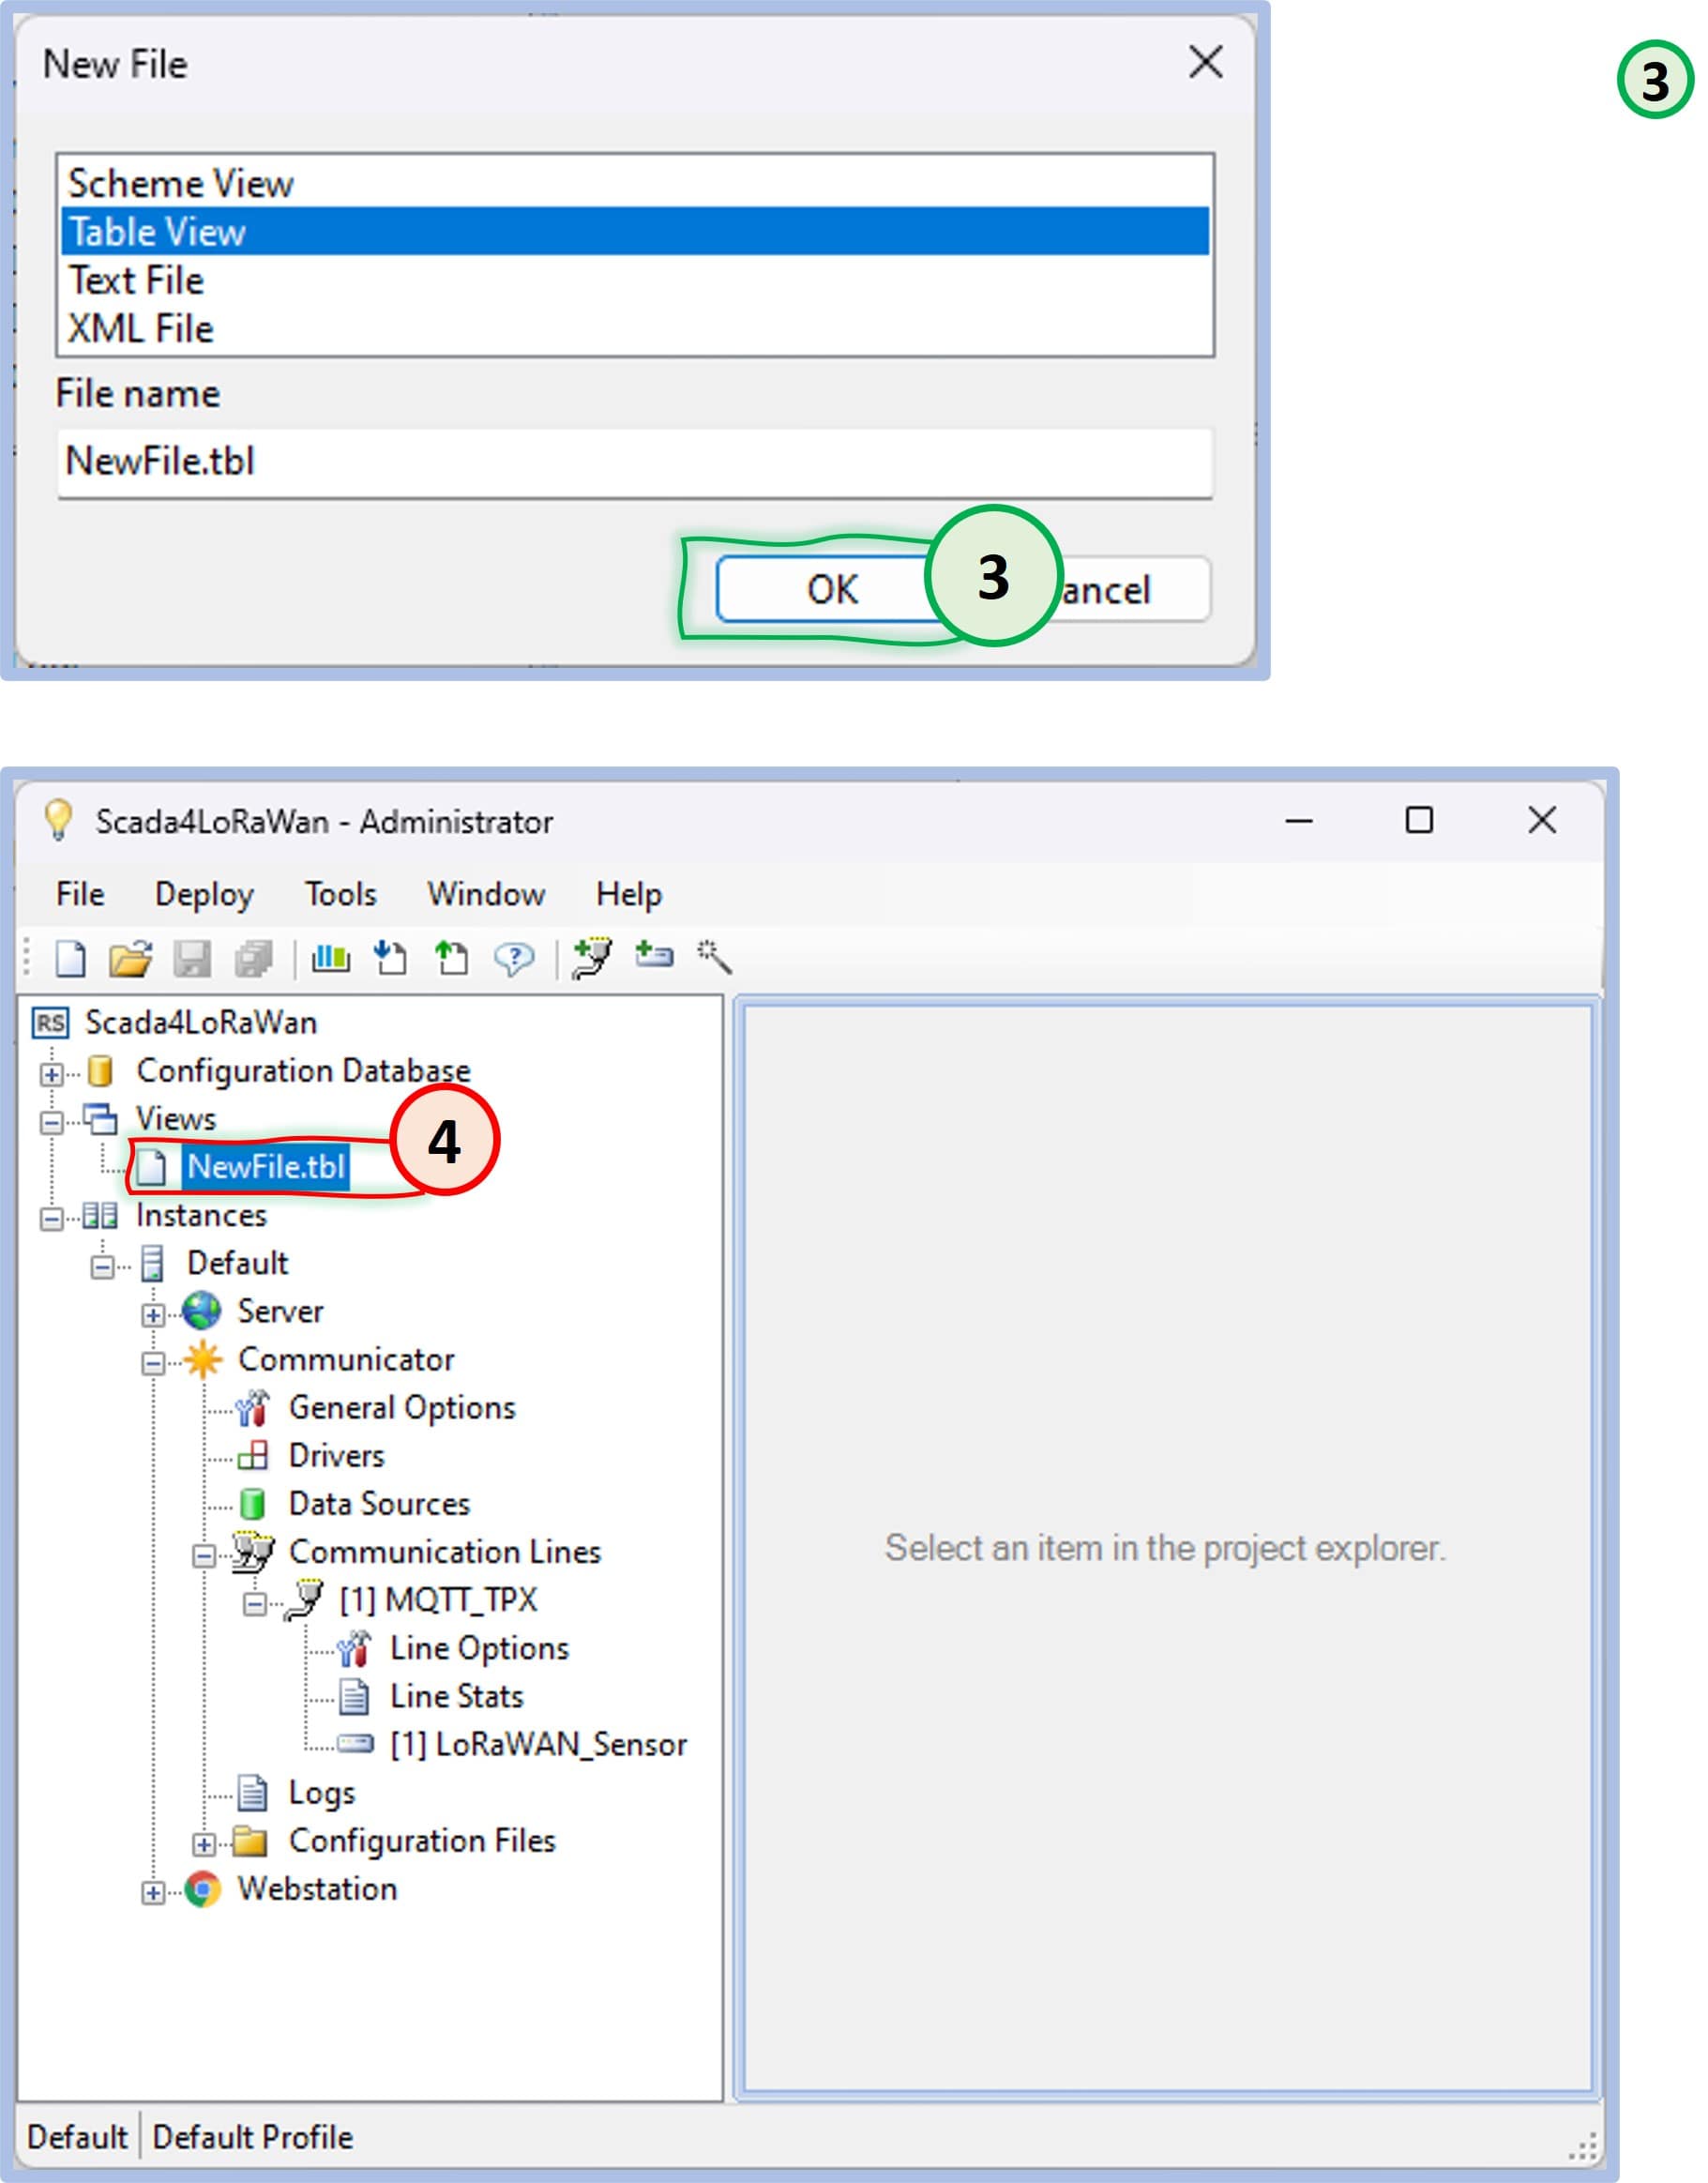
Select Table View and click OK to create a scheme view with a default name.
You can see that a new table file was created with the default name, NewFile.tbl.
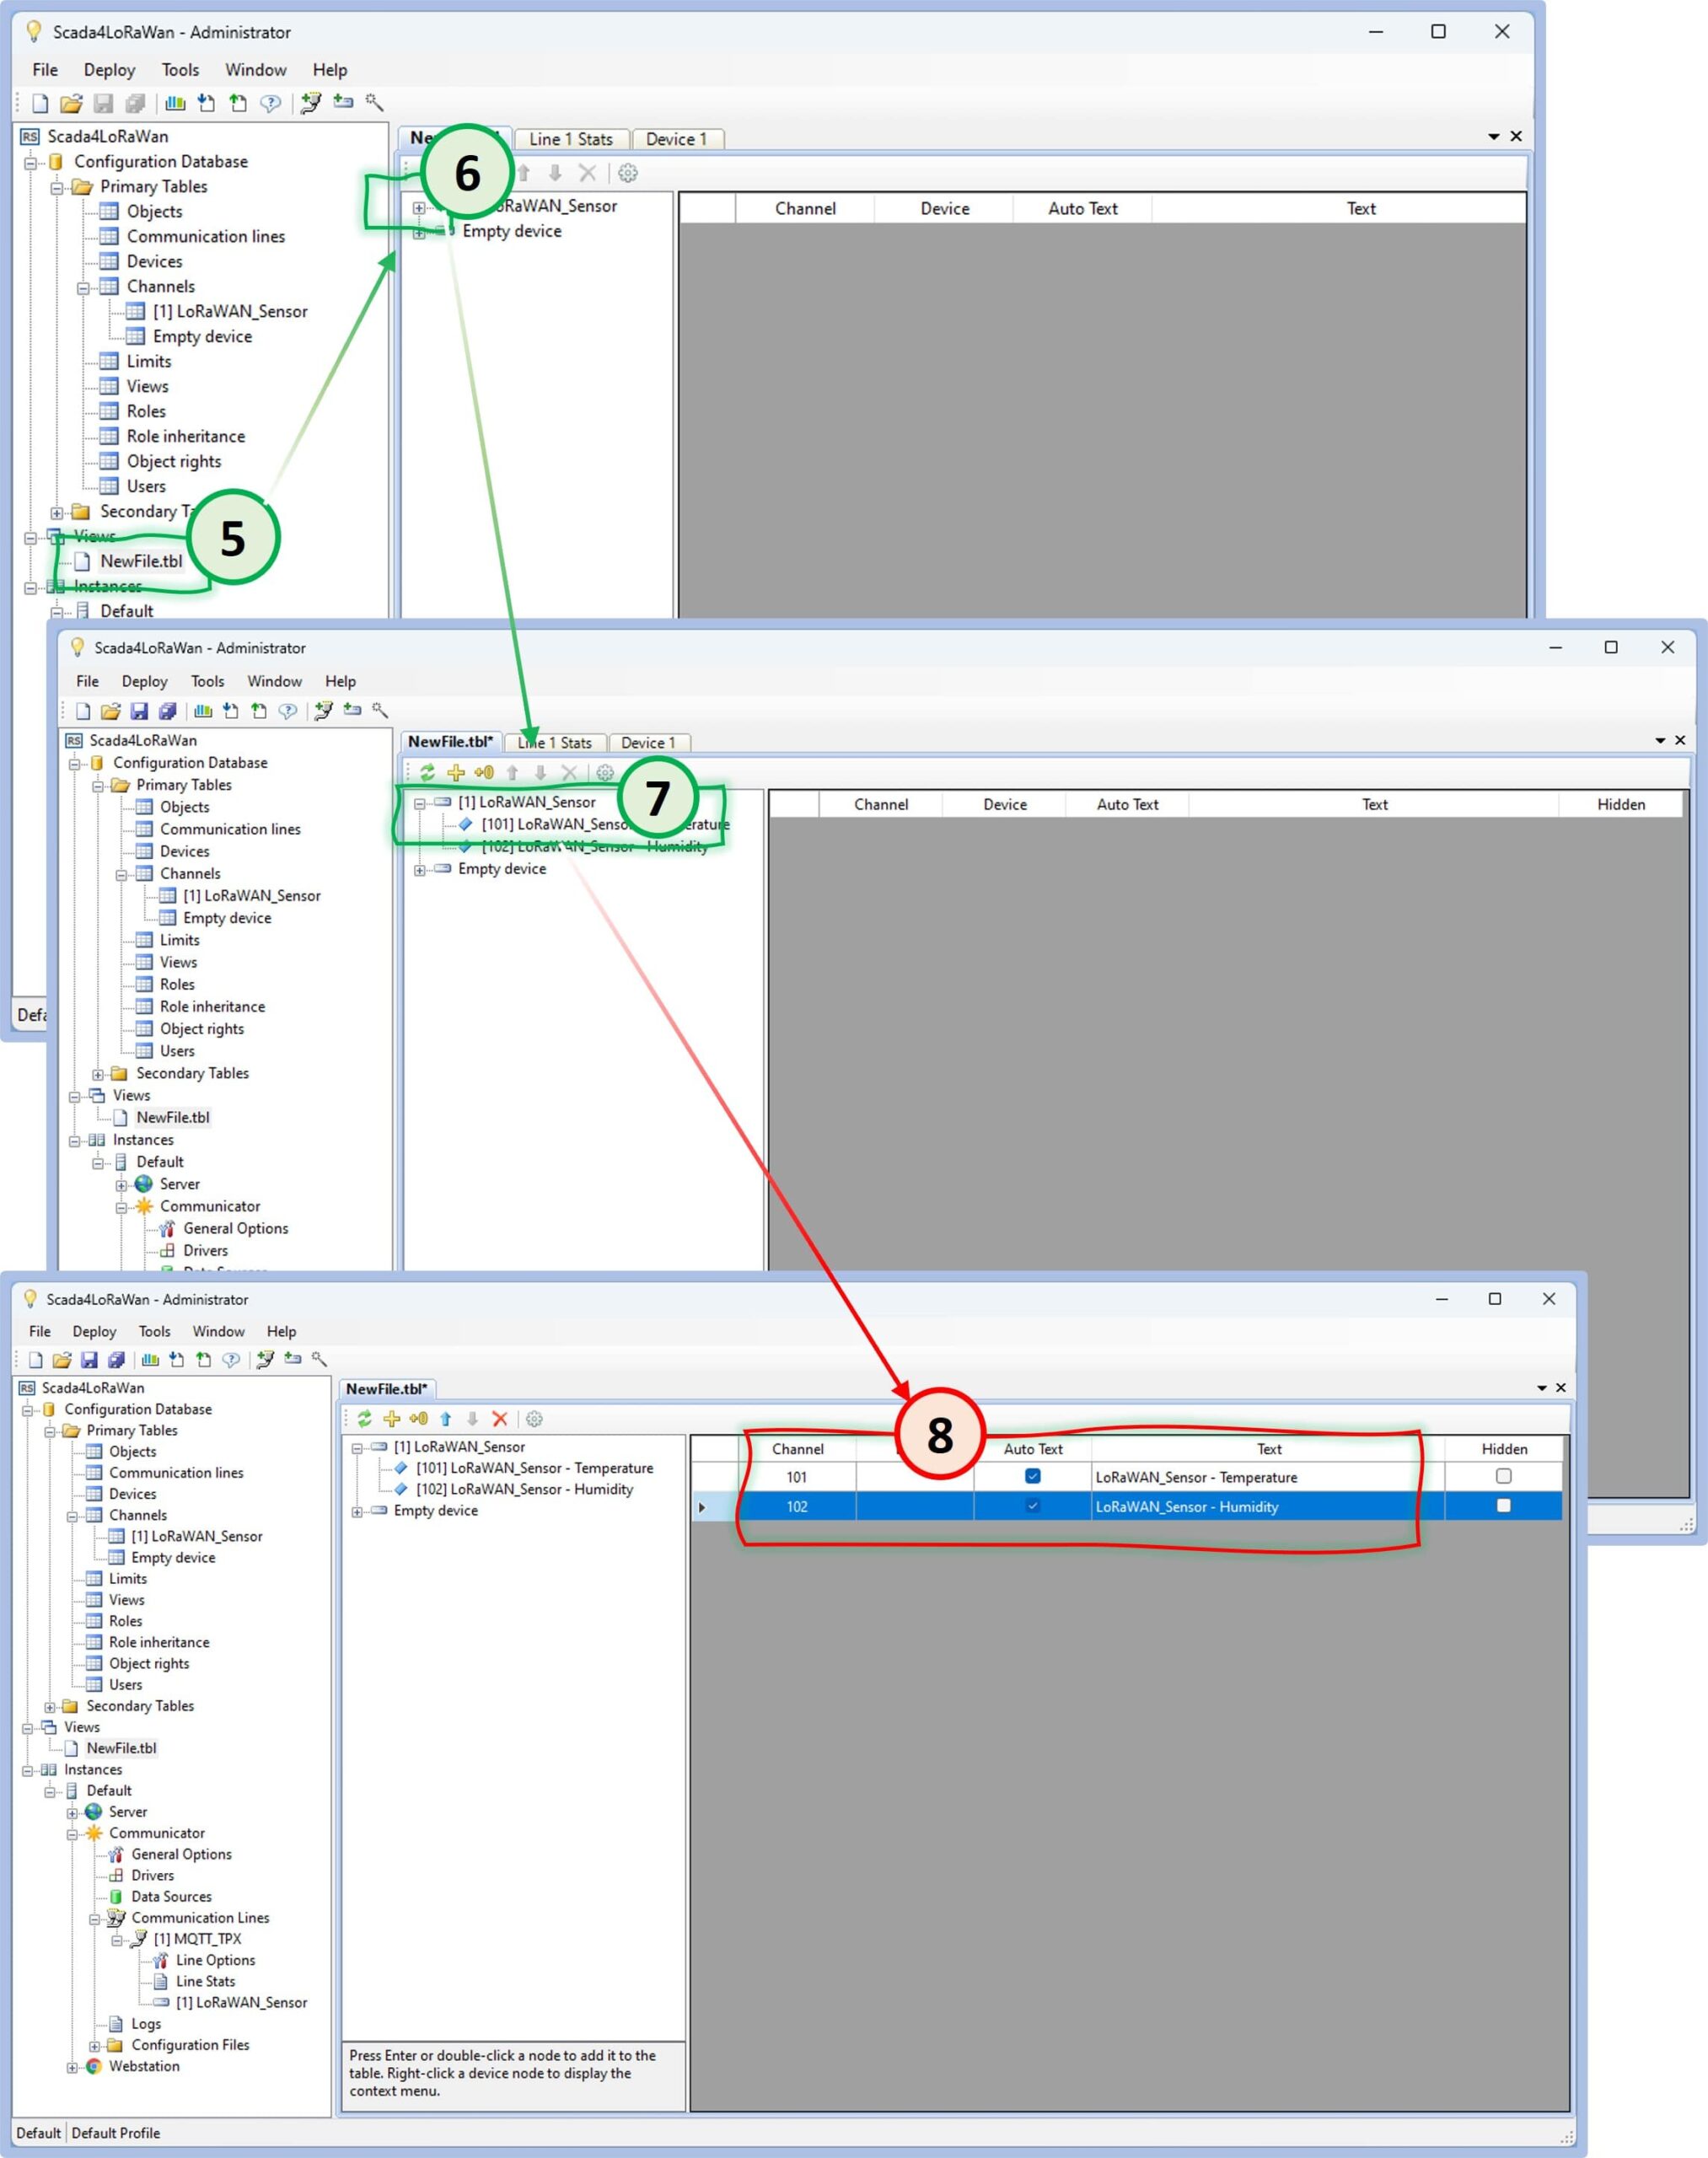
You just created a table view file, and now you have to define the data elements that will be shown in this table view.
You just created a table view file with name NewFile.tbl and now you must define which data elements will be shown in this table view.
Double-click on NewFile.tbl in the Views list.
Click on the + sign to view available channels on the devices.
Double-click on each channel (101 and 102) to add to the report (i.e., on the right-hand side of the window).
You can see that Channels 101 and 102 were added to the report.
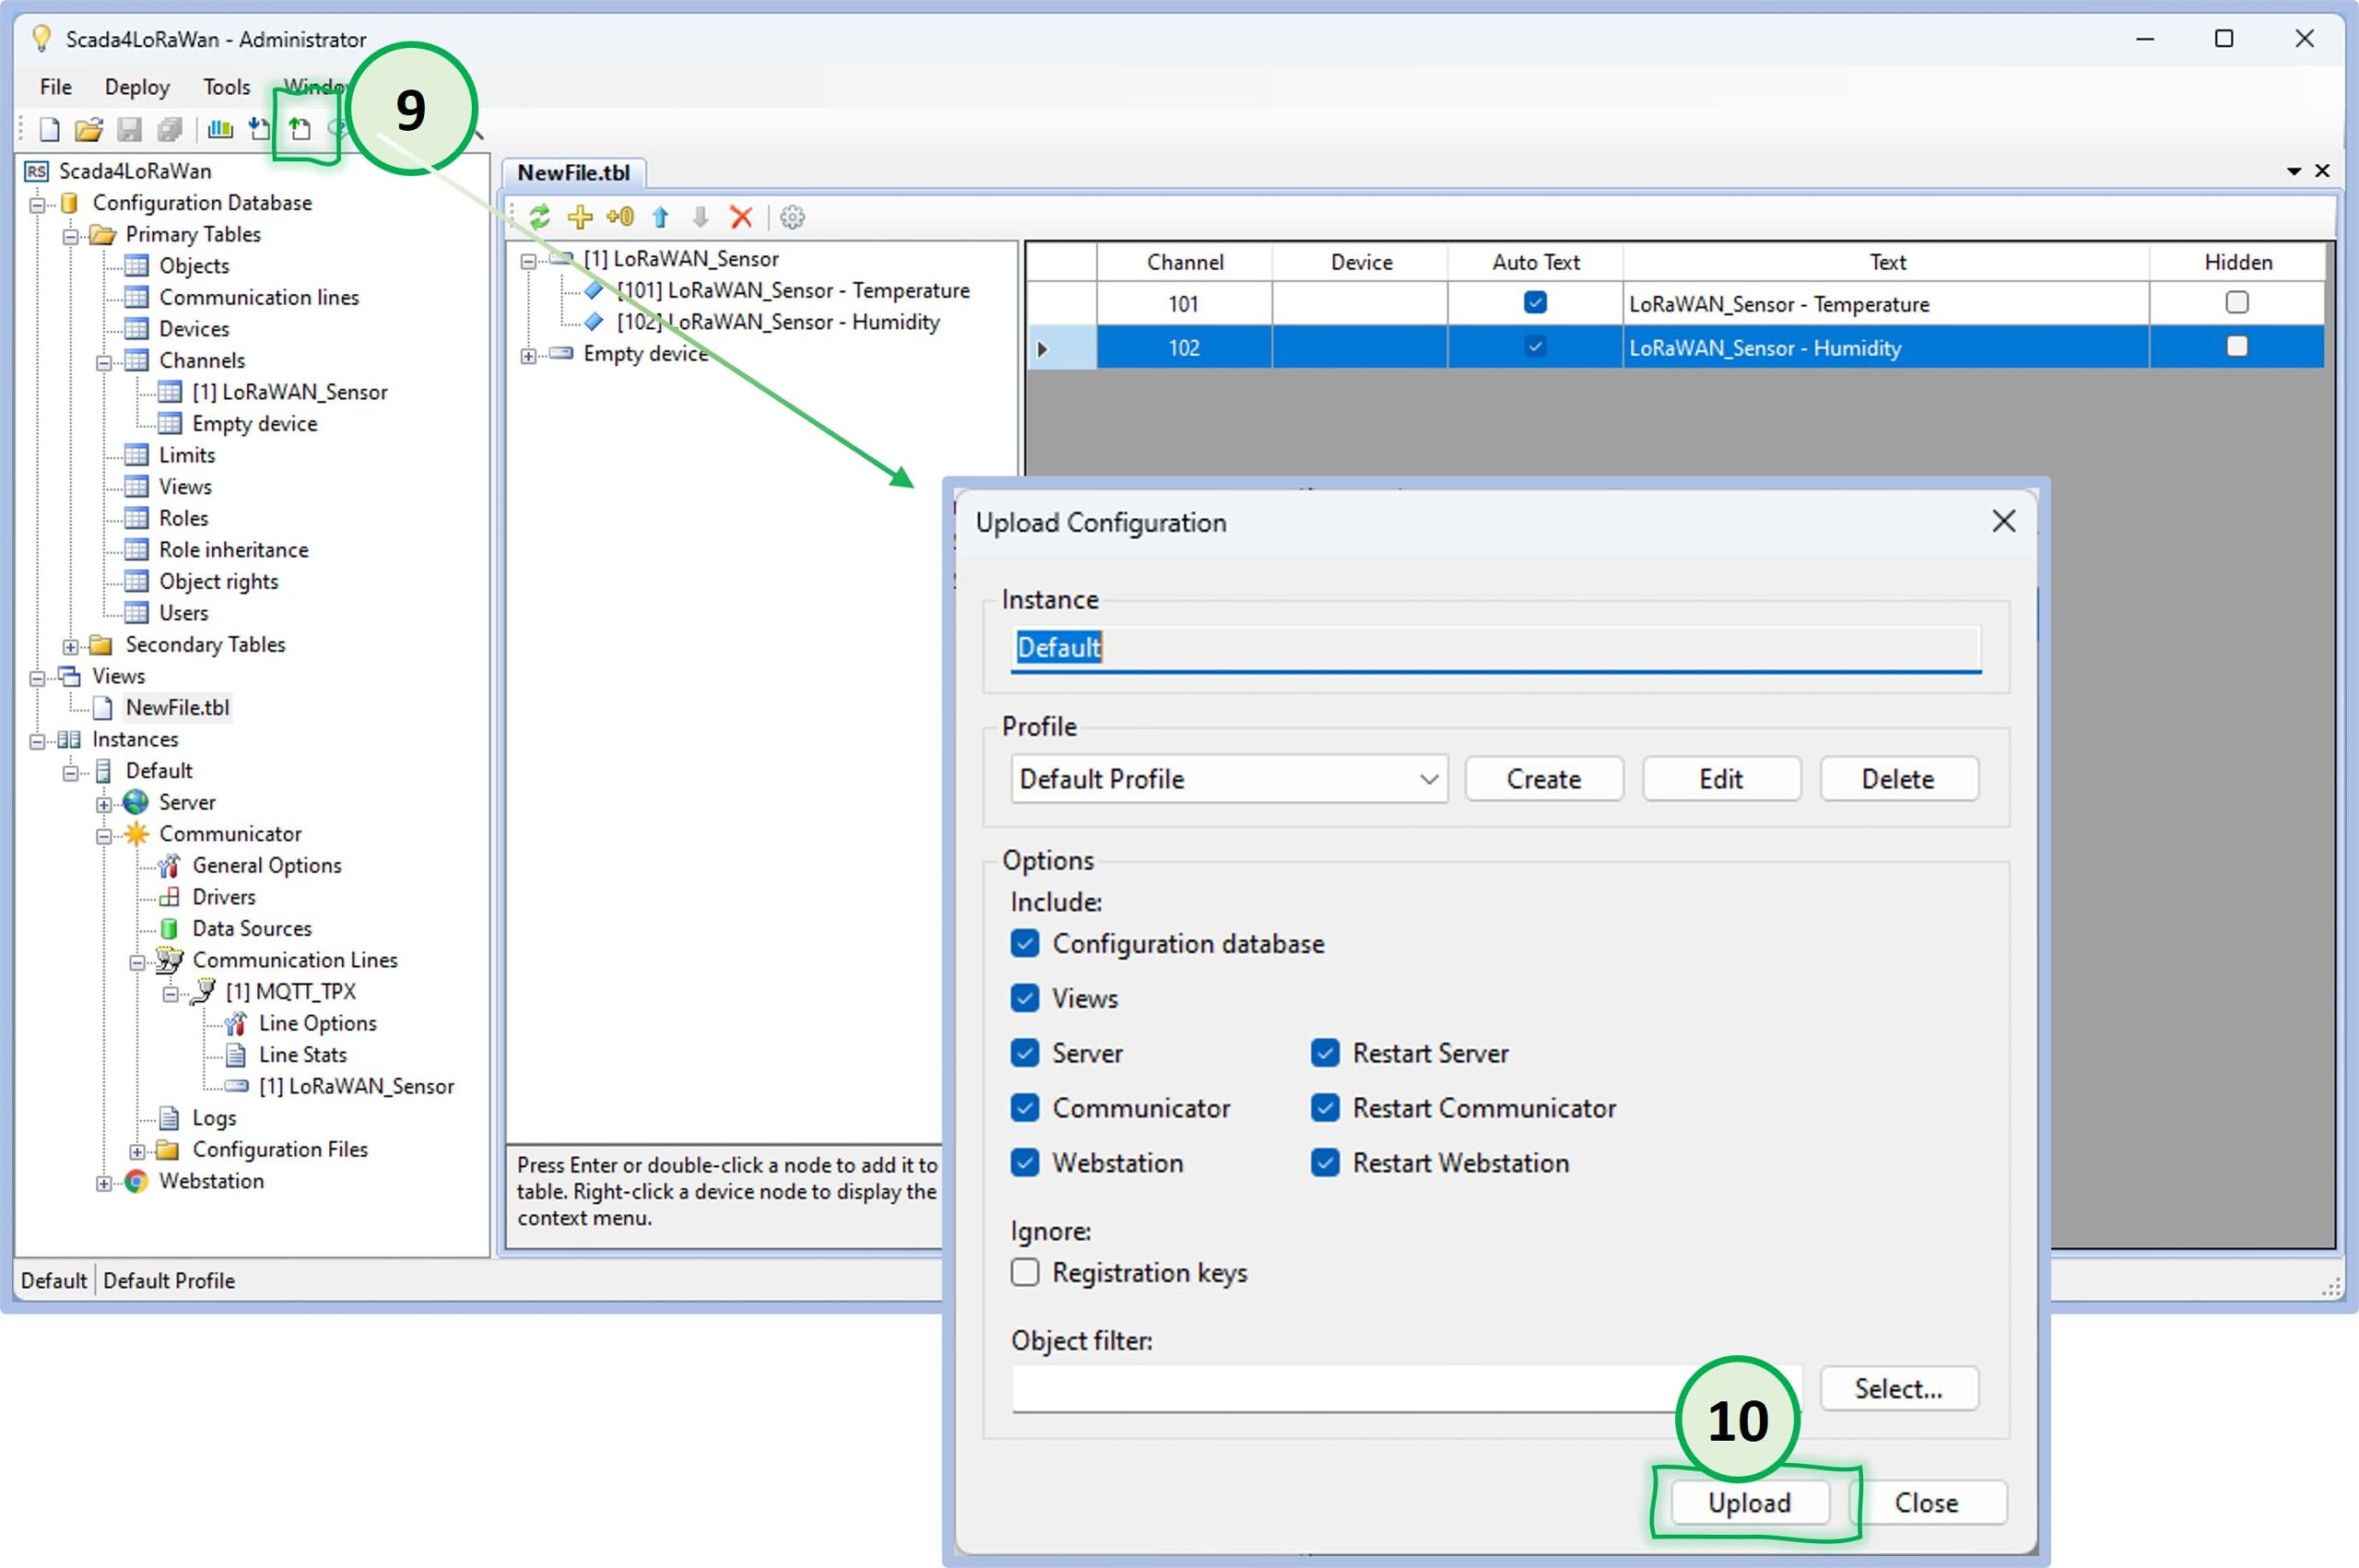
Now you need to upload the changes into the Rapid Scada engine. You are going to use the Upload Configuration option for this purpose.
Click the Upload icon to view the Upload Configuration dialog.
Just click Upload to start the upload process.
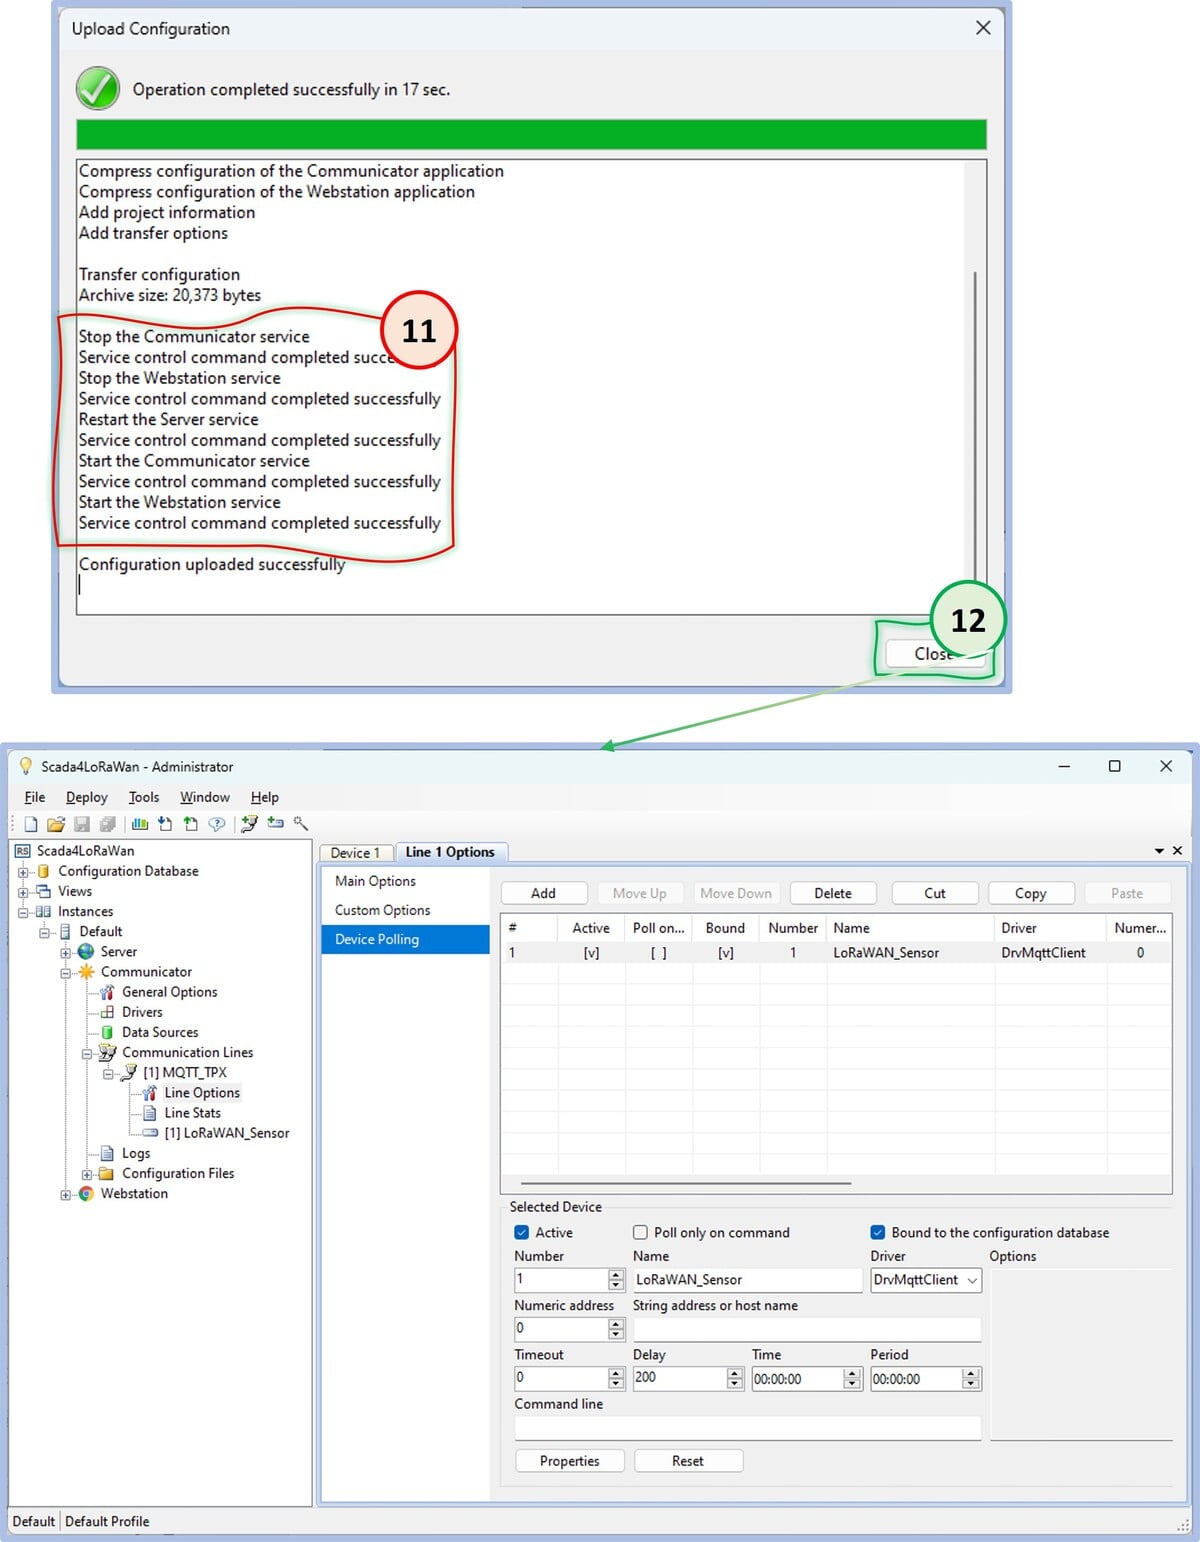
Verify that all the tasks have been completed successfully, and then click Close to return to the main page of the administration application.
Click Close to return to the main screen of the administration application.