In this step, you will:
– Use the IDE to upload the blink sketch to your device.
– Observe that the LED on the device is blinking.
In this step, you will:
– Use the IDE to upload the blink sketch to your device.
– Observe that the LED on the device is blinking.
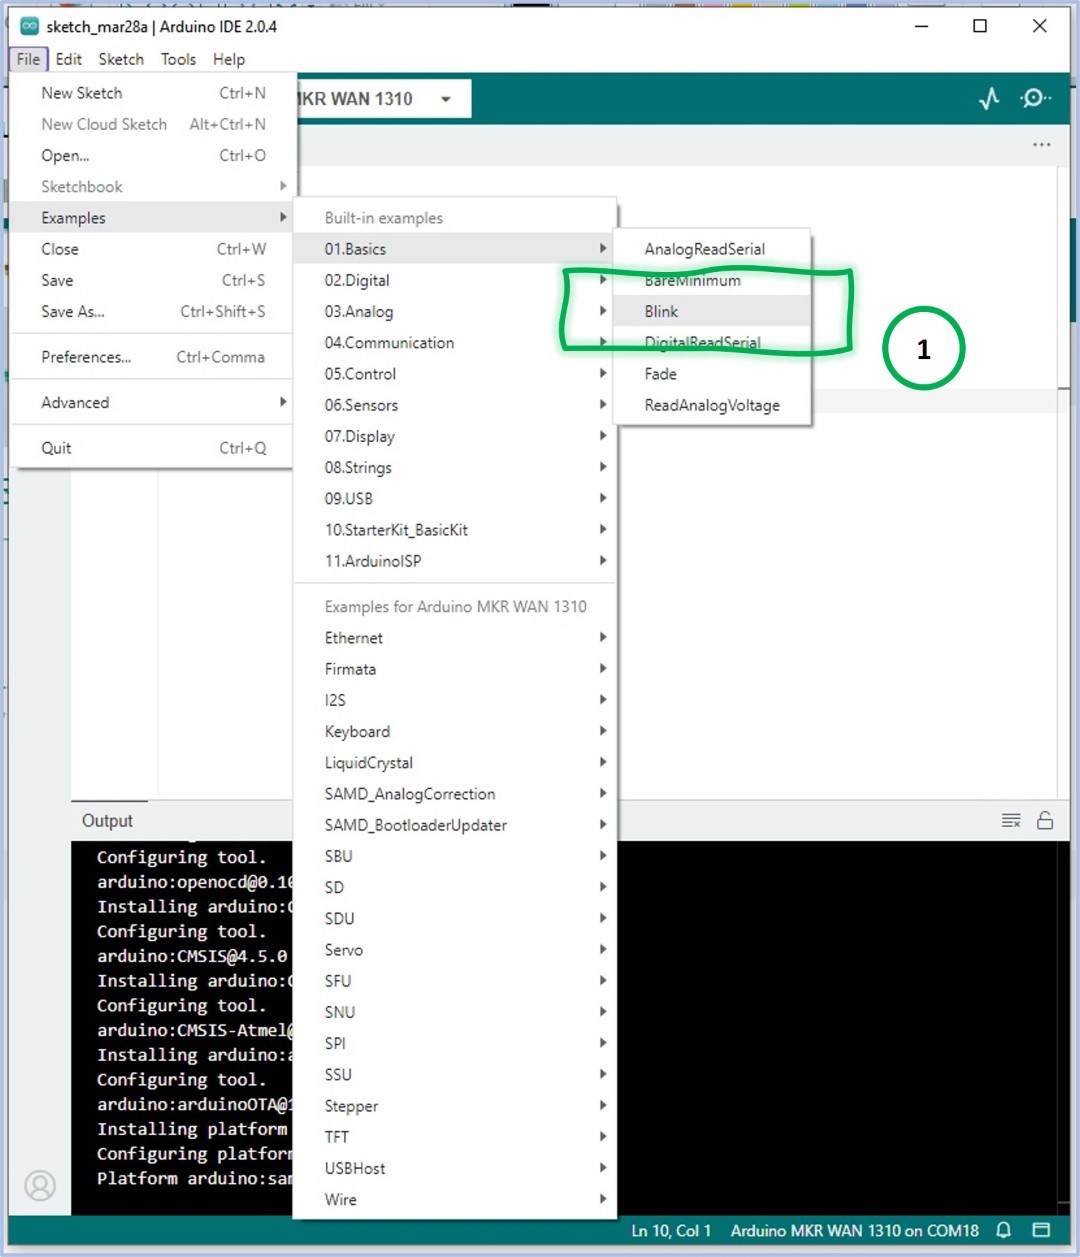
In order to ensure that your IDE and hardware setup are correct, you will use the example blink sketch supplied by the Arduino IDE.
Select the Blink example sketch supplied by the Arduino IDE.
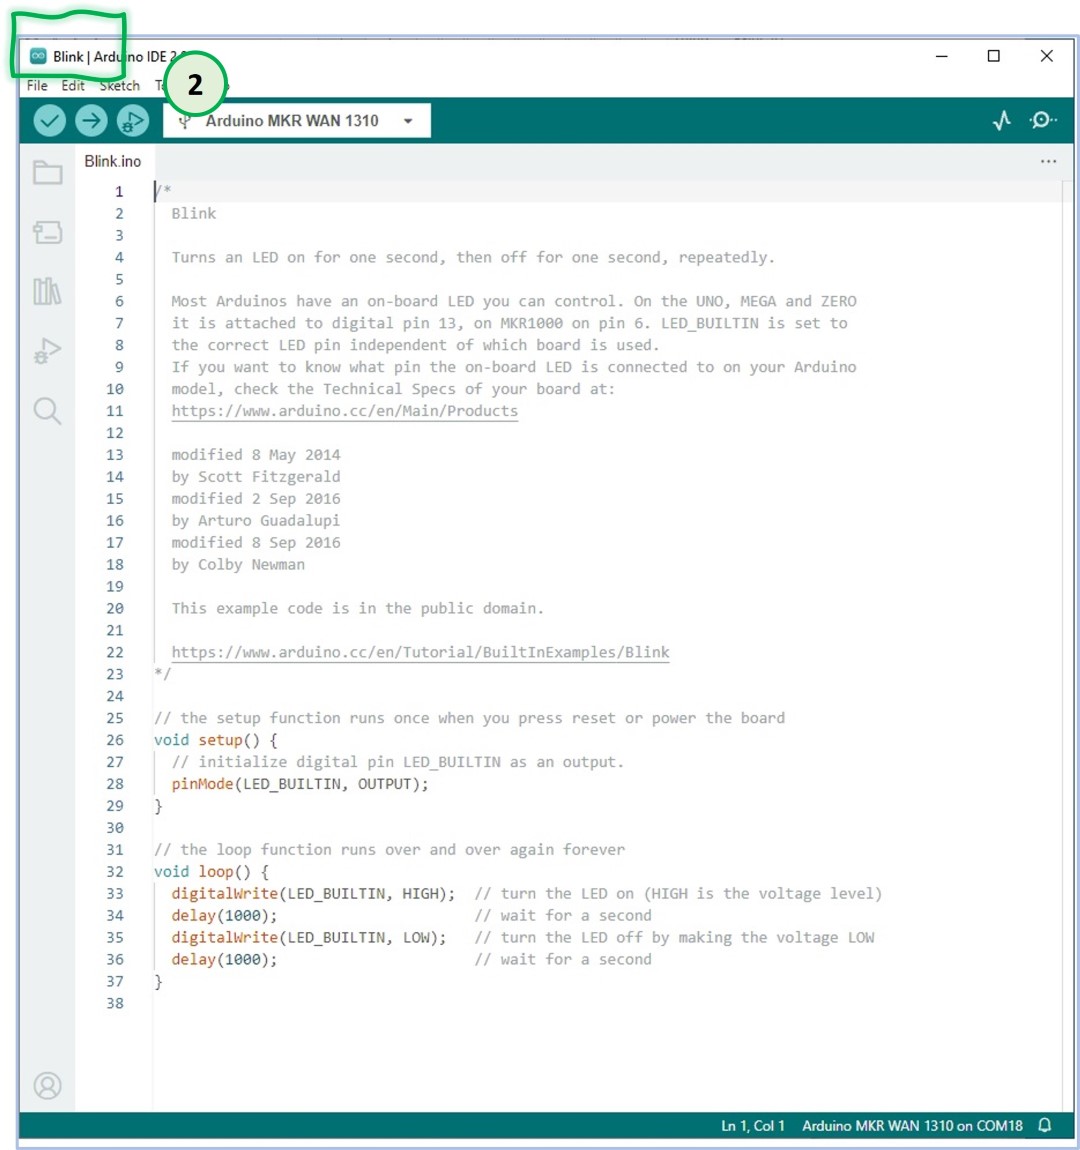
Verify that the source code of the sketch is loaded into the IDE.
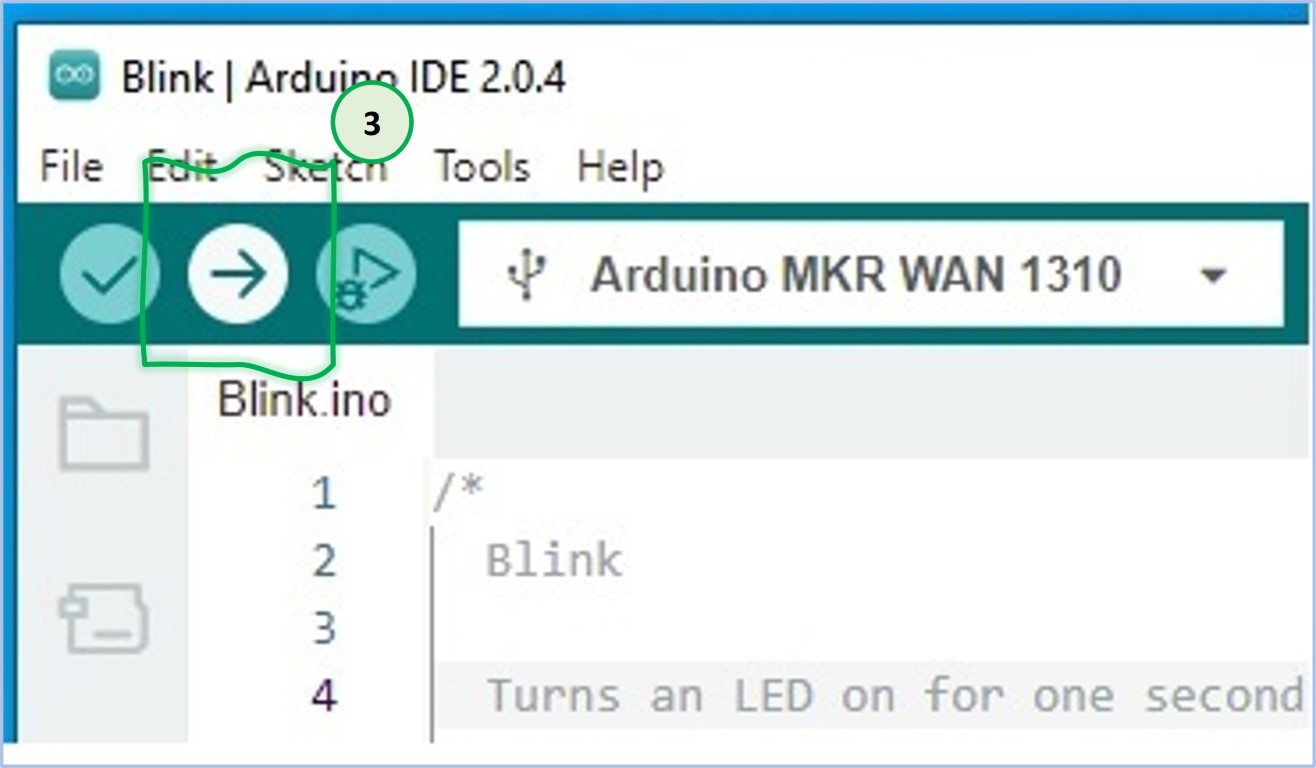
Select upload by clicking on the arrow icon, or alternatively, use ctrl+U for sketches to:
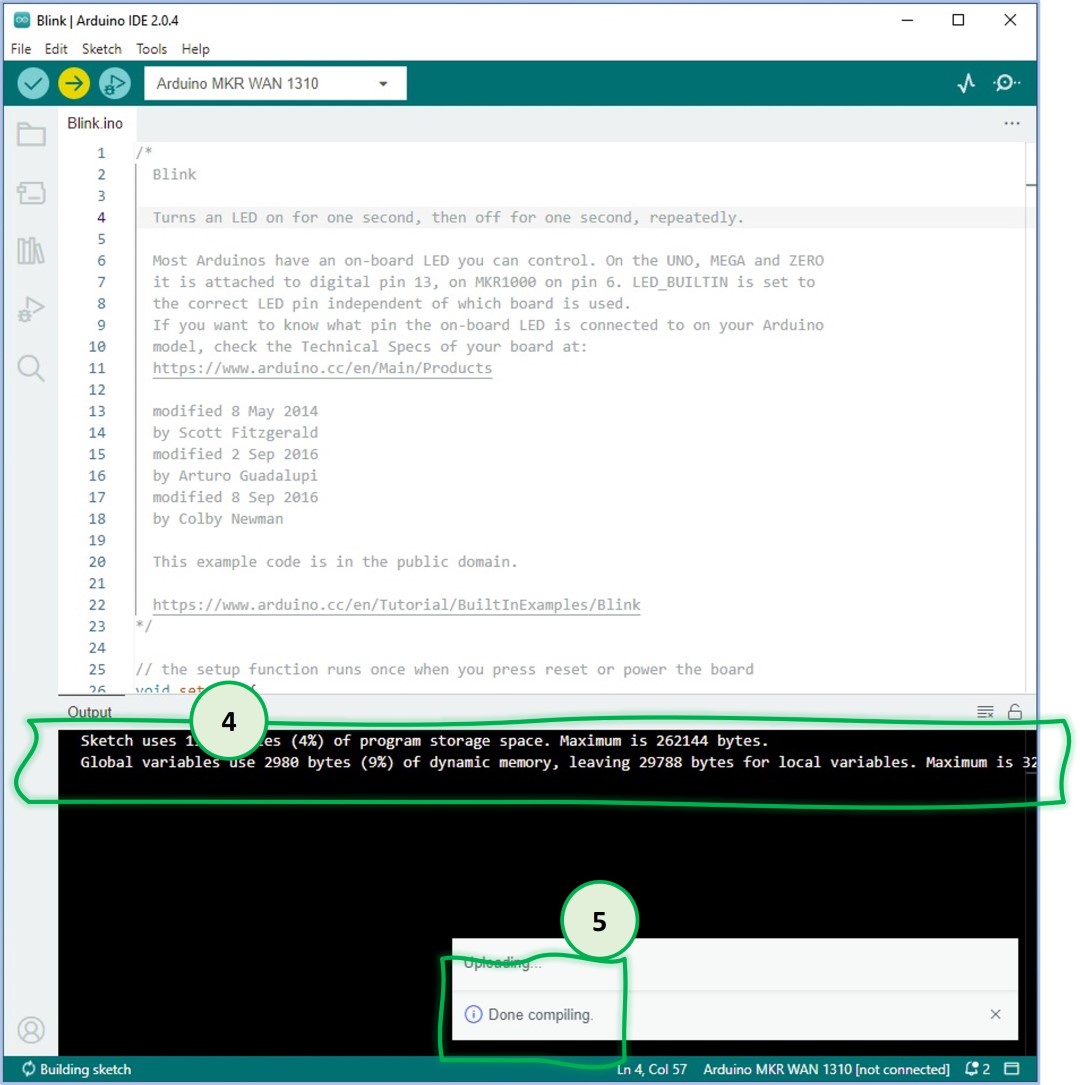
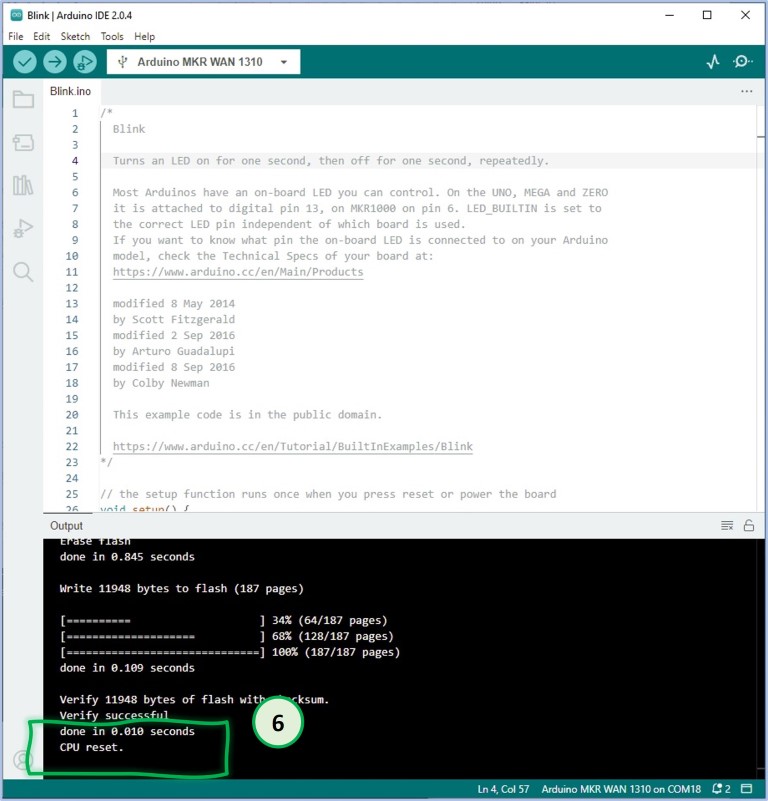
Observe that the compilation of the sketch starts.
The Done compiling message indicates that the compilation of the sketch finished without any problems.
When you see the message CPU reset, it means that your sketch has been uploaded and the device has started to run. As a sketch loads into memory, it automatically starts to run.
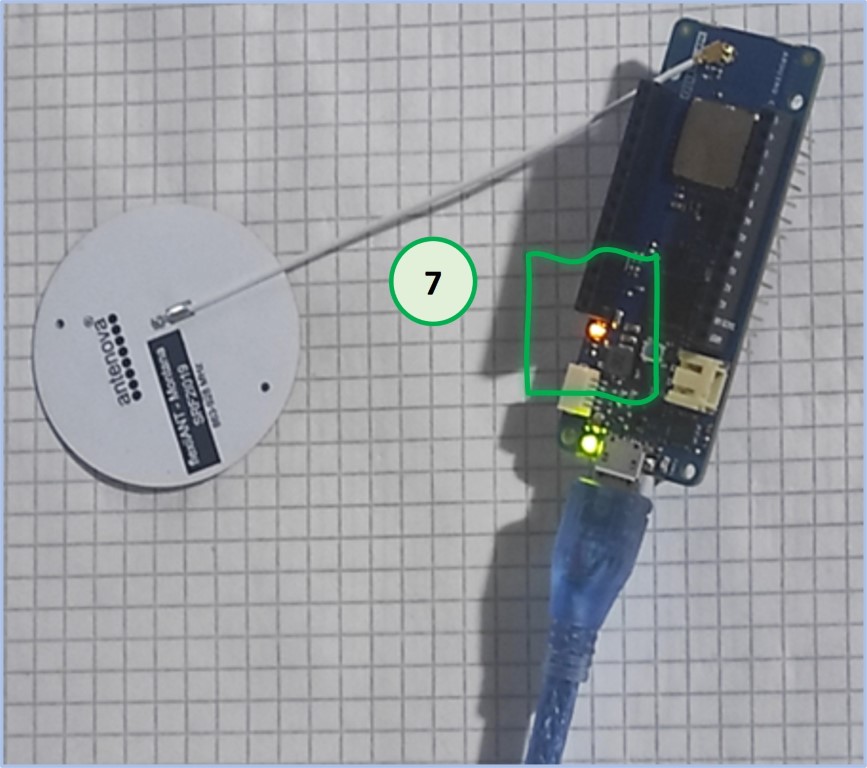
Observe that the LED starts to blink. It shows that your IDE and device are working together without any issues.
As a result of this step, it is ensured that the IDE is setup properly and working with your device, which is connected via the USB port of your computer.