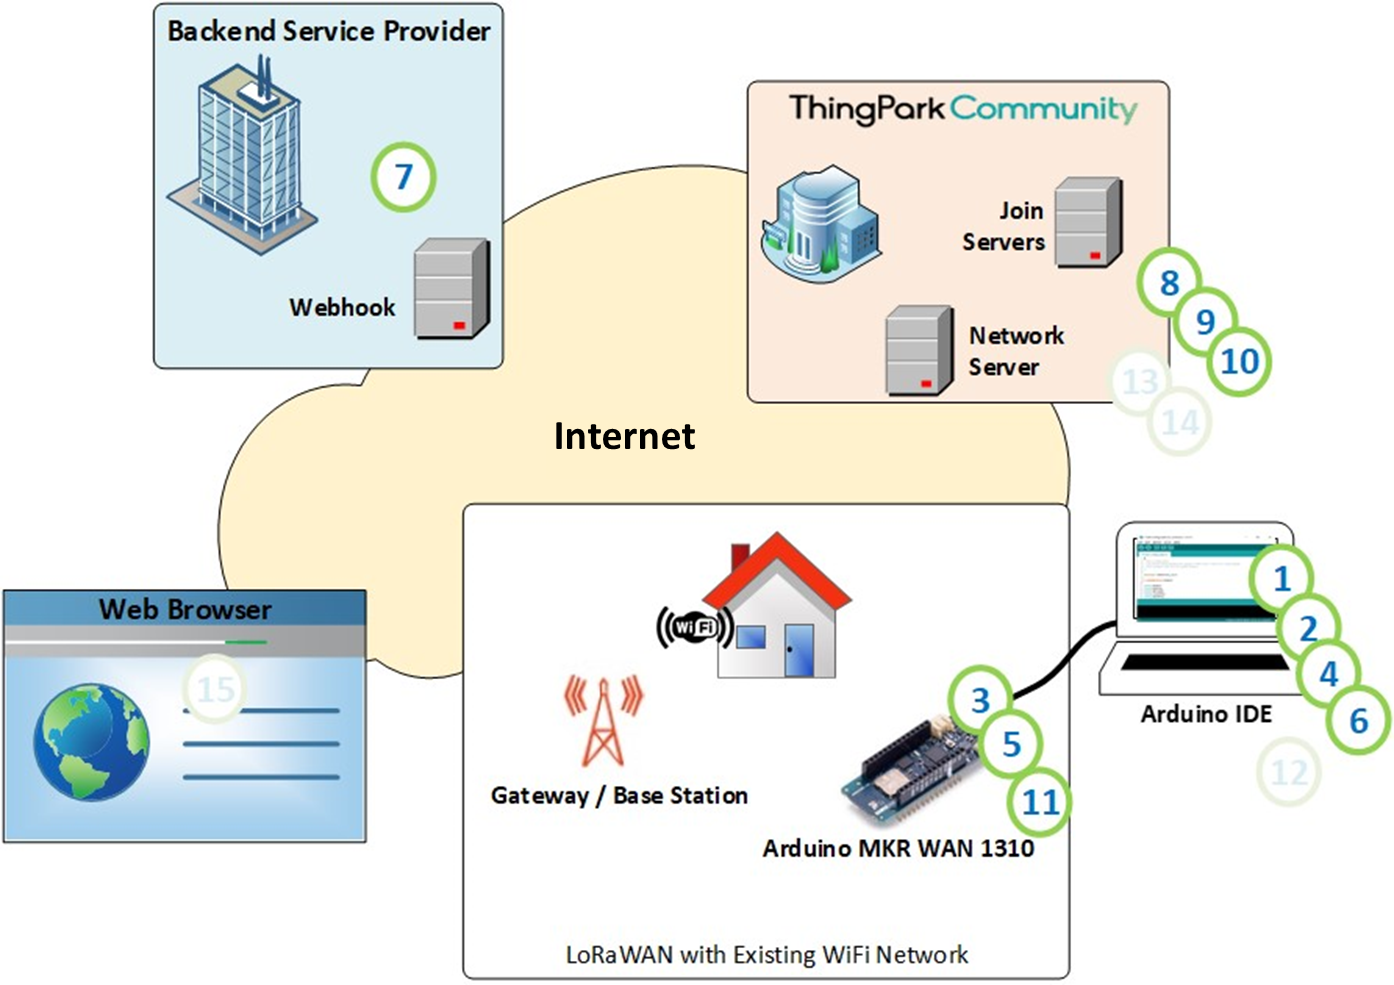
To implement the solution described in the Solution Overview section, you need to do the following:
Step 1: Install the Arduino IDE on your computer to manage the application on your Arduino device, update the firmware of the LoRaWAN® module and access your device DevEUI.
Step 2: Upload the necessary libraries to the Arduino IDE to enable it to use Arduino MKR WAN 1310.
Step 3: Install and run the BLINK application that comes with the Arduino IDE to verify your basic setup.
Step 4: Install the Arduino MKR WAN library to enable the application environment to send LoRaWAN® packets.
Step 5: Update the LoRaWAN® module firmware on Arduino MKR WAN 1310 using MKR WAN library sketch.
Step 6: Create the Arduino MKR WAN 1310 device definitions in TPC using the FirstSteps sketch with the Arduino MKR WAN library on the device.
Step 7: Create a Webhook page to monitor LoRaWAN® packets without application development.
Step 8: Create a TPC account, if you don’t already have one.
Step 9: Create a route to your WebHook application on the TPC platform.
Step 10: Commission your Arduino MKR WAN 13110 on TPC using its LoRaWAN® DevEUI identifier.
Step 11: Send your first LoRaWAN® test packet using the LoRaSendAndReceive sketch that comes with the Arduino MKR WAN library.