
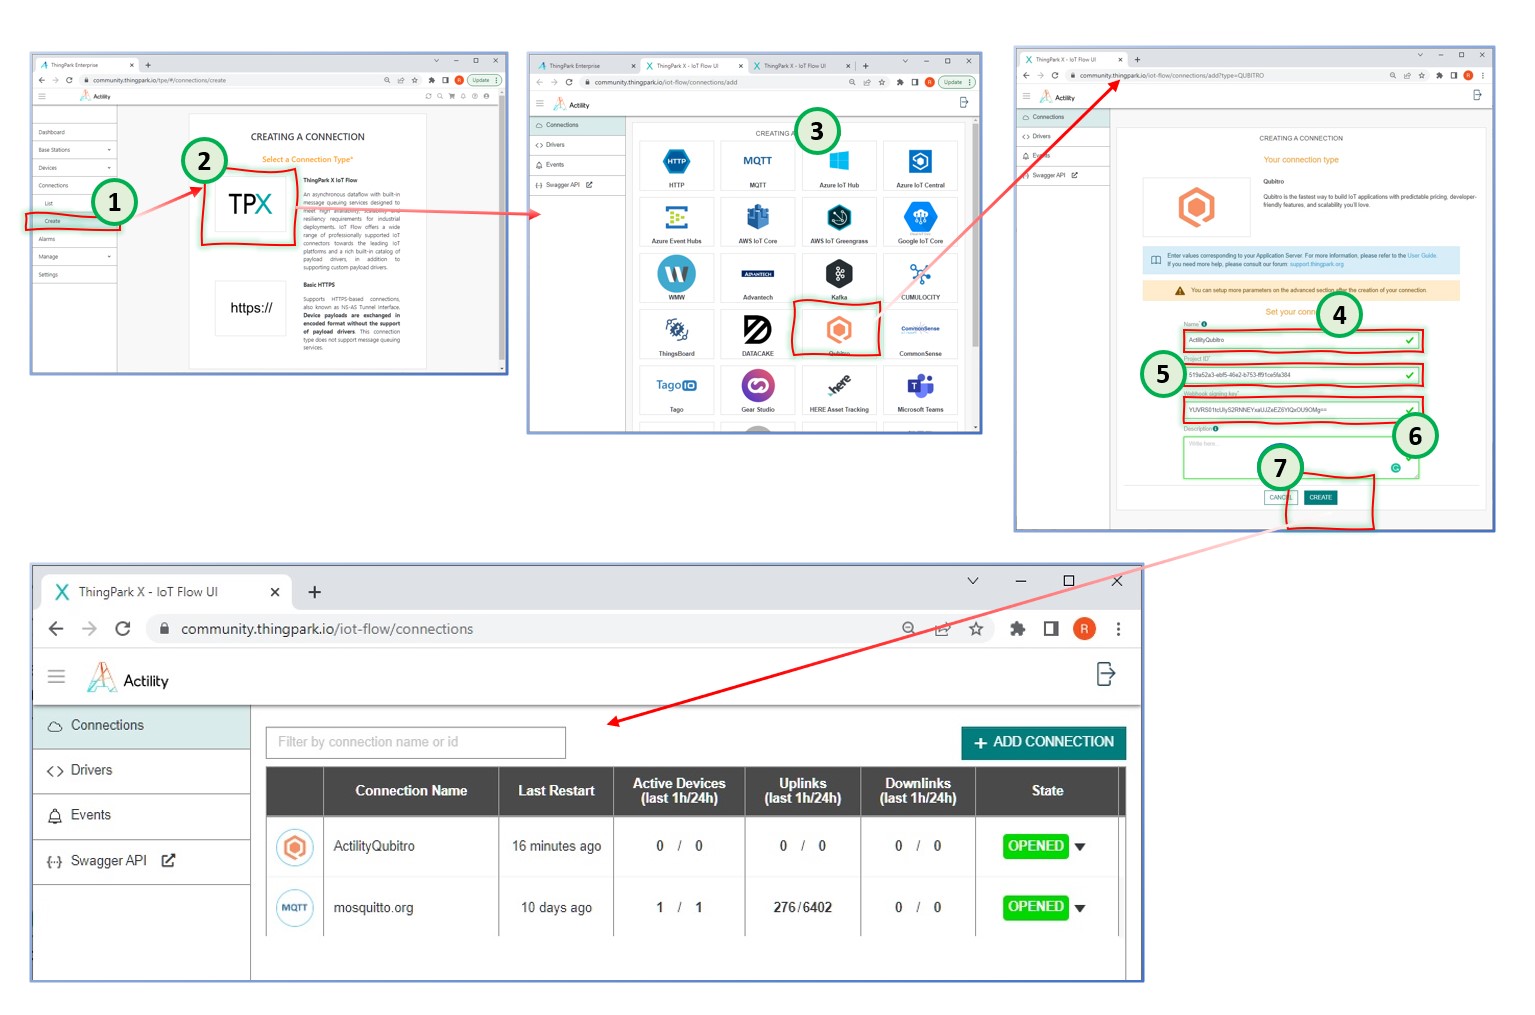
Since the Qubitro connector will be used to send collected data into the backend (i.e., qubitro.com), a new connection should be created at TPX.
Step 2 - Create a TPX connection to Qubitro
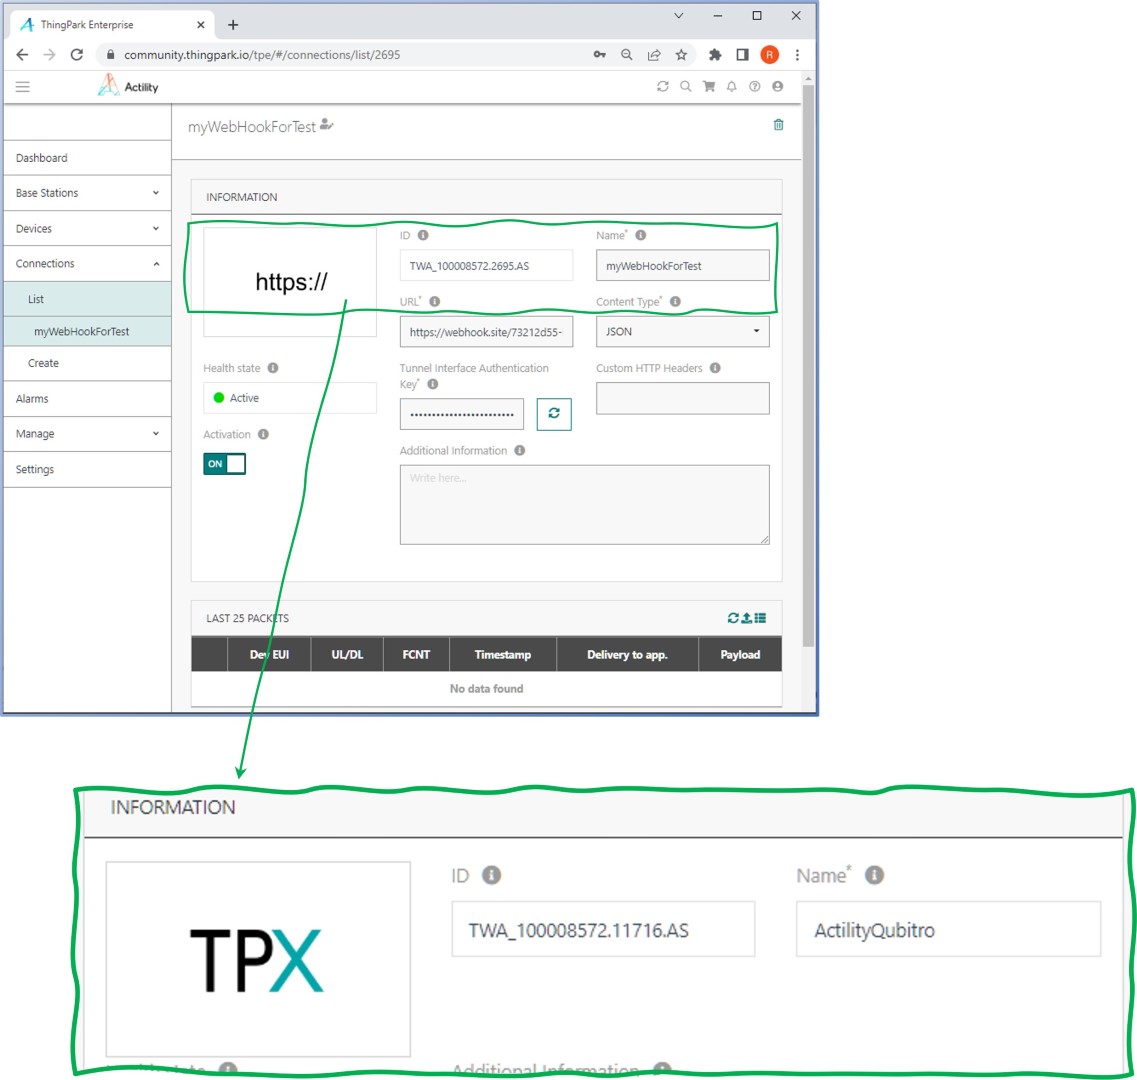
An HTTP connection was utilized throughout the Welcome LoRaWAN® and Thingpark cookbook to facilitate the sending of collected data that could then be monitored.
Using TPX, as shown in the diagram, you are going to establish a connection to Qubitro in the course of this exercise. The type of connection will be Qubitro.
You have to verify that the newly defined TPX connection (i.e., ActilityQubitro) is accurate and that TPC is able to contact the intended service (i.e., Qubitro) in the correct manner.
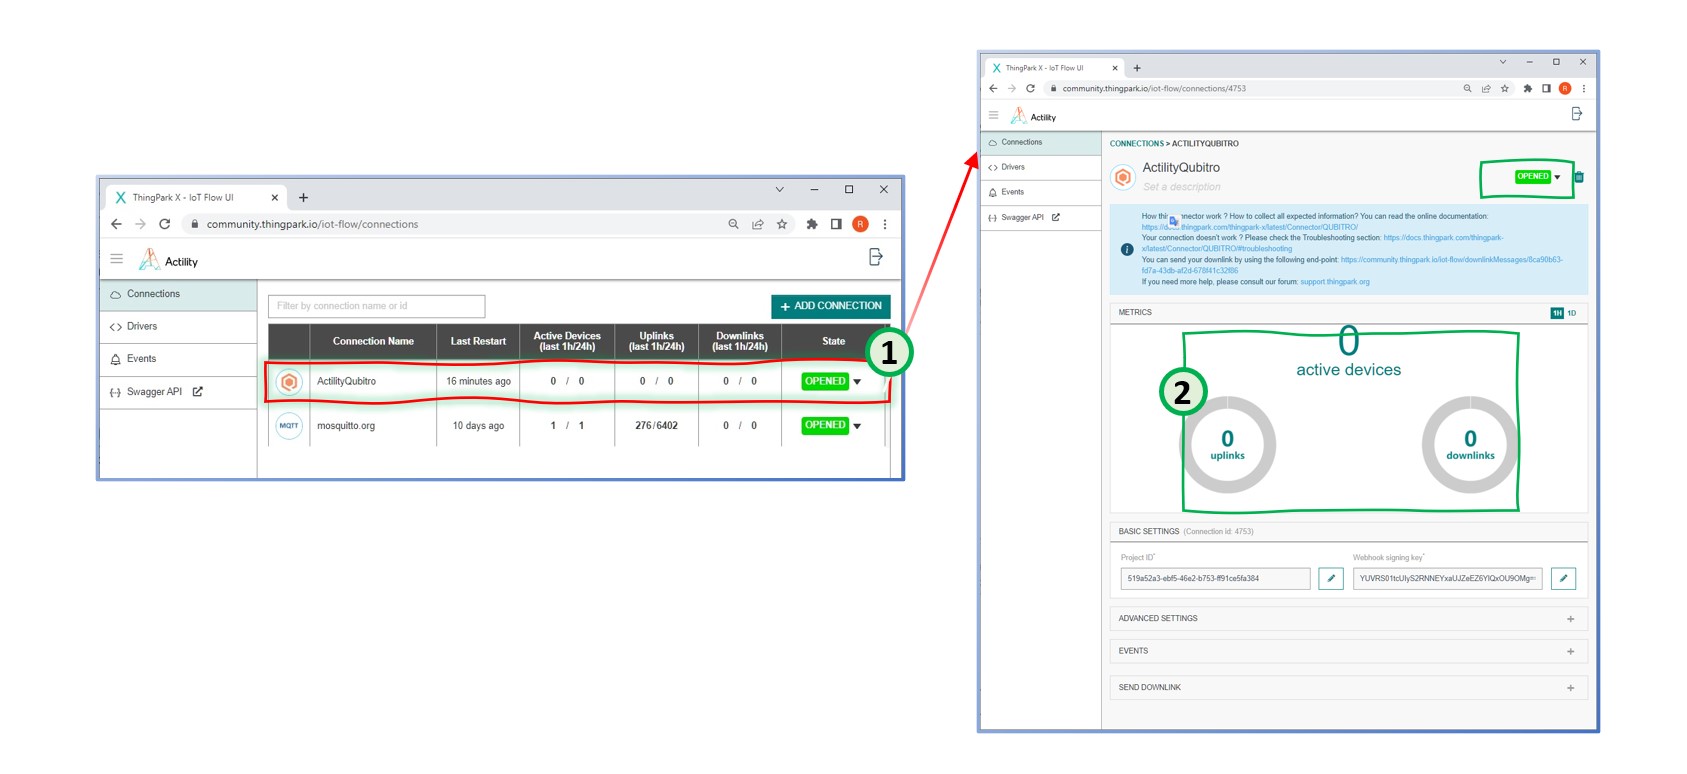
If all definitions are correct, you will see ![]() icon at the top right of the screen. That means the TPX connector has successfully connected to the target system, which is the test MQTT broker at mosquitto.org,
icon at the top right of the screen. That means the TPX connector has successfully connected to the target system, which is the test MQTT broker at mosquitto.org,