Welcome to the tutorial on how to begin with Azure IoT Central through ThingPark Community. You will learn how to connect your ThingPark account to Azure IoT Central and configure your Azure IoT Central account to display the information you want from your abeeway devices.
Before you start...
In order to follow this guide, you need to fulfill the following prerequisites:
- Have a ThingPark Community account
- An active LoRaWAN™ gateway. If you don’t have a gateway, you can purchase one on ThingPark Market, ready to be activated on ThingPark Community.
- An Abeeway tracker (any tracker from Abeeway will work)
We will see in the two following steps how to create the Azure IoT Central application and the ThingPark Community application and how to connect your device to both.
Step 1 -Create your application in Azure
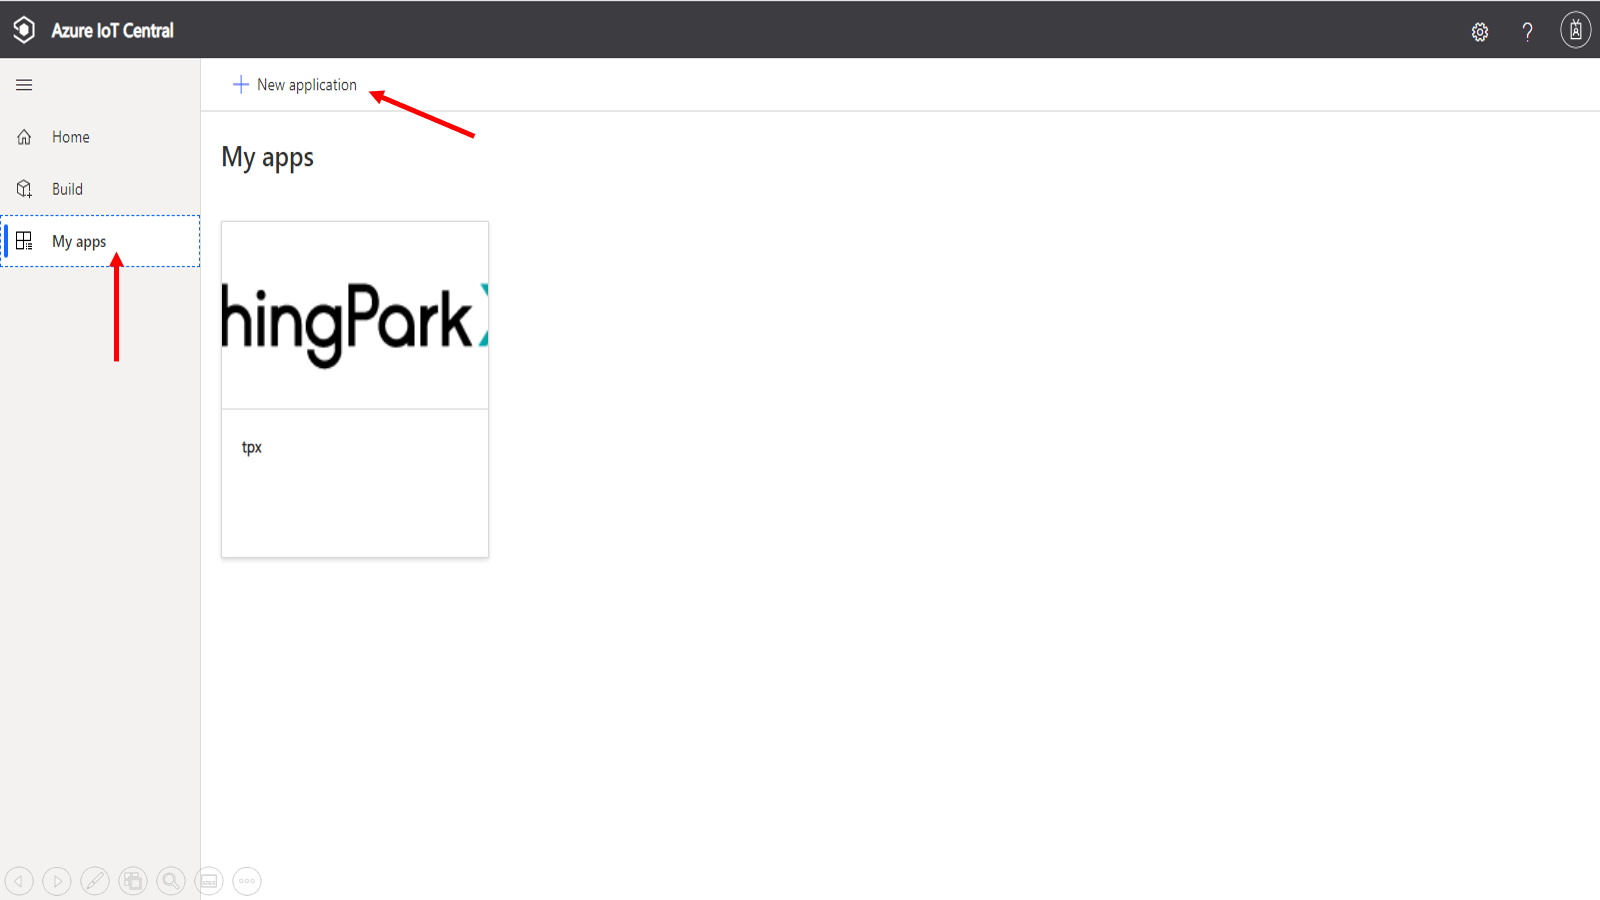
Go to Azure IoT Central home page and click on “My Apps”; here will appear all the applications you will create on Azure IoT Central. As you can see on the picture below, we already have our own app called “tpx”. To create a new one, click on “New Application” on the top left of the page.
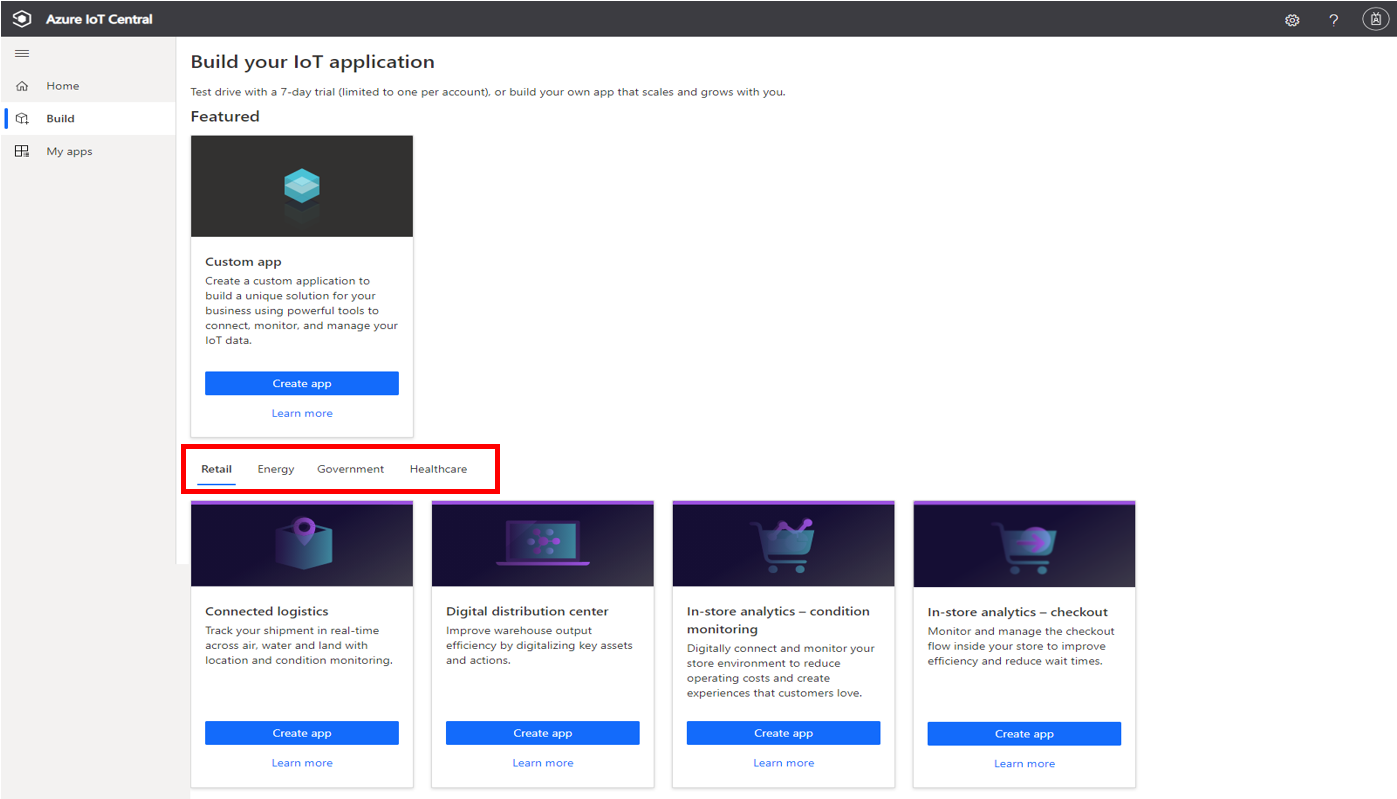
This will lead you to the “Build” menu where you will just have to click on the button “Create App” on the option that corresponds to the app you want to create. In our case, none of the options fit the application we will create, so click on “Create App” under the “Custom app” option.
Now, you have to choose the main features of your app : its name, URL, and pricing plan; you will be able to change those parameters later if you want in the “Administration” tab.
Click on “Create” once you are done.
Step 2 - Connect ThingPark to Azure IoT Central
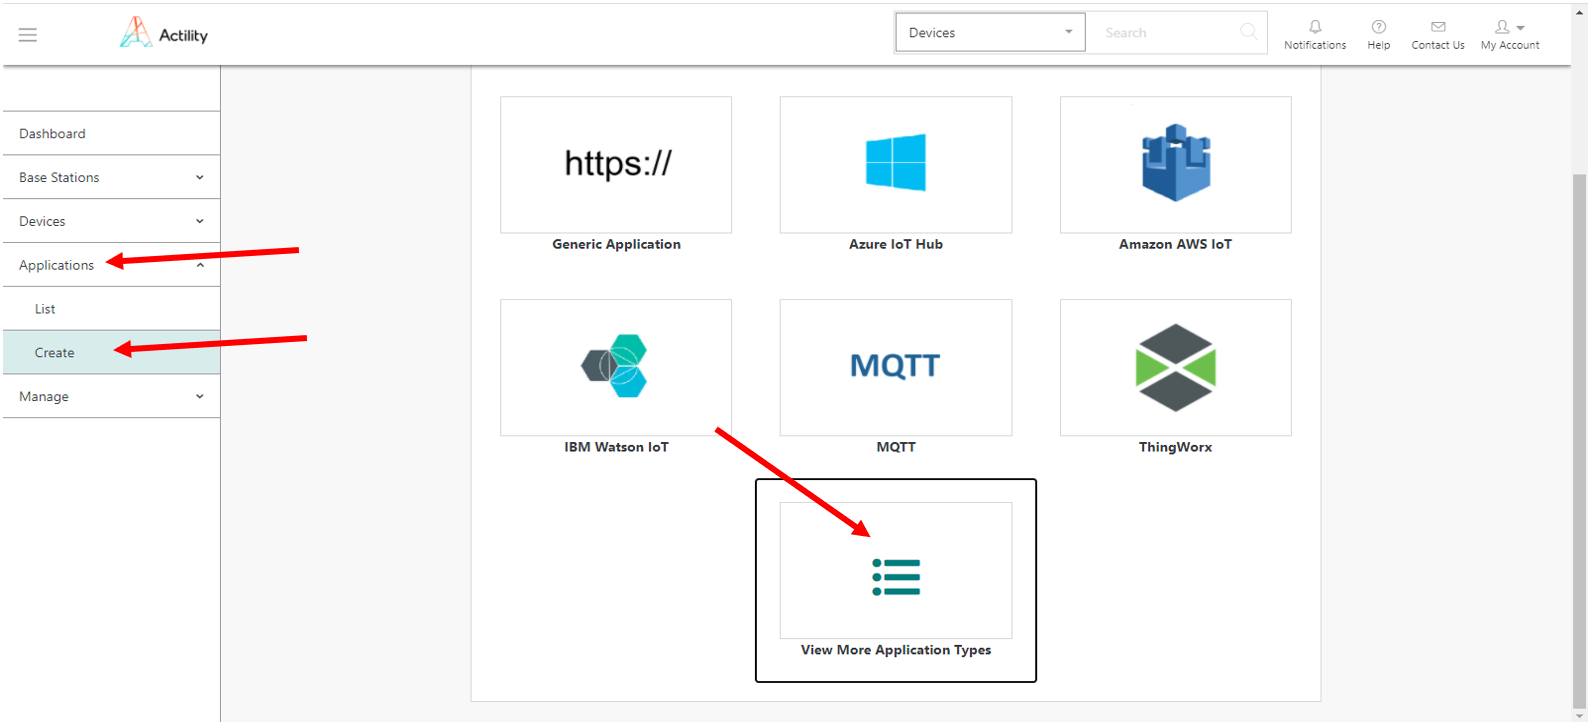
Now that you have created your application in Azure IoT Central, you need to create an application in ThingPark Community. In order to so, you will need to go on your ThingPark account and click on the left on “Application” > “Create” and then select “View More Application Type”, this will lead you to a new page with more options where you will have to select “Azure IoT Central”.
Here you will have to fill the fields with the information you can find in Azure IoT Central:
- Name: Choose the name you want for your app
The following information can be found in Azure IoT Central, in the “Administration” tab inside of the application you created in the step 2.
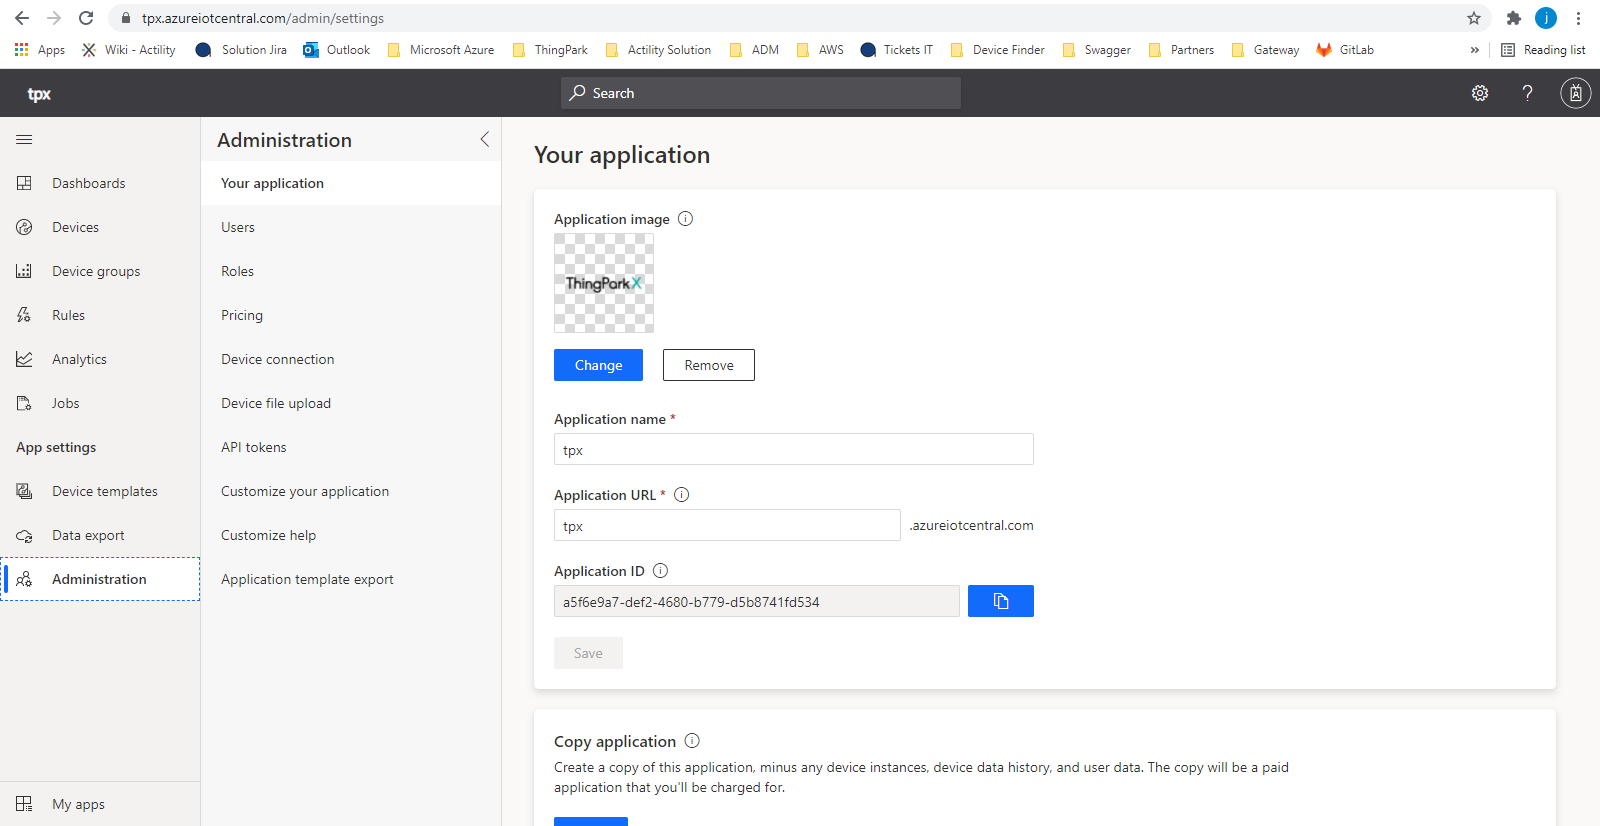
- Hostname: TheNameOfYourAppOnAzureIoTCentral.azureiotcentral.com (You can find this information in “Your application” under “Application URL”)
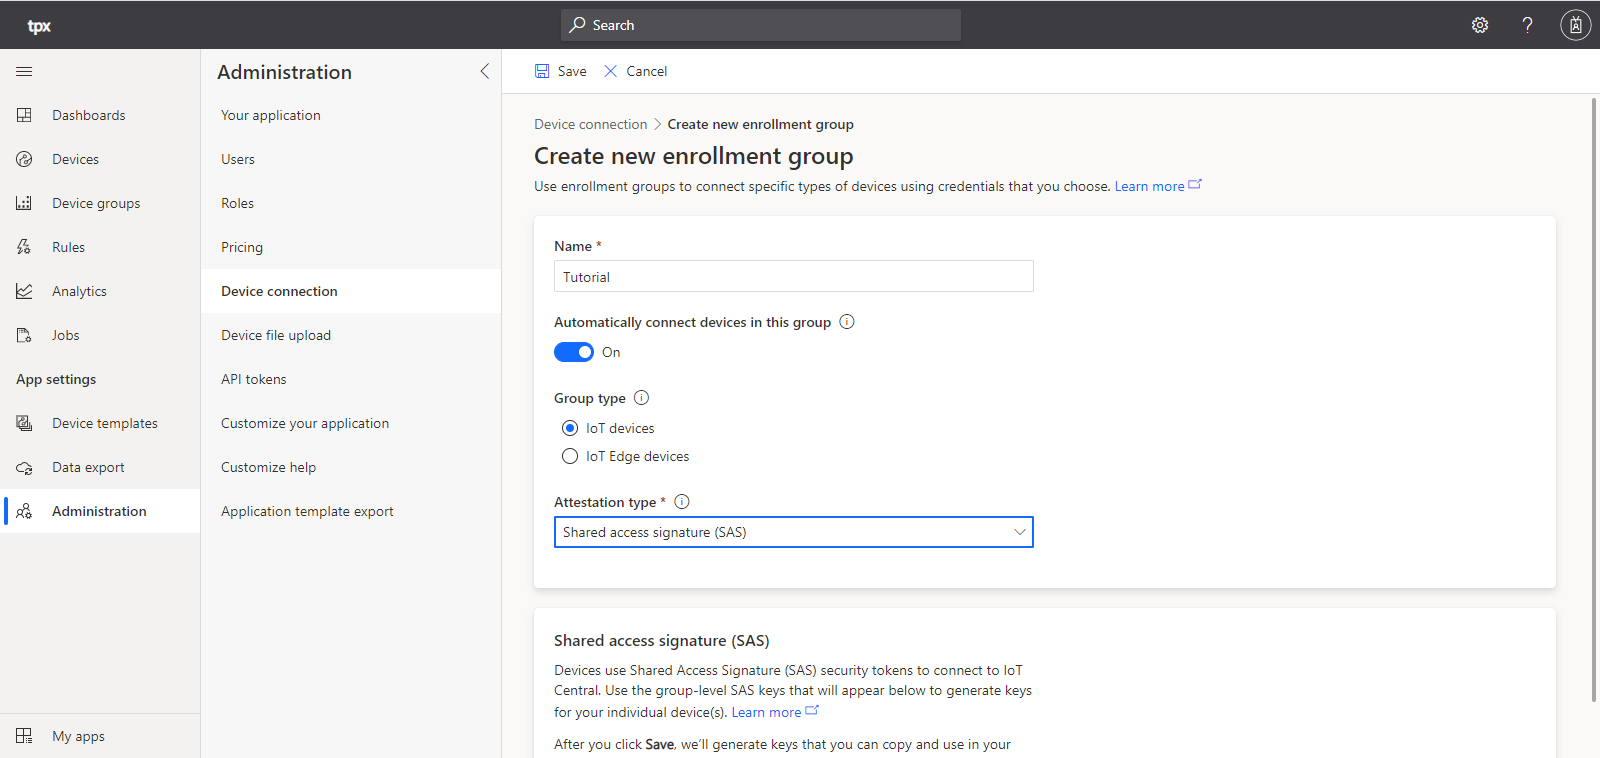
- Shared access key: In “Device Connection”, create a new enrollment group for IoT Devices with “Shared access signature” as its attestation type. Click on “Save” to create it, once it’s done, scroll down to copy the primary key
- API Token: In the “API Token” tab, you will be able to create new token for your connection. A token cannot be opened again so copy it as soon as you can.
- ID Scope: It can be found at the top of the “Device Connection” tab.
- Pricing plan: This information is available in “Pricing”.
The last step you to complete in order to connect Azure IoT Central and ThingPark Community is to create your sensor in ThingPark.
Go to “Device > Create” on the list on the left, if “Abeeway” is in the list of the device manufacturers, select it, if it’s not, select “View more manufacturers”.
Once again, you will have to fill field to create your device:
- Model: Choose a model that correspond to your device and its region (AS923 correspond to Asia, AU is for Australia, ETSI is for Europe and FCC is for the United-States).
- Name: The name your device will have in ThingPark Community.
- DevEUI, AppEUI and AppKey: The codes you have received with your device.
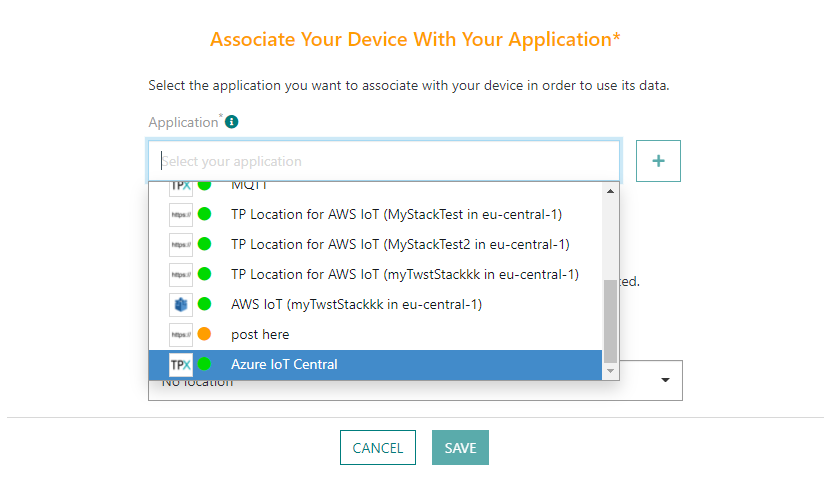
In the "Associate your device with your application" field, click on "Select your application", a drop-down list will appear. There, select the application you created for Azure IoT Central; it should have a green dot showing that it’s working well.
Leave the mode to “No location” and click on “Save” finalize the operation.
Step 3 - Create your model
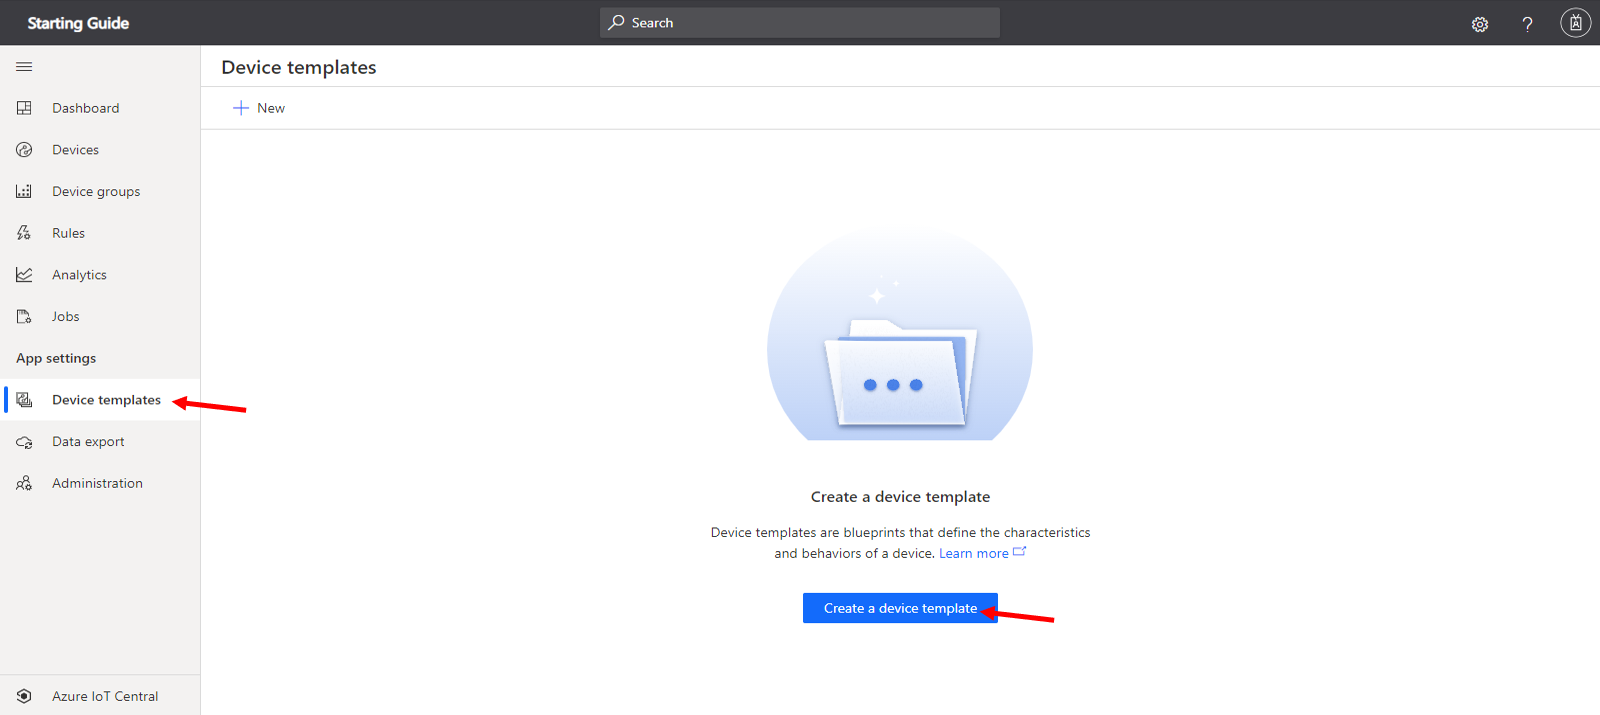
Return to Azure IoT Central and select your application. You will arrive on the “Dashboard” page, but you can’t use it for now so go directly to “Device template and click on “Create a device template”.
You can look in the list to find the template corresponding to your device but if it doesn’t exist, click on “IoT Device”, give a name to your device template, click on “Next: Review” and then “Create”.
If you click on this link, you will find an Abeeway template that you can directly import in Azure IoT Central by clicking on "Import a model". This import will contain all the capabilities that you need for your abeeway device, but also the classic capabilities that any LoRa device would have such as its SNR or RSSI and finally some commands to modify the parameters of your abeeway tracker directly from you IoT Central application. The only part not exported through this process are the information vizualization pages that we call views. Thus, you can directly go to the next step "Create your views".
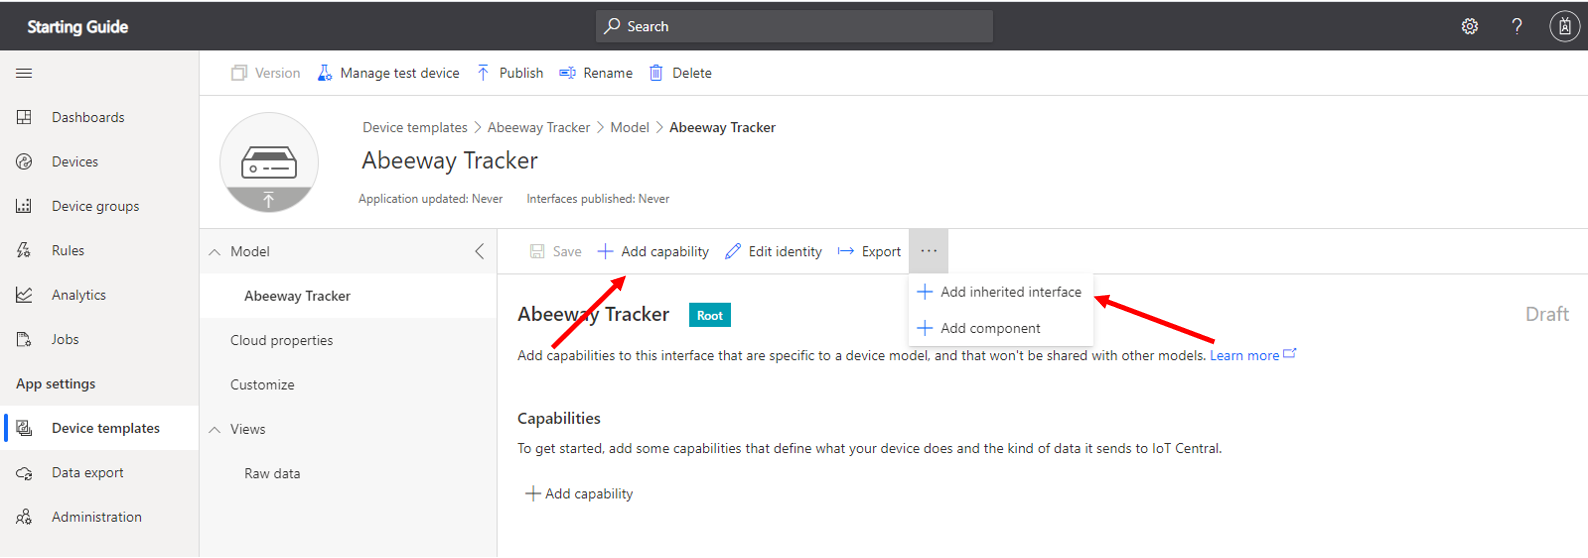
If you want to create your own model, click on "Custom model". Now, it’s time to fill it up. Either you want all the model’s attribute in the same place in which case you have to click on “Add capability” or you want to compartmentalize them for which you have to click on “Add inherited interface”, then “Custom” and now that you are in the interface, click on “Add capability”.
There are three types of capabilities :
- Telemetry: A telemetry is a measurement that evolves naturally such as the temperature or the remaining battery.
- Property: A property is a measurement intrinsic to the device such as its software version.
- Command: A command is a downlink you want to transmit from Azure IoT Central to your device.
For our example, we will make one of each. You must give a displayed name to each capability which will automatically give it a name that you will have to use for the mapping and choose its capability type. Once that’s done, click on the arrow on the right to give more information such as its unit or the type of data that will appear in this capability.
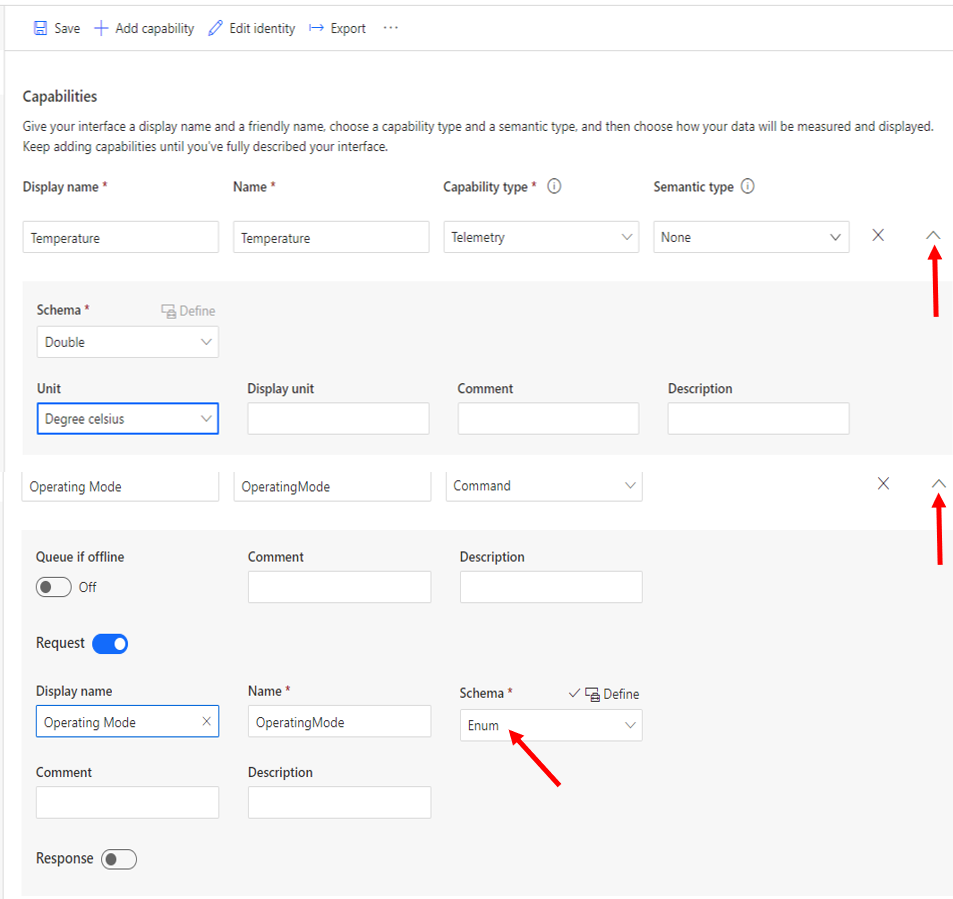
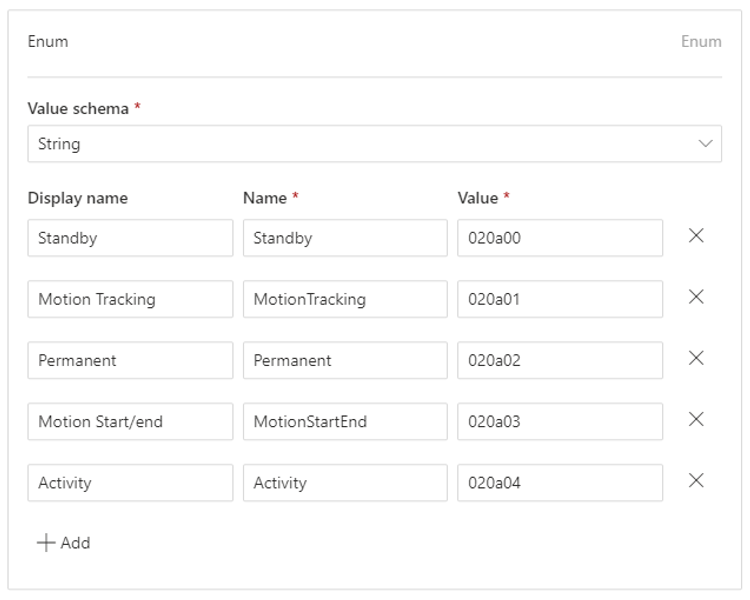
Here, our command will be a list of options to change the operating mode of our device so our data type is an enumeration. In this enumeration, we will put every mode our device has and put as the value the correposding hexadecimal payload.
By linking every command possibility to its hexadecimal payload, it will automatically send downlinks to the device, changing its command mode without the need of a mapping.
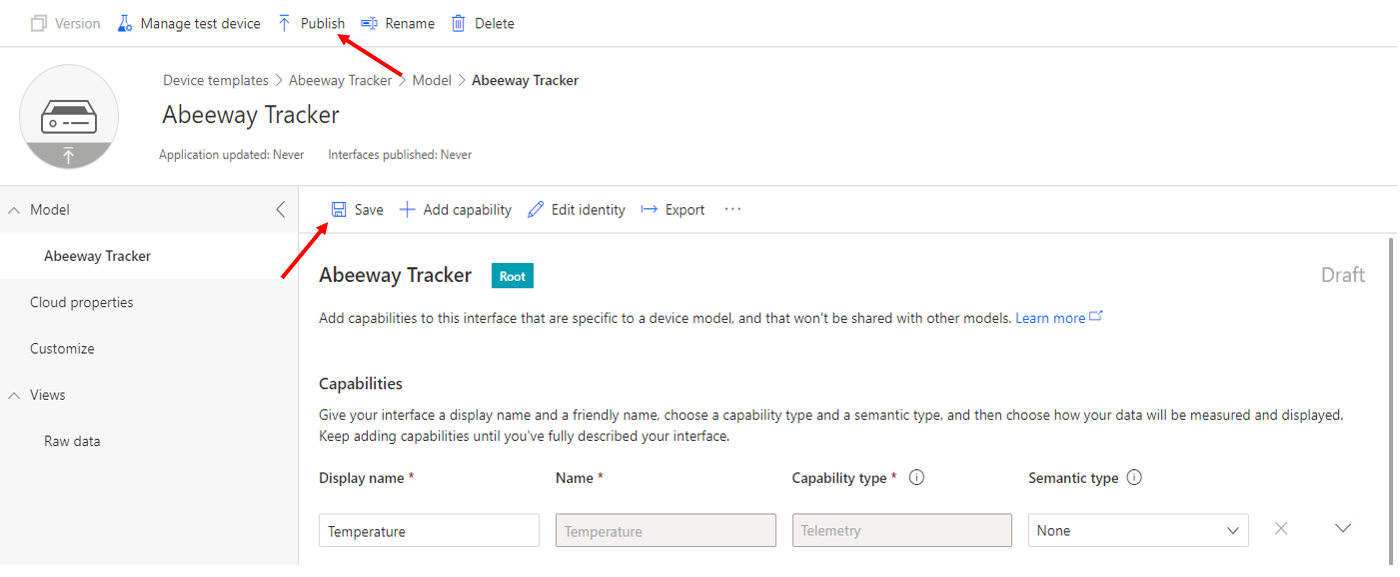
Once that’s done, click on “Save” and if you are sure you haven’t made any mistakes, click on “Publish”.
Step 4 - Create your views
Now that the model is completed, you can create views to visualize the data.
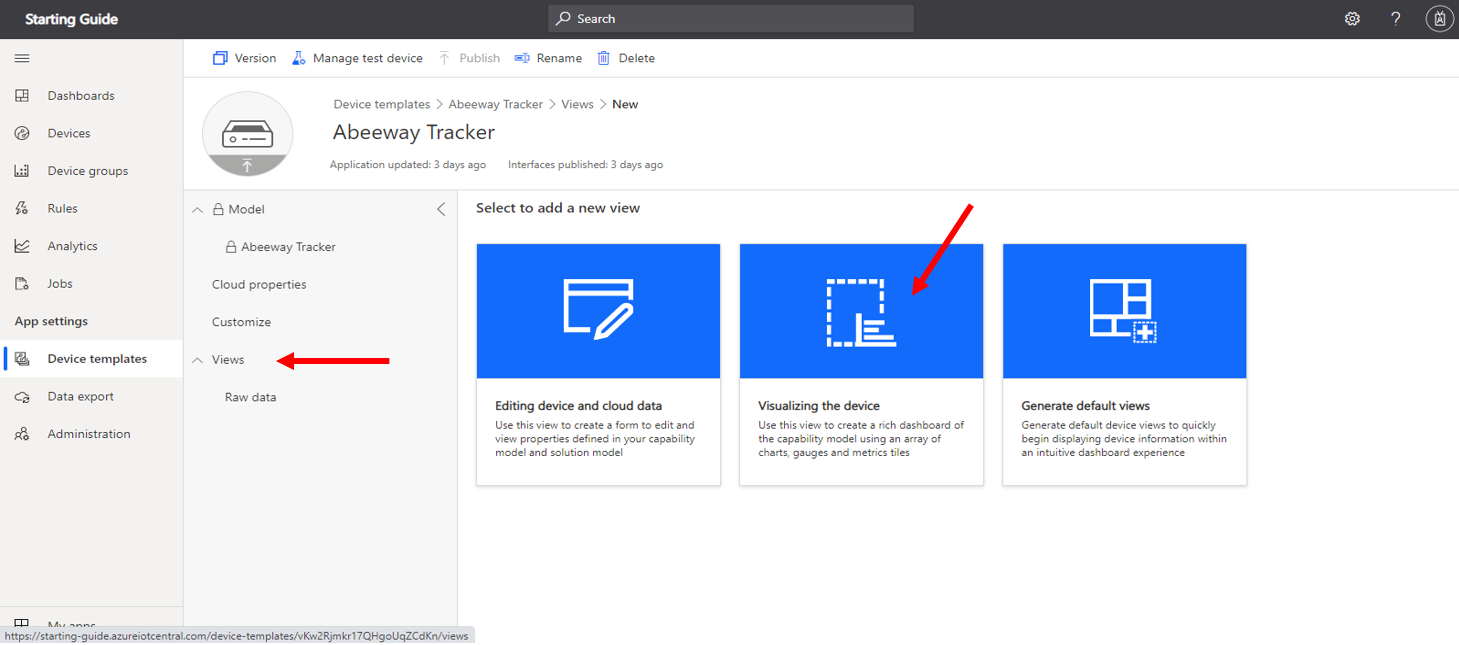
Return to your model in “Device templates”, click on “Views” and then, “Visualizing the device”
Now, choose the tiles that will compose your view and their position.
You can add any of the capabilities you have created in your model plus four type of custom tiles : image, label, markdown, and link. (you can use the markdown as a link too)
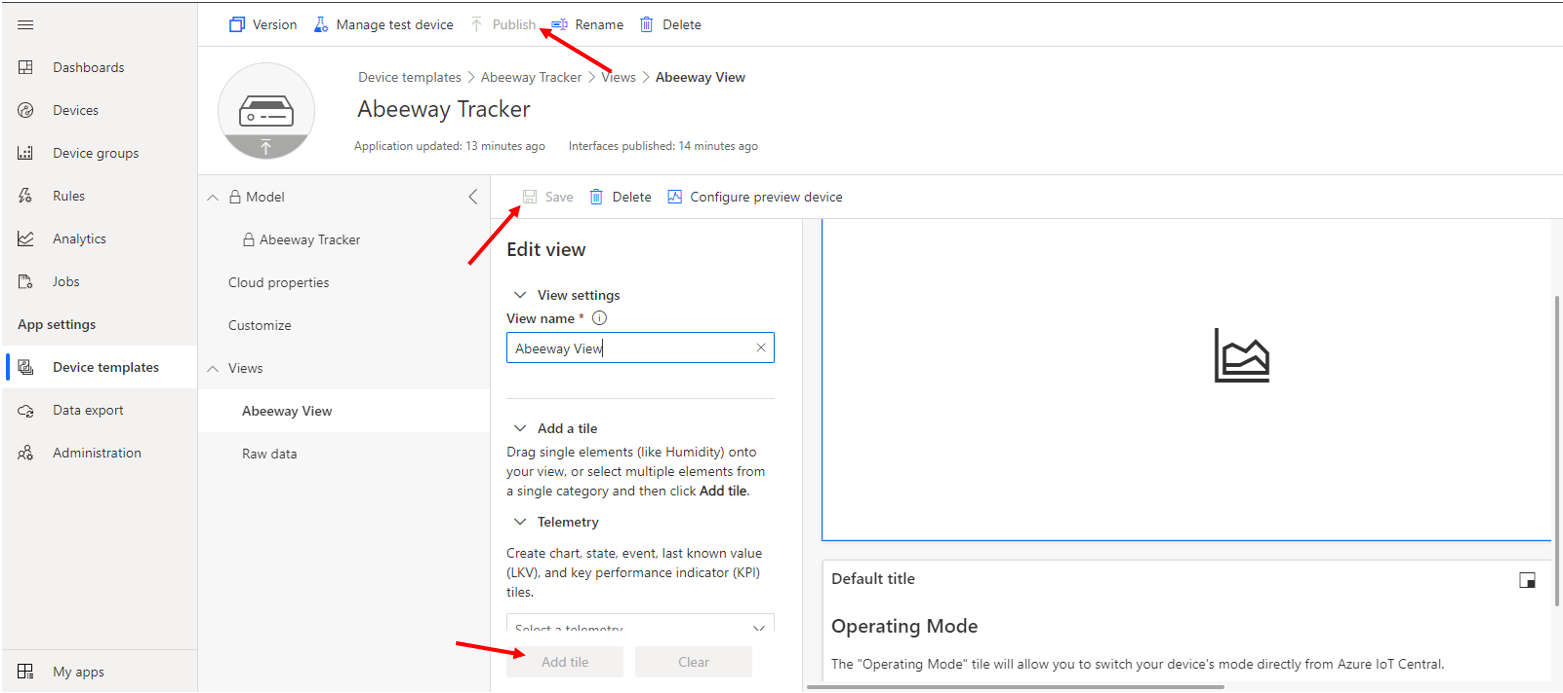
To do so select one by one in the category you desire the capability you want to add to your view and click on “Add tile”.
Place the tiles and drag them across the screen to change their position, you can also change their size by dragging their down right corner. Clicking on the top right icons allow you to change the way you see the capabilities (KPI, pie chart, heatmap…), to put two capabilities on the same graph or even to change the time scale.
Once you are satisfied with the result, click on “Save” and then “Publish” to complete your view.
Step 5 - Manage your views and devices
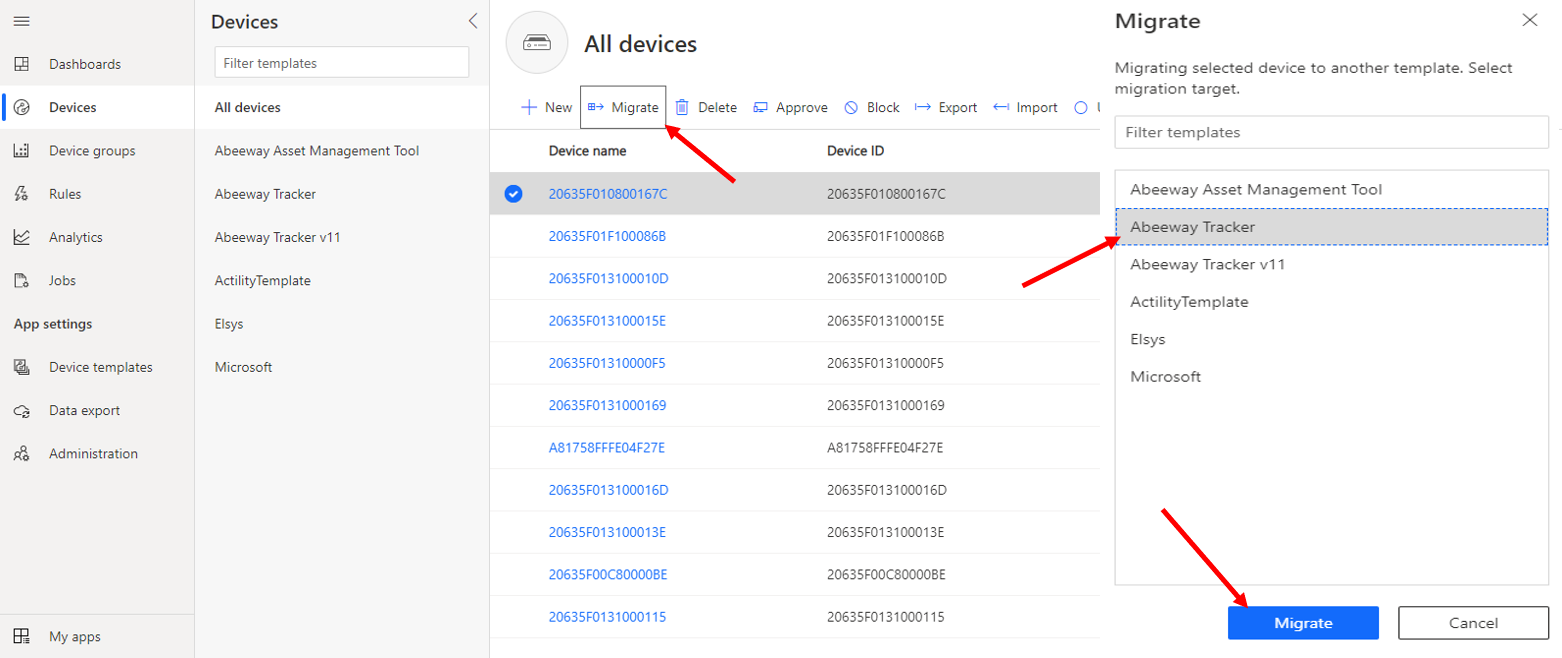
You need to move your device to the model you created. Go to “Device”>“All devices” and select your device. Click on “Migrate”, select you model and click on the blue “Migrate” button. The process can take few seconds.
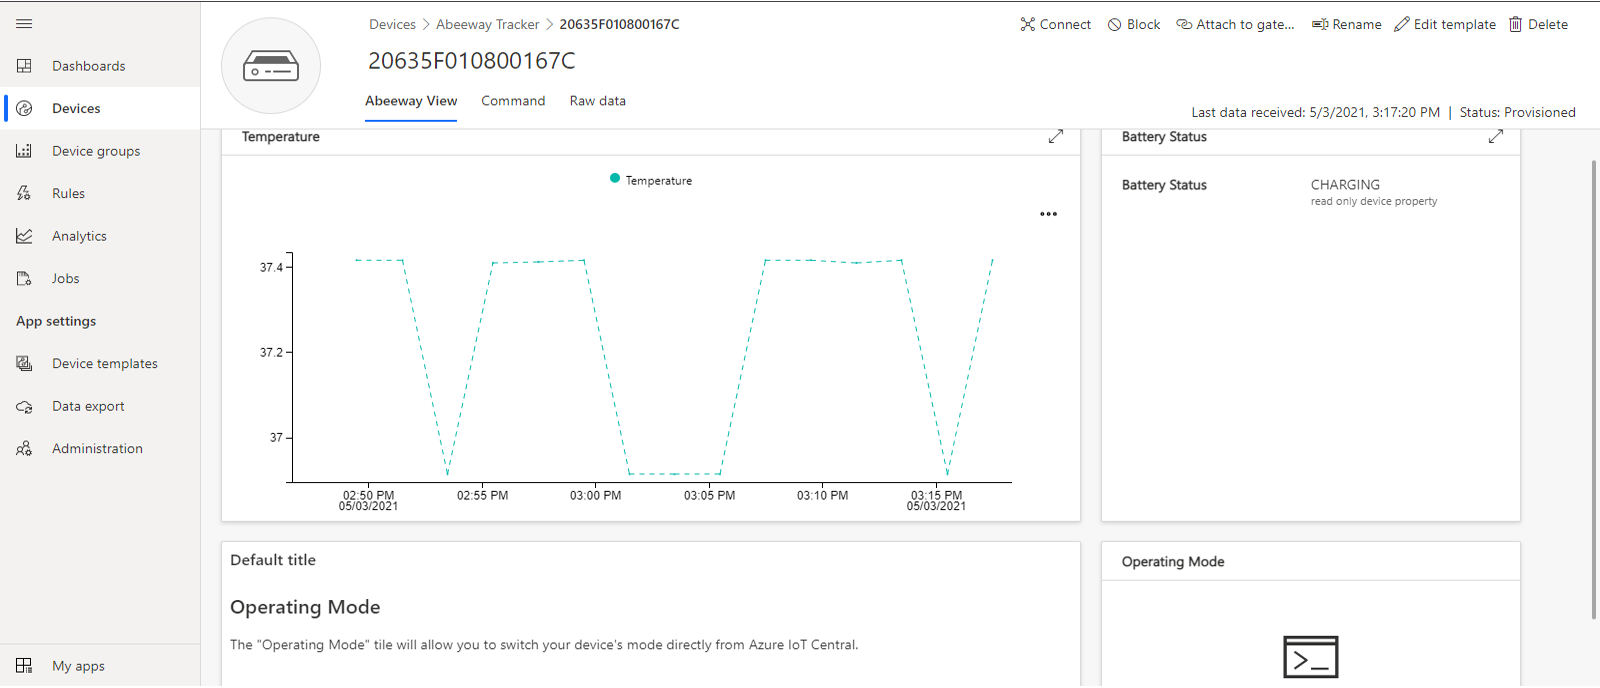
If the mapping is done well, you can see the result by clicking on you device ID in “Device”>Your model’s name>Your Device ID.
The tiles should be filled, and if you click on the “Operating Mode” tile, it will put you on the “Command” tab, and if you want to check the content of the uplink the device sends, you can go to the “Raw data” tab.
Step 6 - Modify your model and views
If you want to modify your view you need to return to your view in your model, modify it and like when you created it, click on “Save” and “Publish” to complete it.
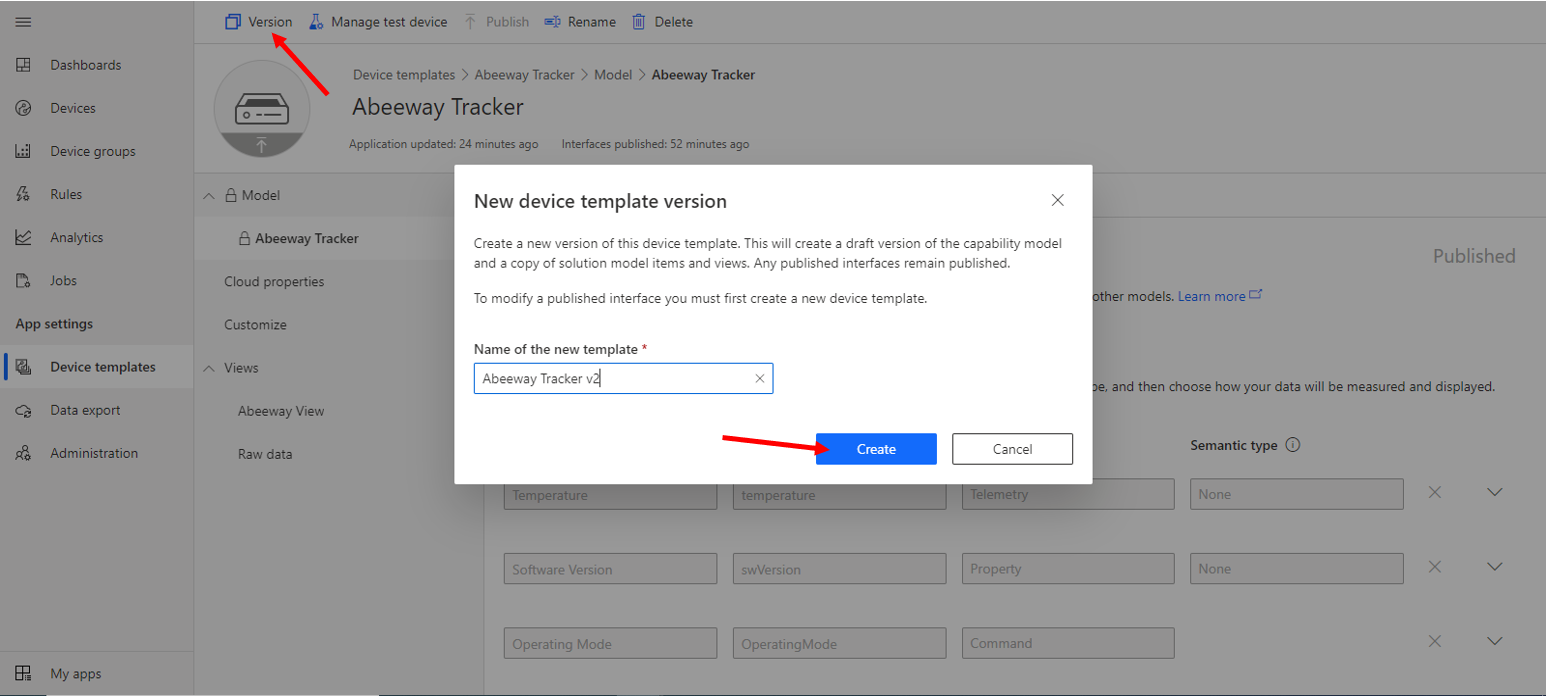
If you want to modify your model, it is a bit more complex: click on “Version” and “Create”, it will automatically put you in this new version. There, add and modify the capabilities you want and once again, click on “Save” and “Publish” once you are done. You will have to migrate your devices again if you want them on this new template.
Step 7 - Create your dashboard
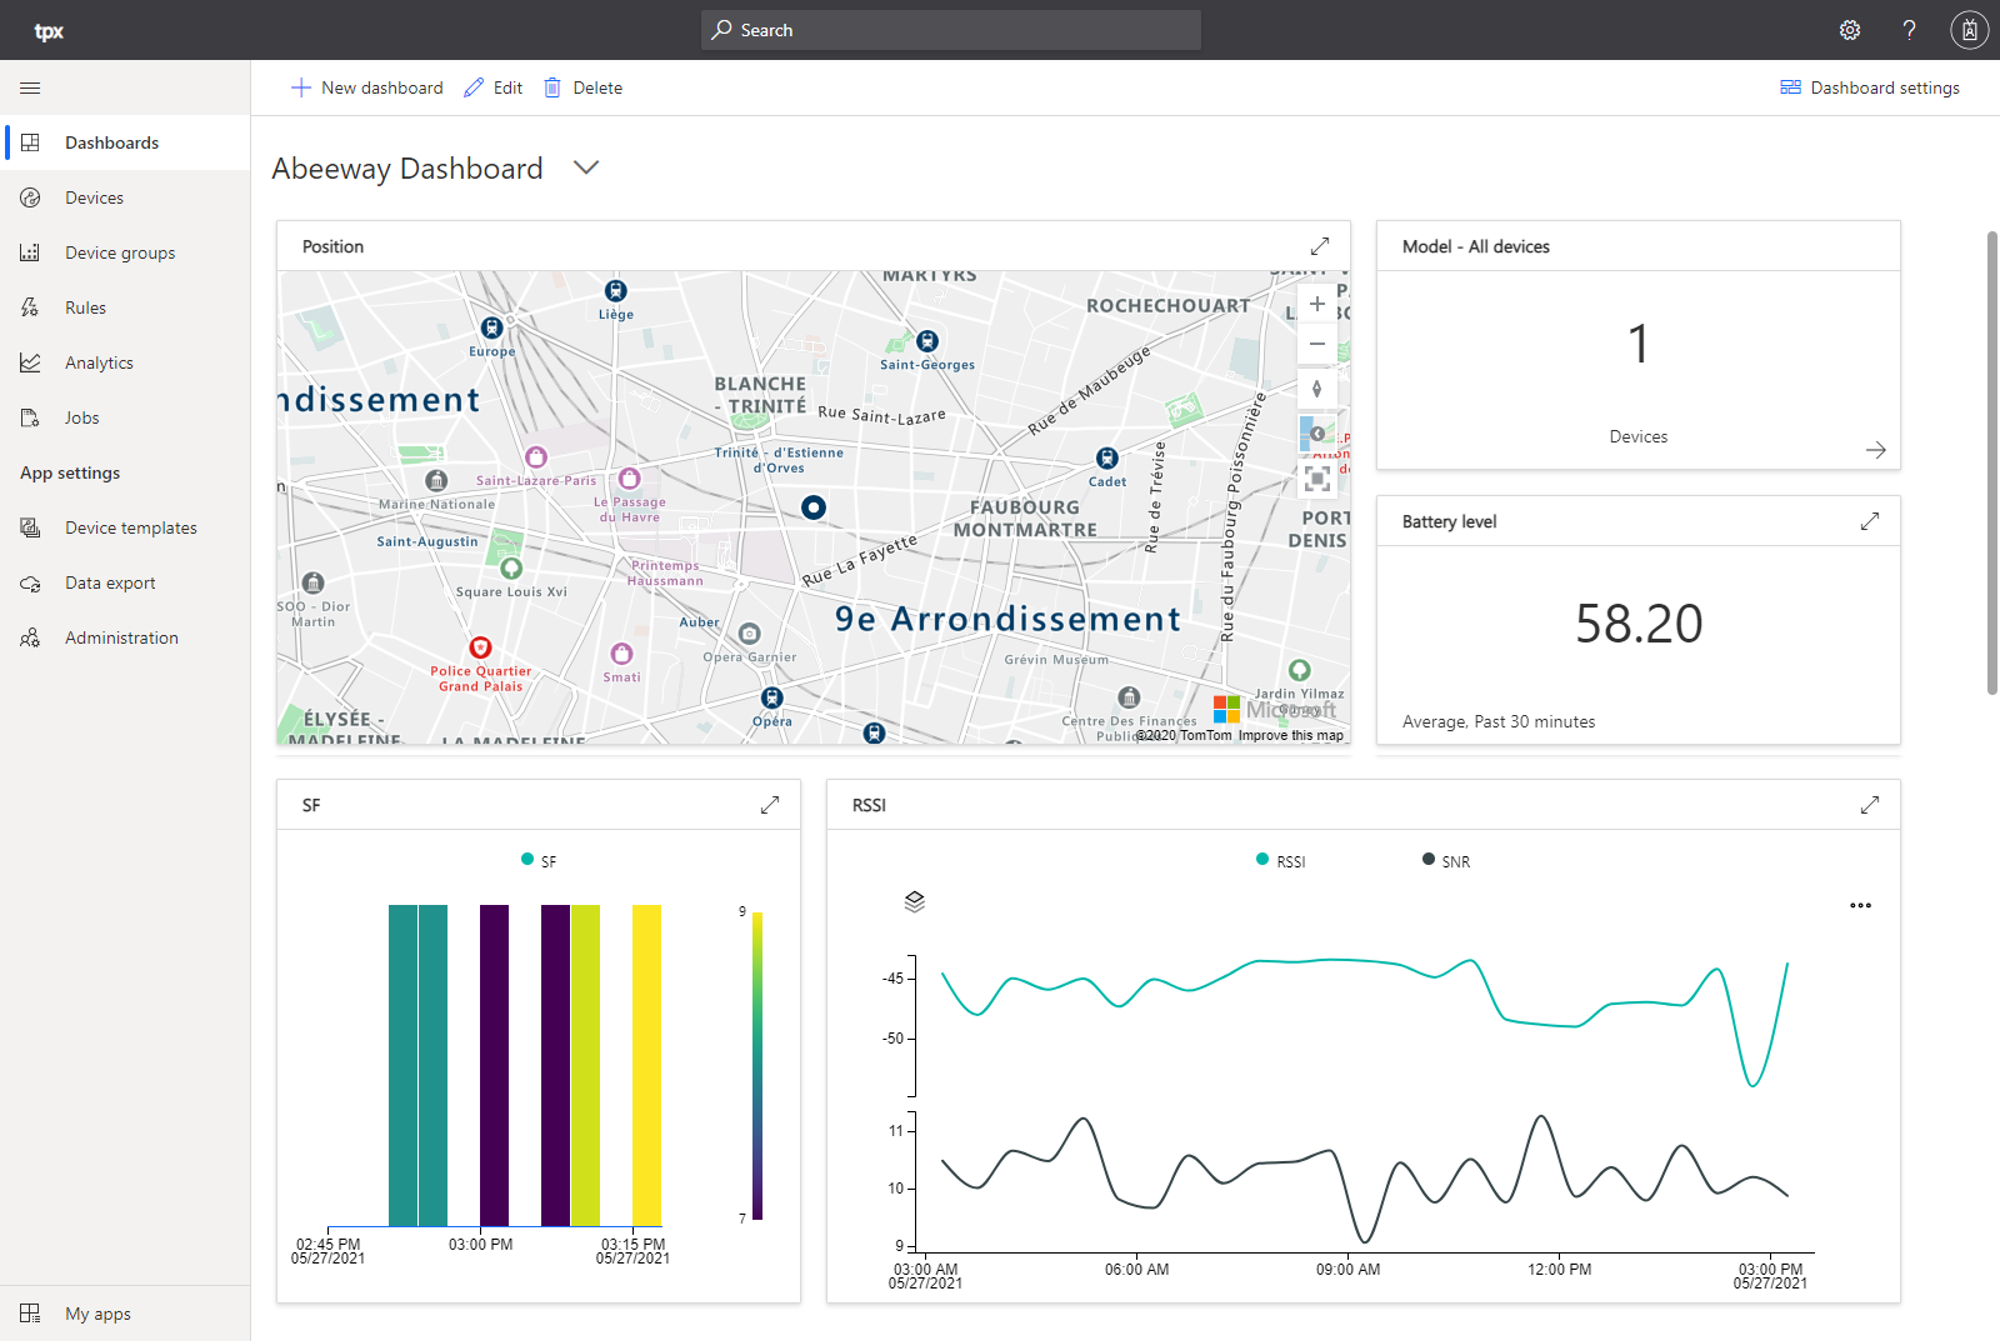
The last thing you can create is a dashboard. Its main use is to be able to monitor multiple devices on the same screen.
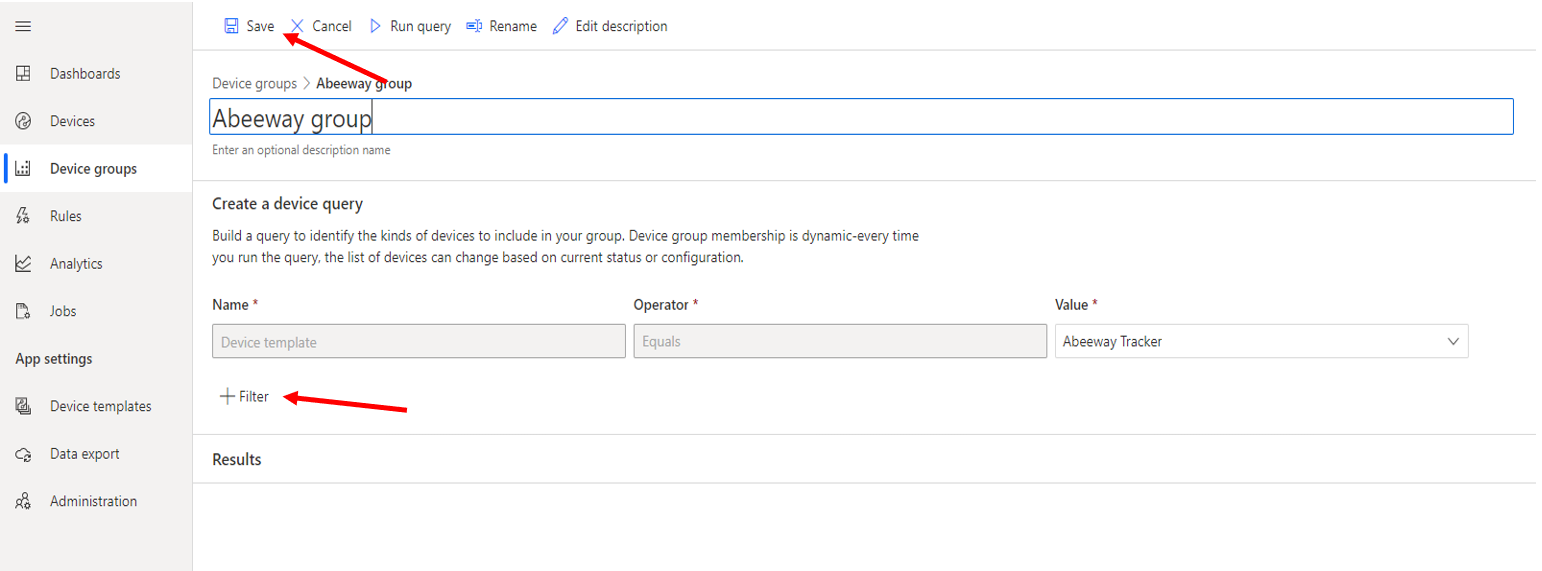
The first step in order to create a dashboard is to create a device group. Go to the “Device group” tab and click on “+ New”; enter a group name and select your device template as your value. You can filter the devices of the group through their properties by clicking on “+ Filter”. Once you are done, click on “Save” to complete your device group.
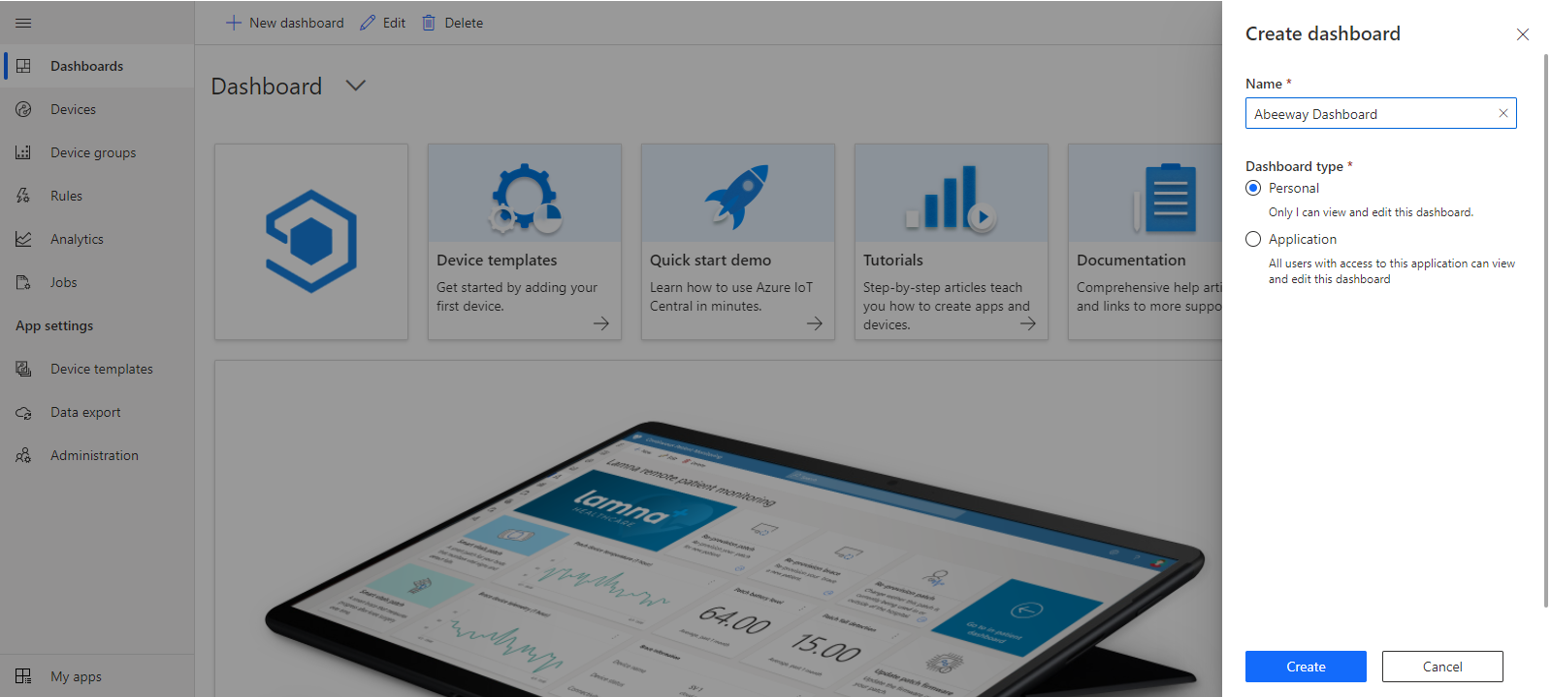
Now, select the “Dashboard” tab and click on “New Dashboard”, give it a name and choose whether it’s a personal dashboard or if it will be seeable by everyone using the application. Click on “Create” once you have chosen.
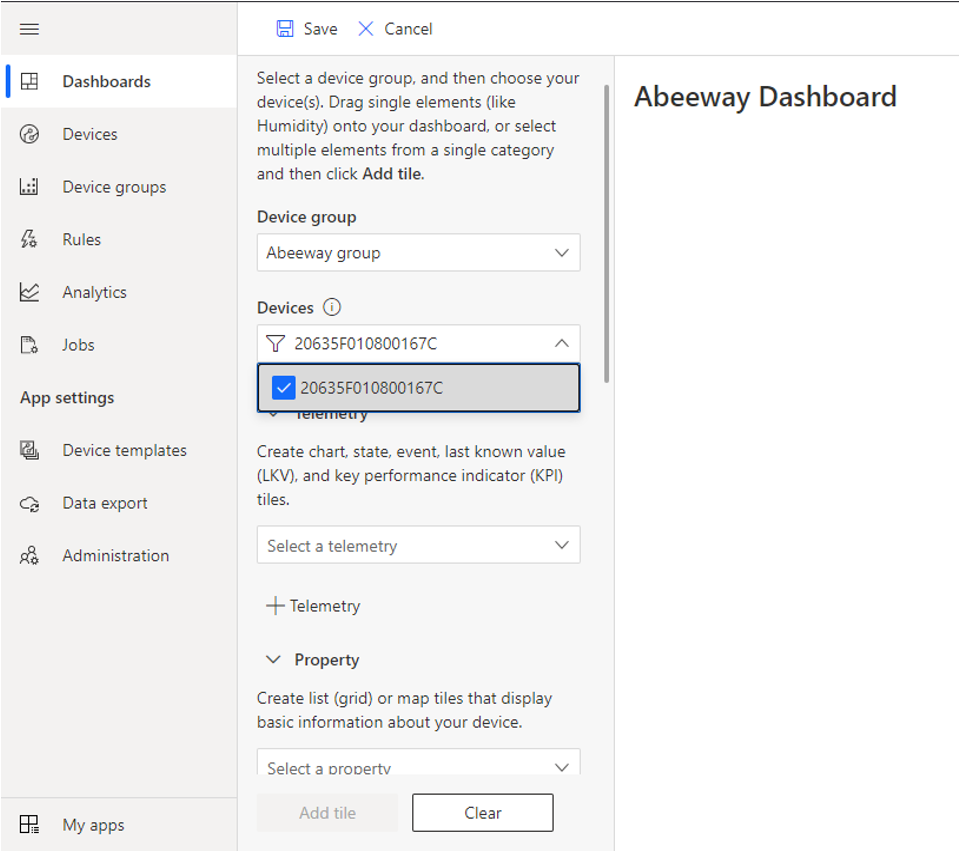
Click on “Edit dashboard”, pick the device group you created and select the devices you want to include in the dashboard. Now, just like you did with the view, add the tiles you want on your dashboard and organize them as you wish. Click on “Save” once you are done.
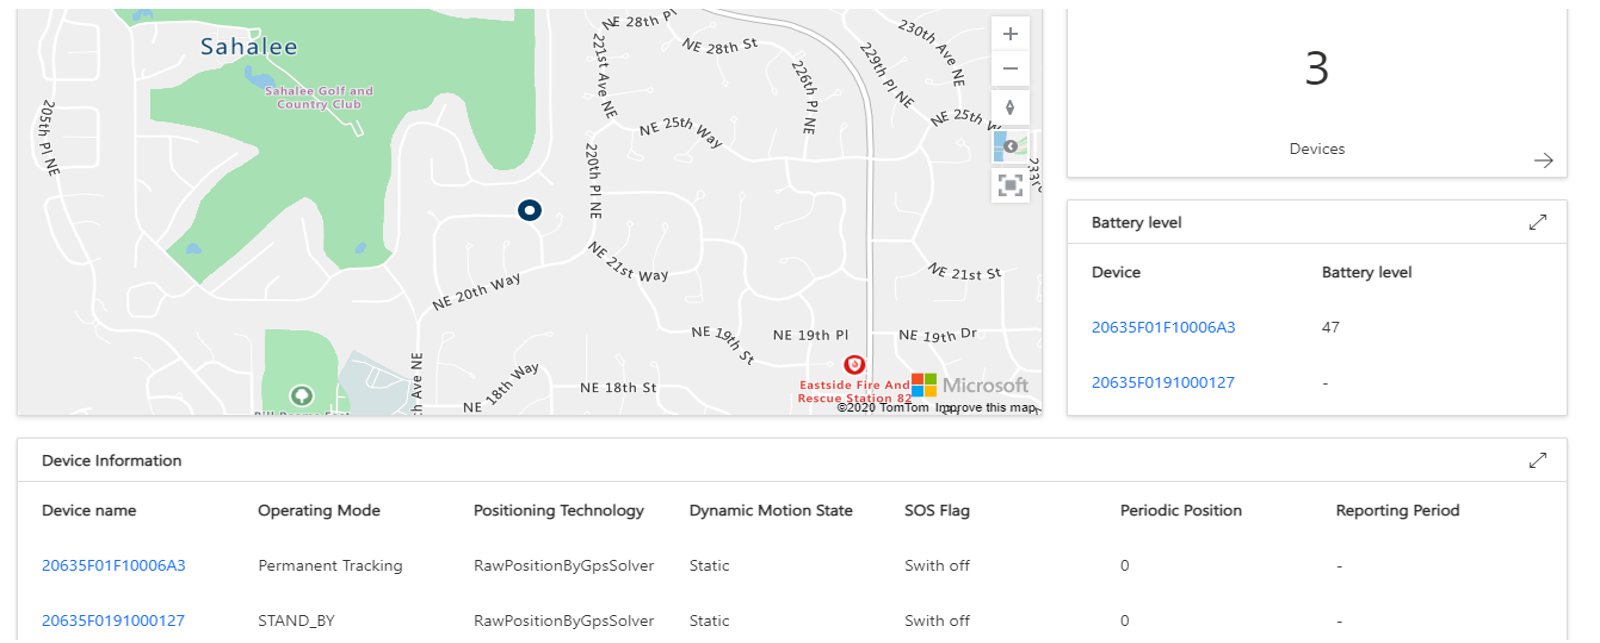
As you can see in the following example, once enough information is returned by the devices, it becomes easy to monitor your assets behavior.