Combining Here Tracking together with Abeeway low-power trackers on your ThingPark powered LoRaWAN infrastructure, you'll benefit from a global asset visbility within your industrial facilities, whether indoor & outdoor.
- Abeeway Multi-technology trackers dynamically adapts to the situation to provide assets position wherever they are, indoor or outdoor.
-
Here Tracking fingerprinting algorithms combined with Here Venue Maps enable accurante locations of assets within your private facilities, fully leveraging indoor positioning technologies – Wi-Fi or BLE.
If you want to develop a project on Here Technologies to test its possibilities, this post provides you withthe steps to follow in order to put your project on its feet.
Before you start...
If you wish to test Here with this tutorial you will need:
- An Abeeway tracker
- A ThingPark Community account
- An android phone
Step 1: Get your account on Here tracking
You want to develop a project on Here Technologies to test its possibilities, here are the steps to follow in order to put your project on its feet:
- First, you need to go to Here website in the tracking solution section and click on “Get Started”.
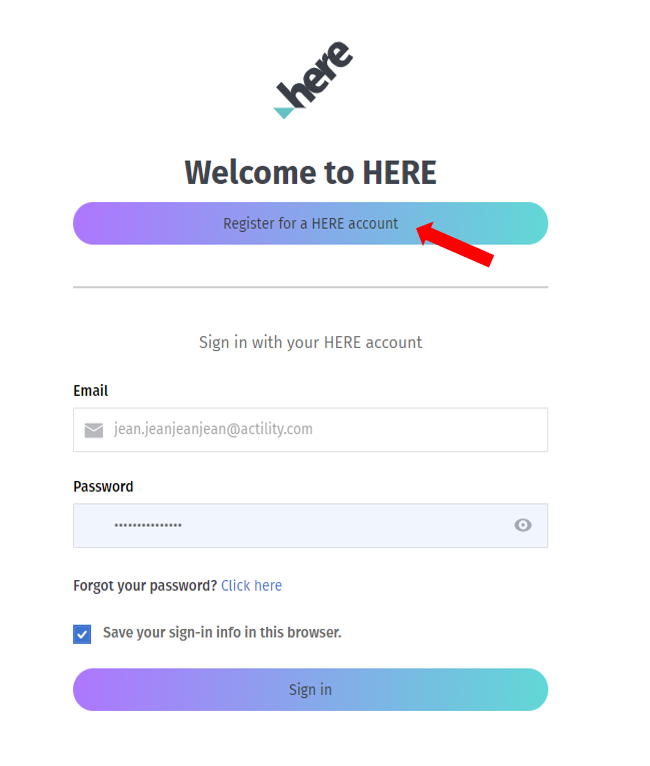
- The following webpage should appear, click on “Register for a HERE account” button to create your account.
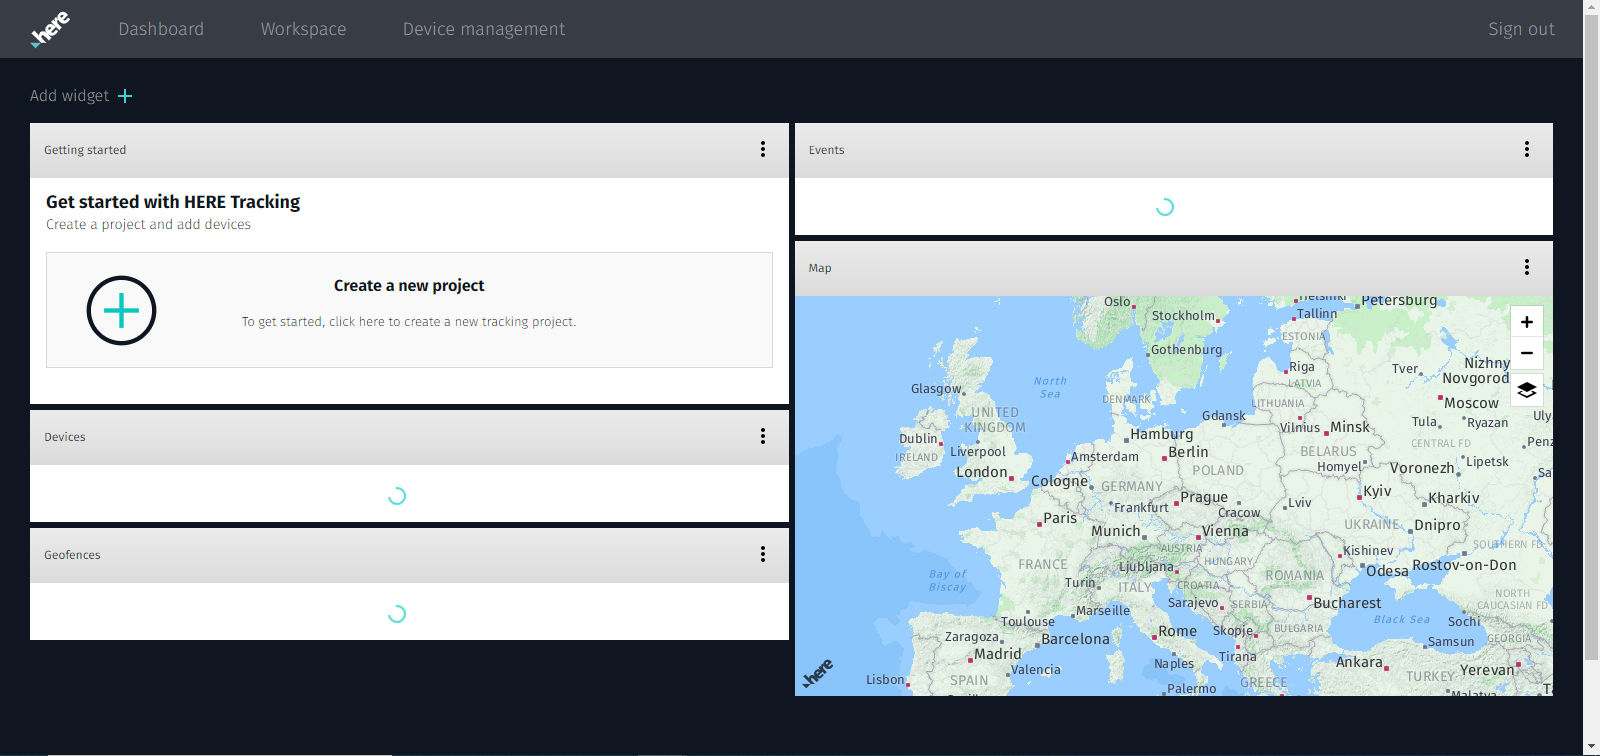
- Once you are done, click on “Come in” and you will be taken to the web app page.
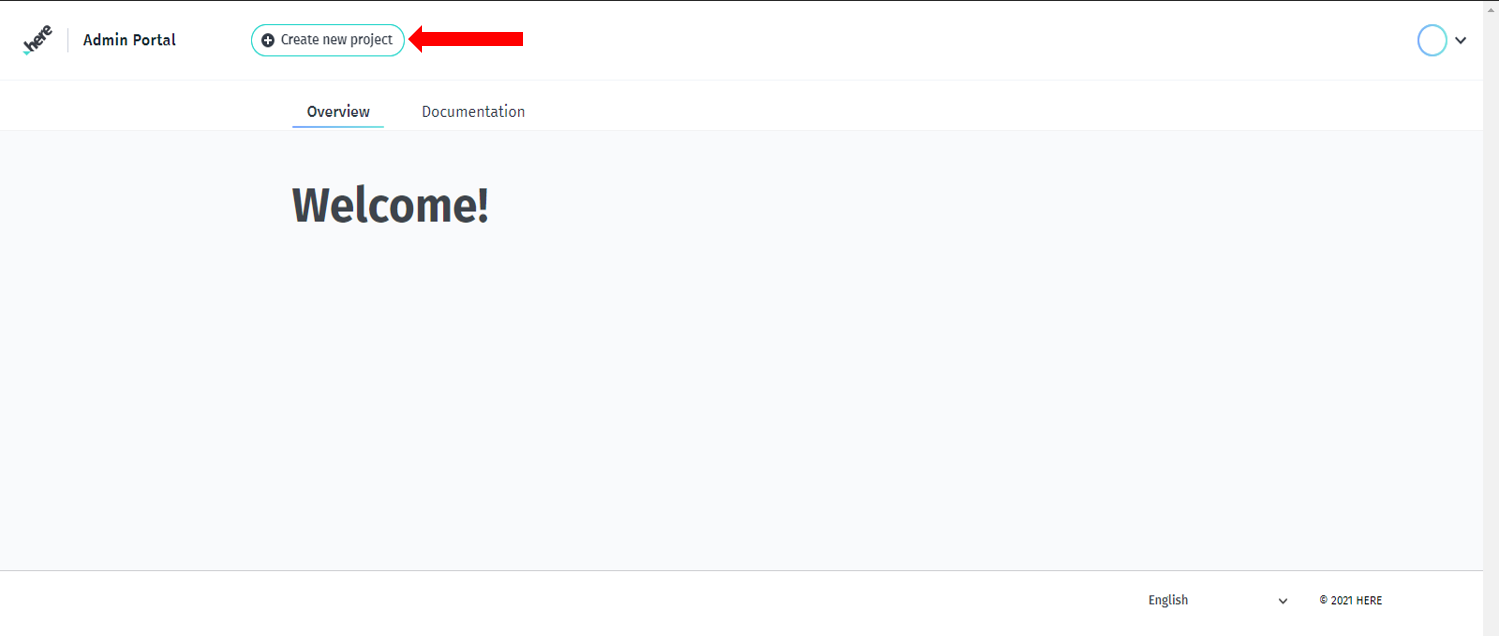
- Click on “Create a new project” and then “Set up a new project in the admin portal”, it will lead you to a new page.
- Click on “Create a new project”, give it a name, agree to the Developer Service Terms, and click on “Create”; your project has started !
- Once it is done, its name should appear in bold. You should also see new tabs.
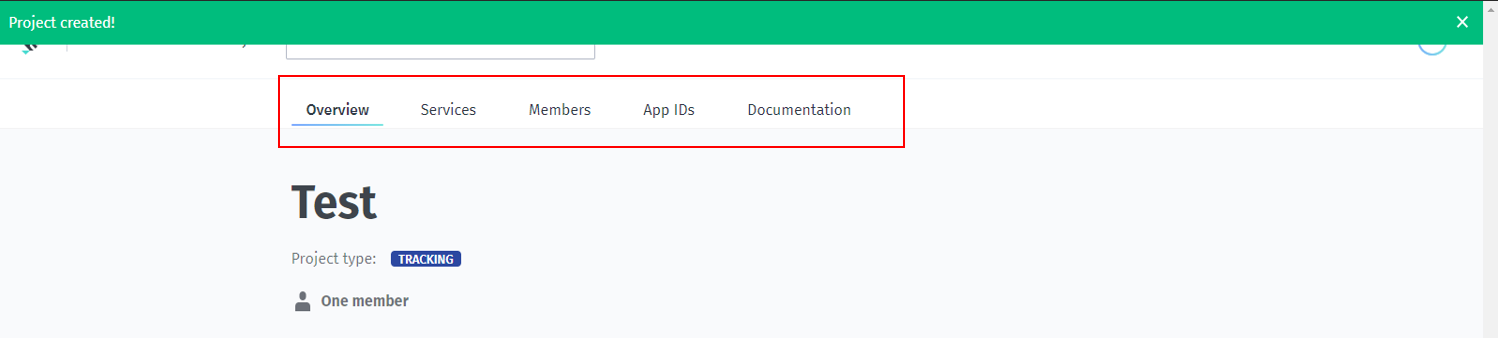
In the “Service” tab, you will find two options, “Indoor positioning” and “Tracking”:
- In the “Indoor positioning” part, they present you the HERE Indoor Radio Mapper, an Android app for the versions 6.0 or higher which will be used to do the radio-mapping.
- “Tracking” will guide you to tracking.here.com, where you will be able to develop a dashboard to manage your maps, devices, geofences and events.
On the “Members” tab, you can manage the members of the projects and their roles.
The “Documentation” tab contains all the files and links about venue creation as well as mobile SDKs.
Step 2: Create your indoor radio map
Here is a tutorial on how to radio map with Here, you can find details for each step her under:
1- First, you will need the map of your office/factory to be able to map it; you have two options: either get in contact with Here and send them the map of your office so they add it or do it yourself with your phone. If you do it from your phone, refer to the custom venue part.
It is time to calibrate the map of your office or factory:
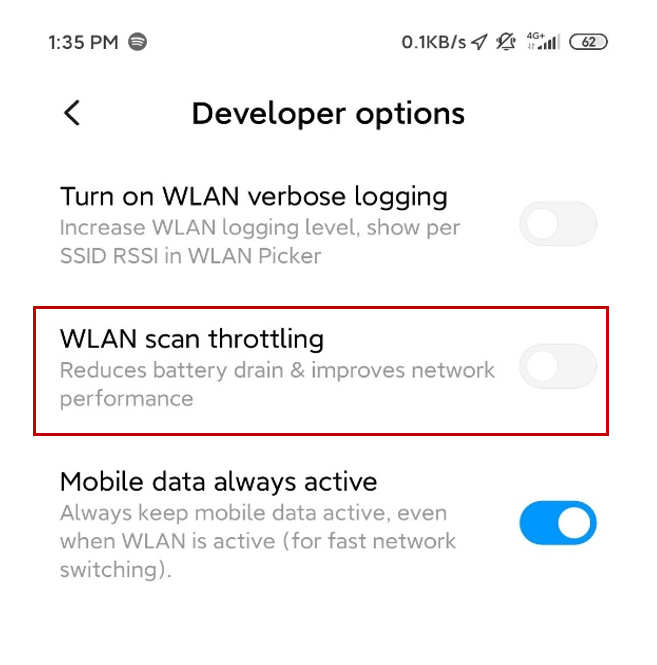
2- To collect Wi-Fi data, you will need to do a quick change in the parameters of your phone: go to the “Developer options” (some phones need some short manipulations to access those, you can check that on the internet), there, find the option “WLAN scan throttling” and turn it off.
3- Then, download the HERE Indoor Radio Mapper app on your Android phone with a 6.0 or higher version.
4- You can now go on the app, click on “SIGN IN” and identify yourself with the same login/password you used on the web app.
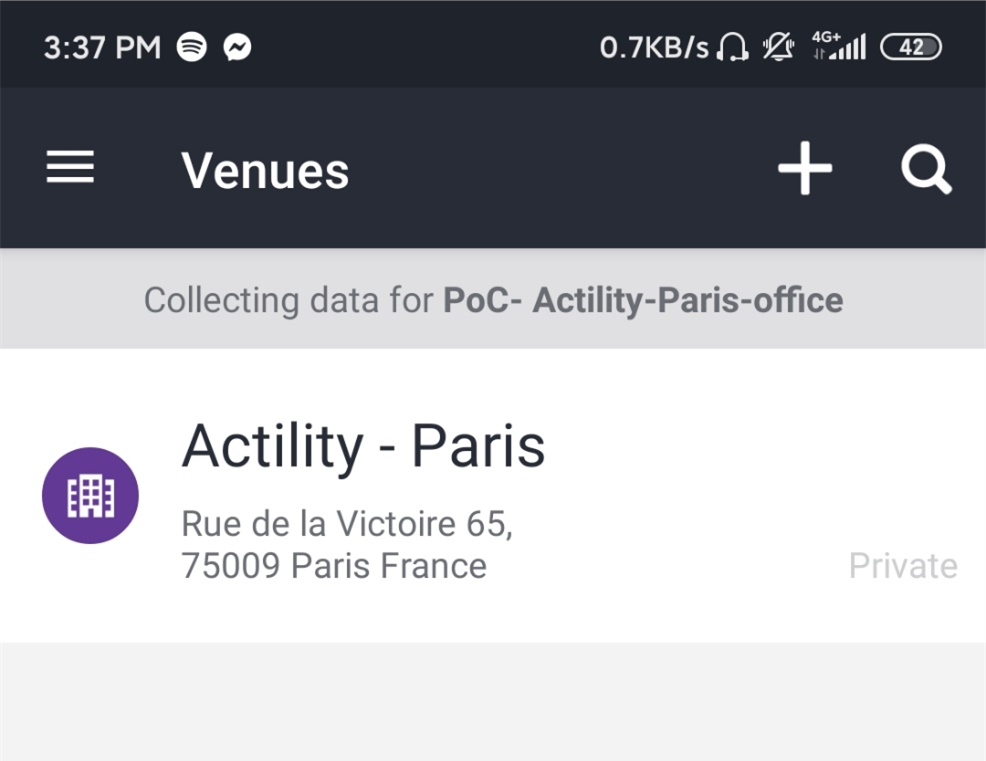
5- Now, click on the project you are mapping, the venues already deployed should be displayed on the screen.
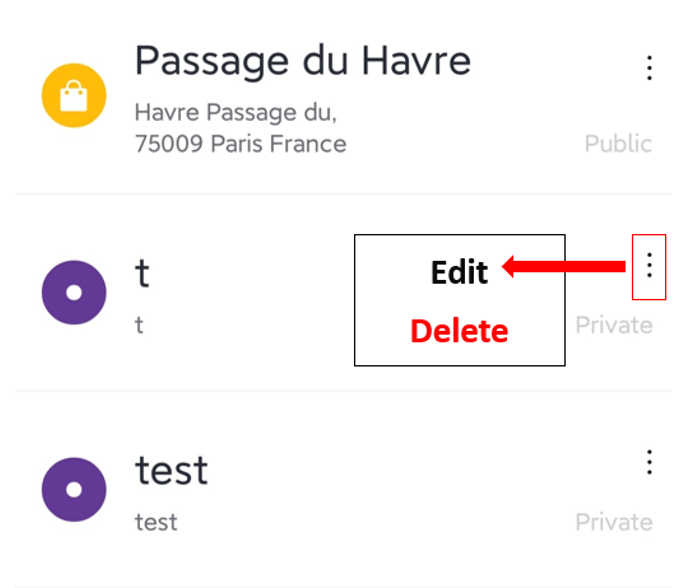
If you want to add a custom venue, you can click on the (+). You will give it a name and an address and then, you can add the map yourself or even start without a map and add it later by editing the venue you want. The map must be a picture and not a pdf if you want to add it from your phone.
If it is a public venue you want, click on the magnifying lens; if your location is activated, it will show you the closest venues that you could also radiomap. The status of your venue will be written in its lower right corner.
6- Click on the venue you want to access its map.
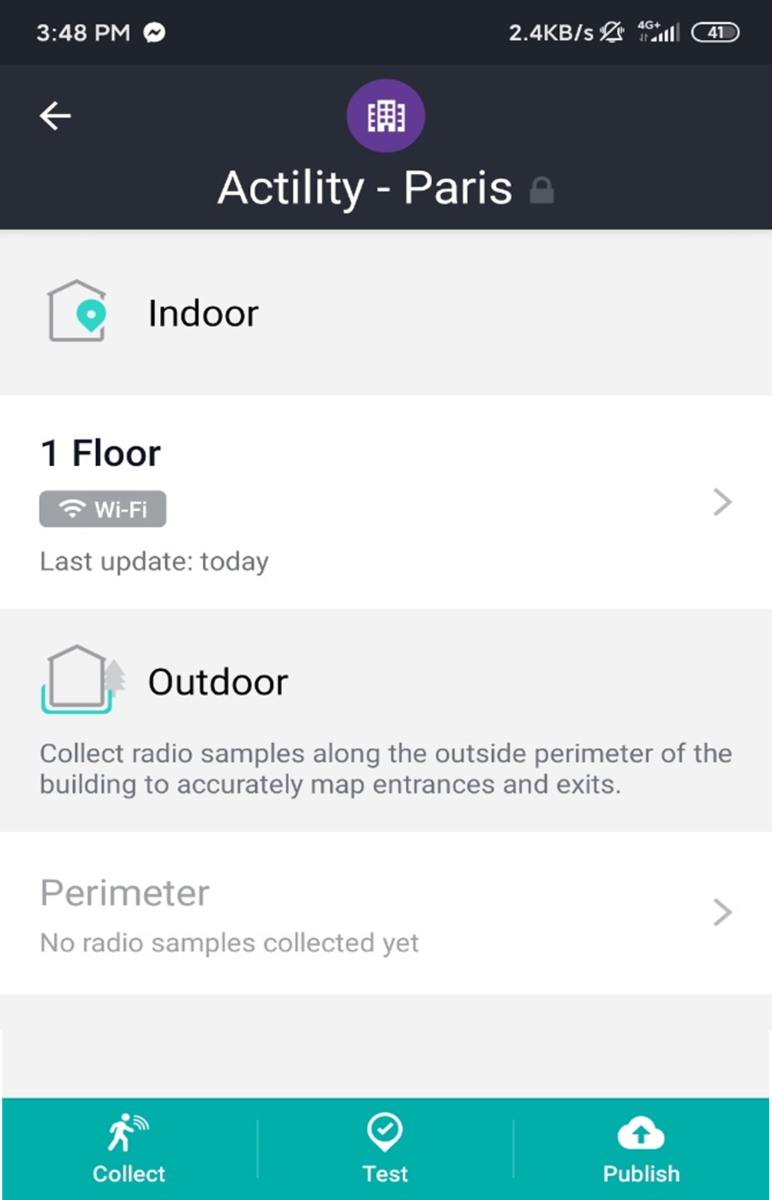
On this example, we only have one floor, but you can have multiple floors that you will have to plan one at the time.
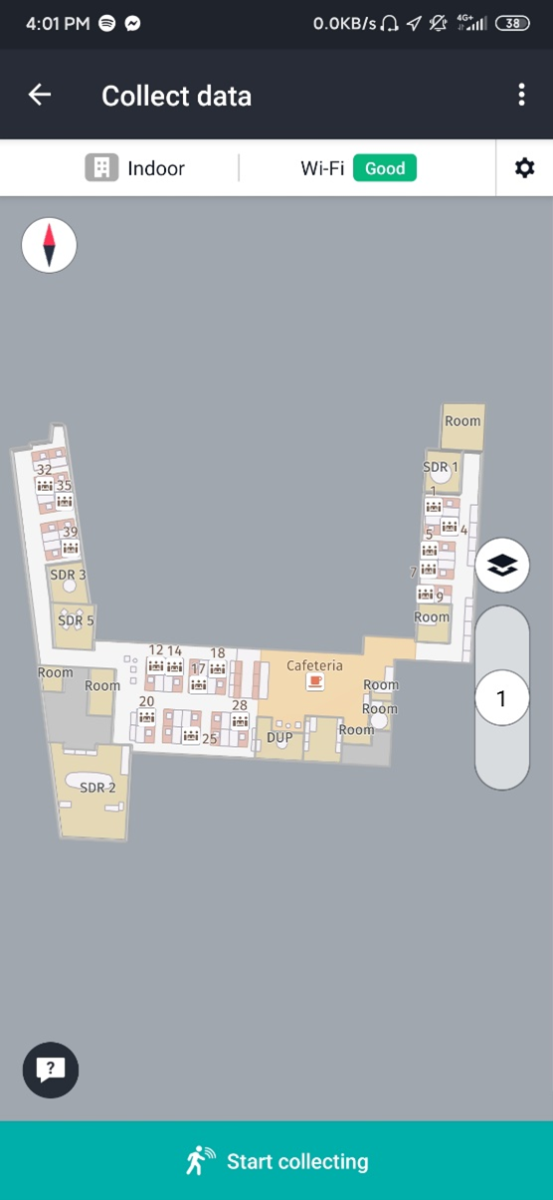
7- To start the calibration, click on “Collect”.
On the top, you will find the parameters to choose whether you want your radio type that you want to collect to be Bluetooth or Wi-Fi and if your environment is indoor or outdoor; the quality of the radio type you chose will be written on the top when you return to the “Collect Data” page.
8- Let’s start collecting tracks:
- Click on the map on your location, a blue and white circle should appear.
- Click on “Start Collecting”, the lower band should become red.
- Walk a straight line between 3 and 15 meters.
- Once you have finished walking, click on “Stop Collecting”.
- Click on your new position on the map.
- If you are satisfied with what you have done, click on “Save Track”; if not, click on “Delete Last Track”
 The tracks that haven’t been uploaded will be in cyan while the uploaded ones will be in black.
9- In order to see the effects of your last tracks on your map, you will have to synchronize them by clicking on the “Map layers” button on the right of the screen that will have changed a bit; a cyan button “Synchronize” will have appeared inside; click on it.
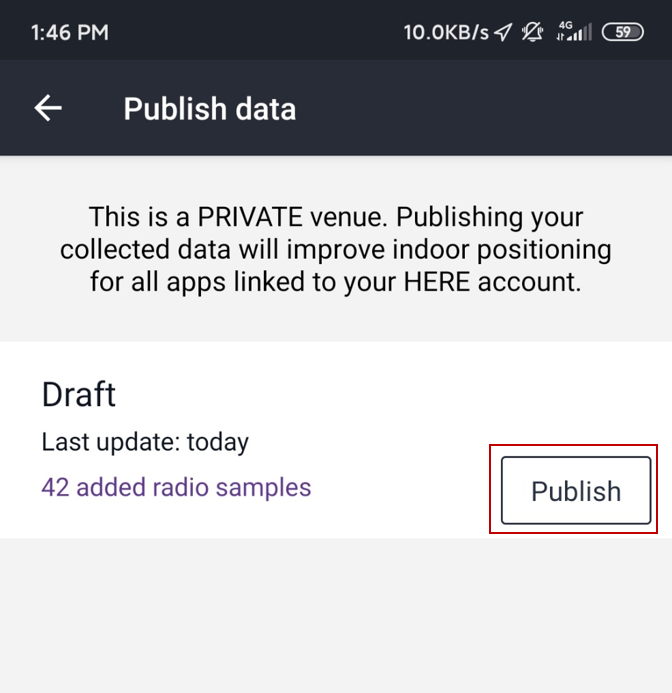
10- You can now test your collection by going back to the main screen and clicking on “Test” next to “Collect”, and if you are satisfied with the result, go to “Publish” next to “Collect” and “Test” to publish it.
11- Click on the big button publish corresponding to the collection of radio samples you created and wait, as it can take a bit of time. Once done, well played, you succeeded in collecting data for your map. You can repeat the operation as many times as you want.
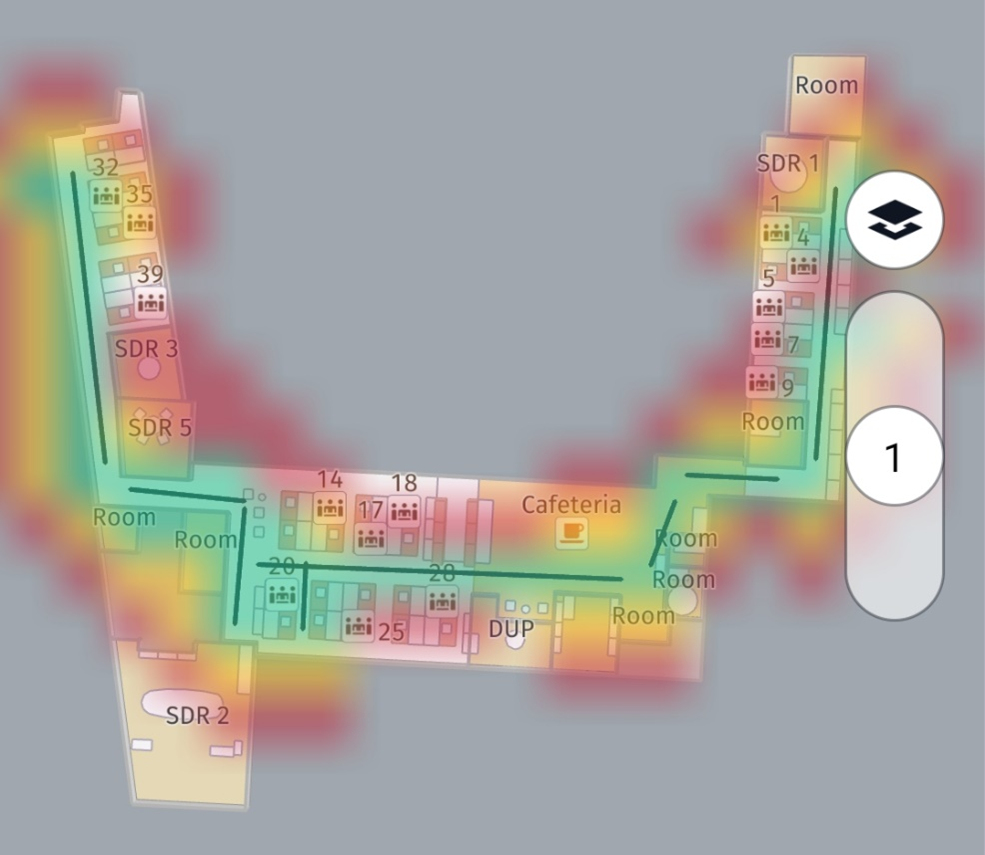
12- Check the quality of your work by clicking on the button you used to synchronize your data, it will allow you to see:
- The quality of data collection, a cloud green, orange and red depending on the quality of the data (green means that you collected enough in this zone, orange that it is a bit lacking and red that there is not enough data).
- The quality of the infrastructure shows if the building has a good coverage in terms of beacons, black clouds will represent the lack of beacon.
- All collected tracks will show you the lines you have already done.
Here is an example of what a map looks when all three are activated (we have a good quality of infrastructure so there is no black clouds):
Step 3: Connect ThingPark to Here tracking
Now that you have your data, you need to connect ThingPark to Here tracking. The first step will be to connect your abeeway device to ThingPark by following this tutorial from the “Creating your tracker” step.
Then, go to “Application”>”Create” on the left and click on “View more Application types”
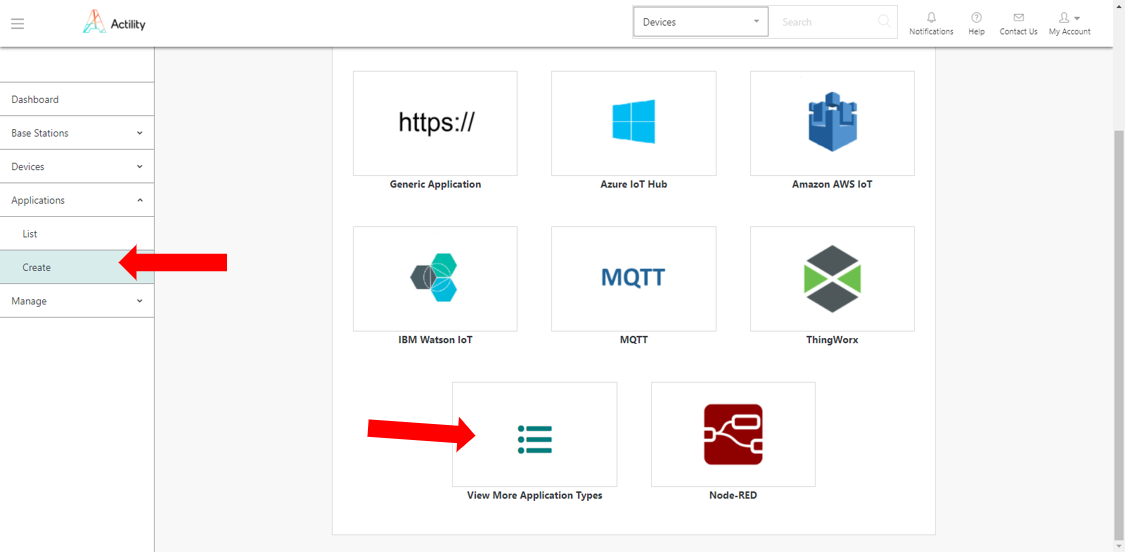
“Here technologies” should be the third choice from the left, select it.
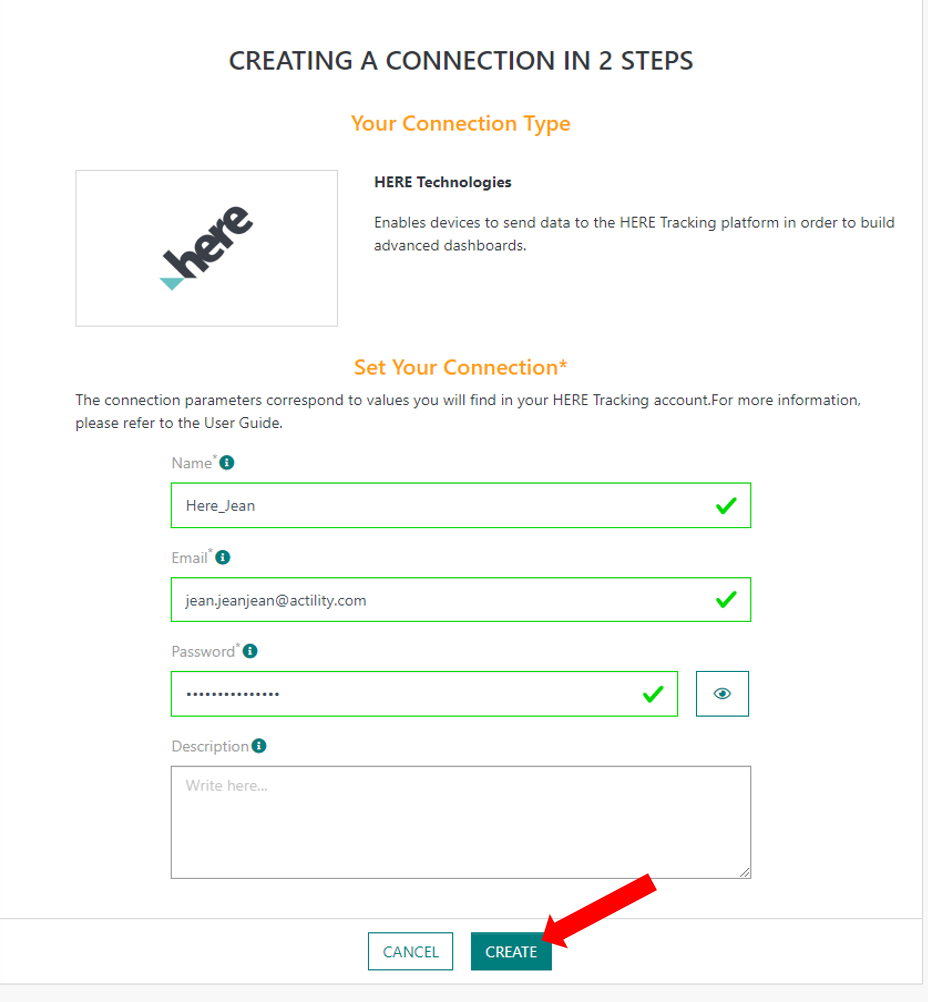
You will have three fields to fill:
- A name to easily identify your application
- The email of you’re here account
- The password linked to that account
Click on “Create” to finish the app creation, the device should automatically appear on Here tracking.
Step 4: Configure your device
Your device is provisioned but you might want to change the way it works; for example, you might want to use BLE instead of Wi-Fi or you might want to change it from permanent tracking where the device reports its position every X minute to motion tracking where the device reports movements.
By default, your tracker is configured in motion tracking mode with the Wi-Fi as its geolocation technology.
To modify its configuration, you can go to Abeeway Device Manager to change its configuration, here is a link to its documentation.
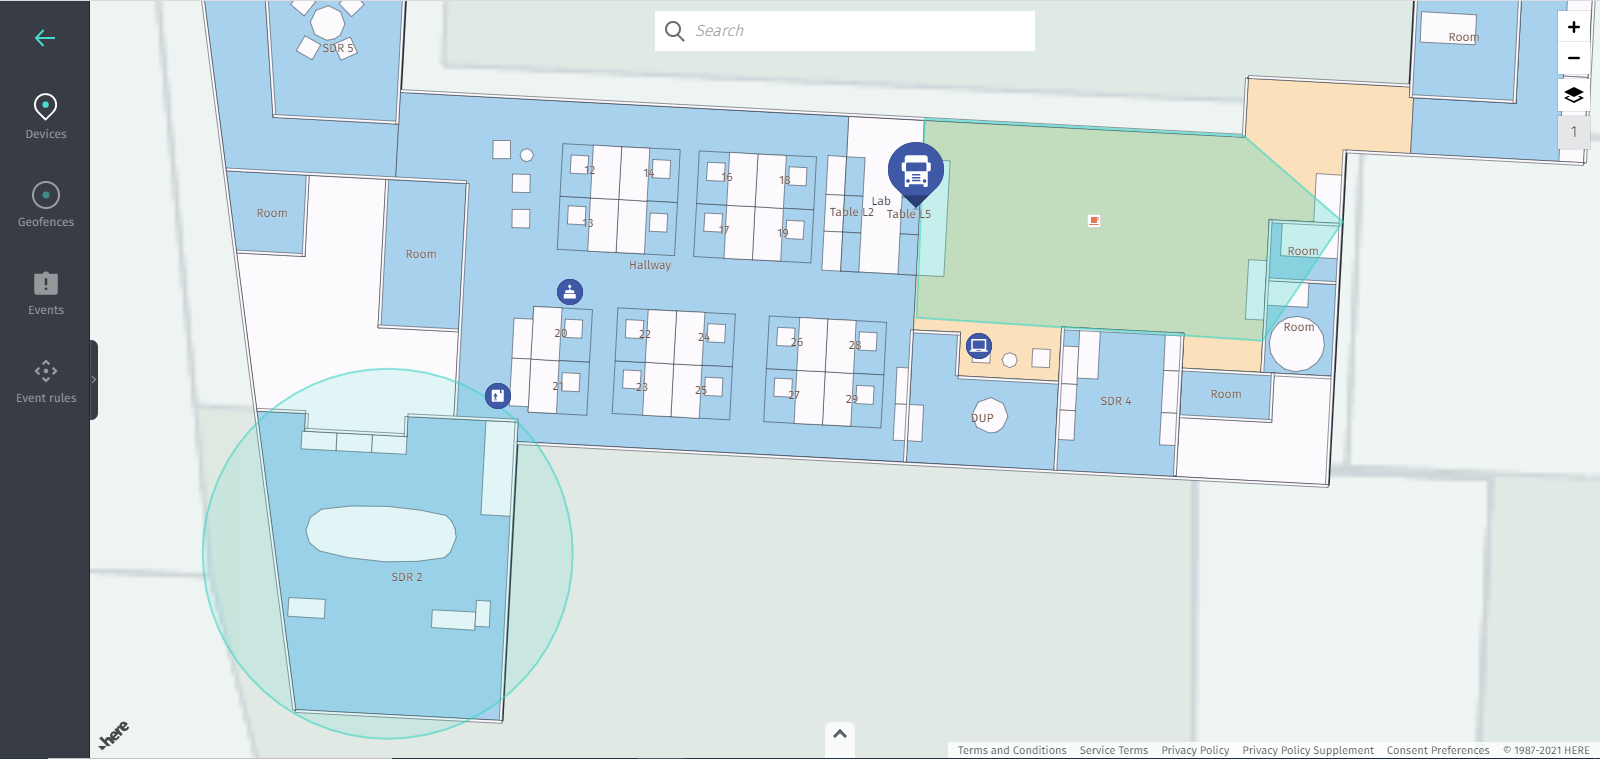
Step 5: Test the Here tracking map
Now that your map is deployed and calibrated, you can go to the link https://app.tracking.here.com/ to test it, your devices should already be connected to your projects.
By clicking on a device, you can modify its parameters: the report location which is more detailed the more time you give it, the associated rules, the associated geofences and a notification history.
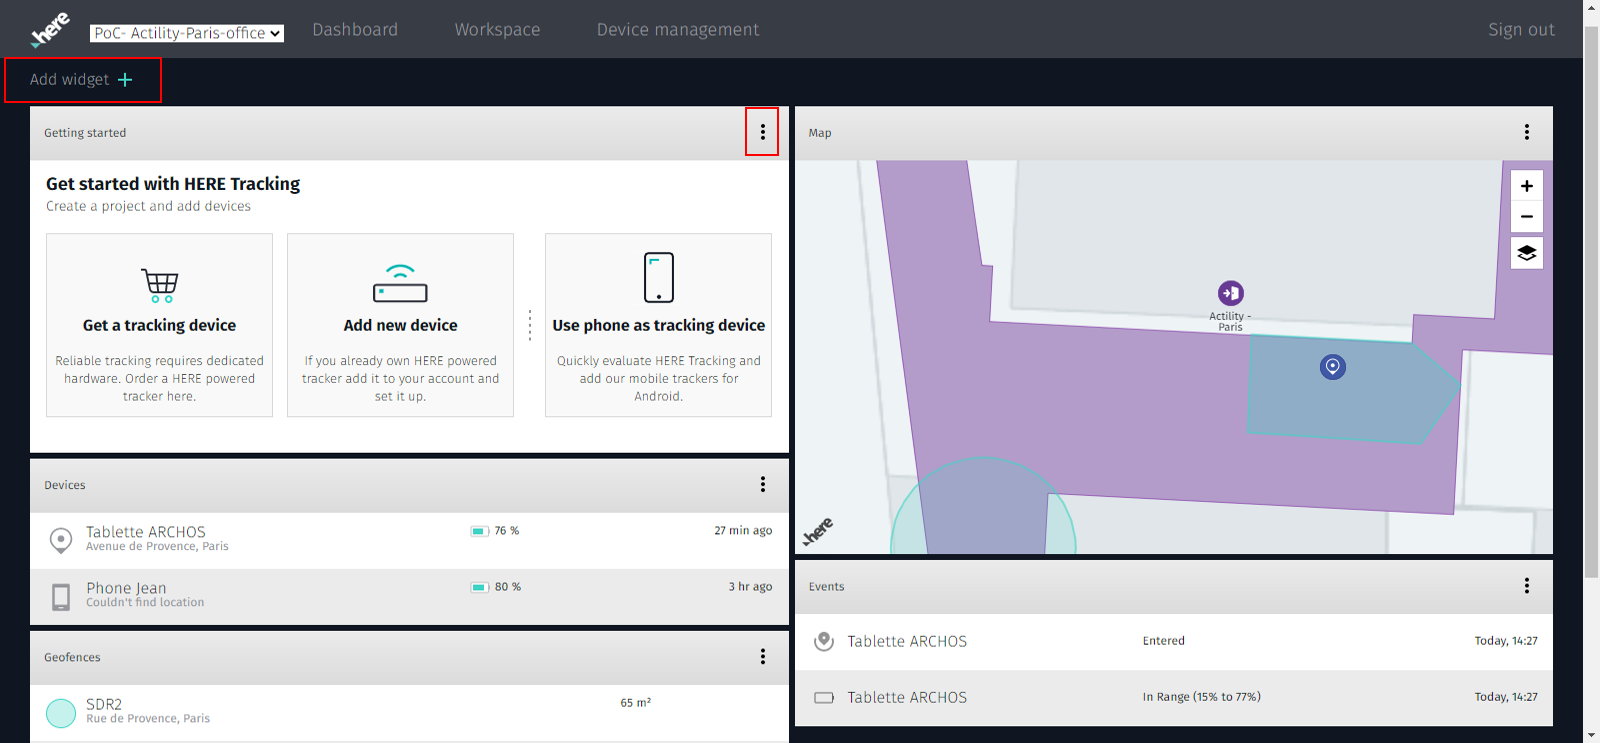
On the Dashboard, you can organize your view of the widgets by clicking the “Add widgets” to add new ones or the three dots on the upper right of each widget to delete them.
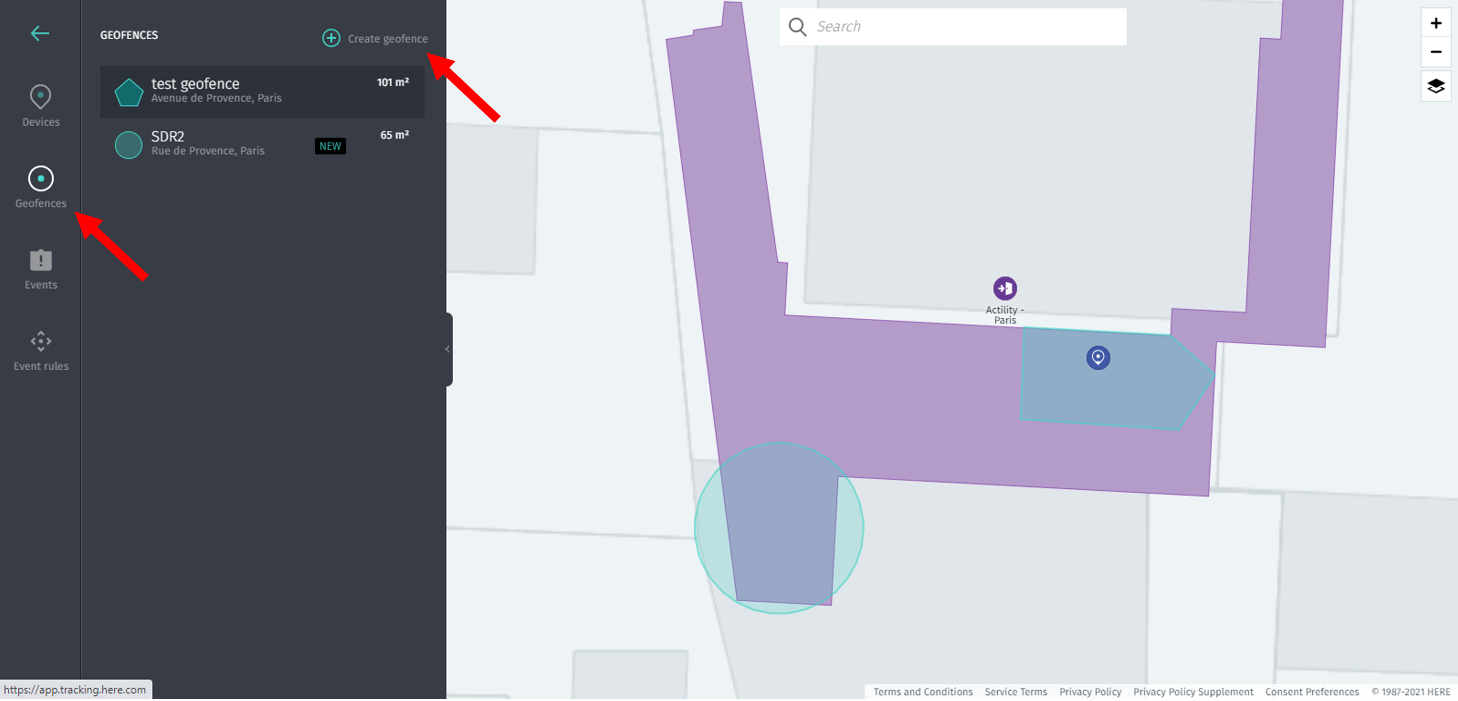
On the Workspace, you will find the map with your office, the devices you already linked and the geofences in a pale cyan color. To create new geofences, go to the second icon from the top and then on “Create geofence”, you will have two shapes possible with a radius that must have a radius between 5 meters and 1000 kilometers (even though you can design shapes smaller than 5 meters or bigger than 1000 kilometers, the web app won’t allow you to create it)
Finally, the “Event Rules” button allow you to create alerts depending on the environment of the device (humidity, temperature…) or its actions (shock, tamper…). It is important to know that there are no rules linked to the geofences as they are automatically created: entering or exiting a geofence will trigger an alert. You can find and sort all those alerts in the “Events” page, just above “Events Rules”.
If you want to use another device, you can also use your phone instead of the tracker by downloading the “Here tracker” app.