In this tutorial, you will learn how to integrate the Wilsen device from Pepperl+Fuchs with Actility on akenza. This kit is offered on the ThingPark marketplace of Actility.
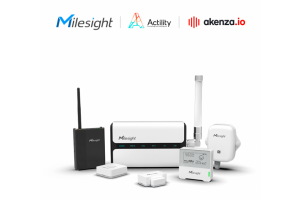
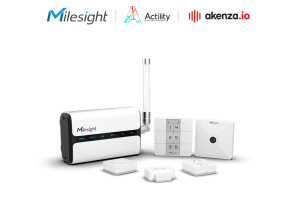
The IAQ Kit contains:
- 1x Pepperl+Fuchs WILSEN.sonic.level UCC2500 sensor or UCC4000 sensor
- 1x Browan Pico NEXT LTE Gateway pre-installed and configured
- 3x Months subscription to akenza.io application up to 2 devices
- 1x Months subscription to ThingPark Enterprise SaaS service
Application examples:
- Remotely monitor fill levels in containers, tanks, and silos, water levels of rivers, lakes, and flood basins for verticals such:
-
- Smart Farming
-
- Smart Environment
-
- Smart Cities
-
- Smart Logistics
Product Features:
- Fill levels are measured at regular intervals and transmitted to operational experts through internet-based applications.
- The measurement and transmission frequency are parameterized via a mobile application and Bluetooth interface.
- Battery-powered ultrasonic sensor with LoRaWAN interface
- Thanks to the IP protection class IP66/67, the sensor can be used in harsh and industrial environments
- The sensor transmits more than just filling levels. GPS data from the sensor allows assets such as containers to be tracked, while other information such as temperature readings and battery charge status enables it to benefit from predictive maintenance capabilities.
In this tutorial, you will learn how to connect the Actility - Pepperl+Fuchs Smart Level Monitoring Kit to akenza. You will achieve the following:
- Integrating your Actility account to your akenza environment
- Creating Data Flows and devices on akenza
- Creating your individual dashboard for data visualization
1. Getting started
2. Add an Actility Integration on akenza
In order to proceed with the Actility integration on akenza, make sure to create a ThingPark community account and pre-commission the Milesight gateway to it as described here. Follow this link if you need to install Actility's firmware on the gateway.
The integration of Actility will be used to connect, synchronize and manage Assets on akenza. Start with the integration of your Actility account by adding your credentials on the Actility tab within Integrations. More details about Integrations (for ThingPark Wireless only) can be found here.

If you use the community instance of ThingPark, the required Profile ID is community-api. To find the Profile ID please check out the Actility API documentation of your account. See the example here.
After successful integration, the Actility-account-integration gets displayed on the Connectivity Integration Overview.

3. Create Dataflow
As a next step, go to Data Flows in your Workspace and choose as device connector LoRa and consequently, the Actility integration you have done in step 2. For data parsing continue with the selection in Device Types of your specific Pepperl Fuchs device. As an output connector, select the akenza database. This will store the data on akenza and allows further use on the dashboard composer. More about Data Flows can be checked here.
Data Flows consist of a device connector, a device type, and an output connector and define how device data are processed on akenza.

Once all specific Data Flows are created for your devices, continue with the creation of your devices.
4. Create Assets
To add a device to your environment, select +Create Device in the tab of Assets and fill in the required device parameters. By assigning the appropriate Data Flow, your device will be automatically registered and connected to your Actility account.
Upon a join request, the device will turn online. Incoming data are displayed in Message Logs and also on the Data Overview of your device detail page.

5. Visualize IoT data with akenza's dashboard composer
In order to visualize your data with the dashboard composer, switch to the dashboard composer by hovering over the akenza-icon (not the logo) in the side navigation and select Dashboard. You will get redirected to the dashboard overview. Select Create a Dashboard and start adding the Widgets of your choice.
By adding the component Chart, the Source Tab allows to select the device of your choice and its data points. Customize the dashboard to your liking.


Optional
Try out other akenza features such as the rule engine. The rule engine allows you to apply a business logic to your infrastructure. E.g. inform your teammates about certain conditions by using MS-Teams as notification service. Check out more here.
Support
Reach out to us if you need any further support:
- Pepperl Fuchs: