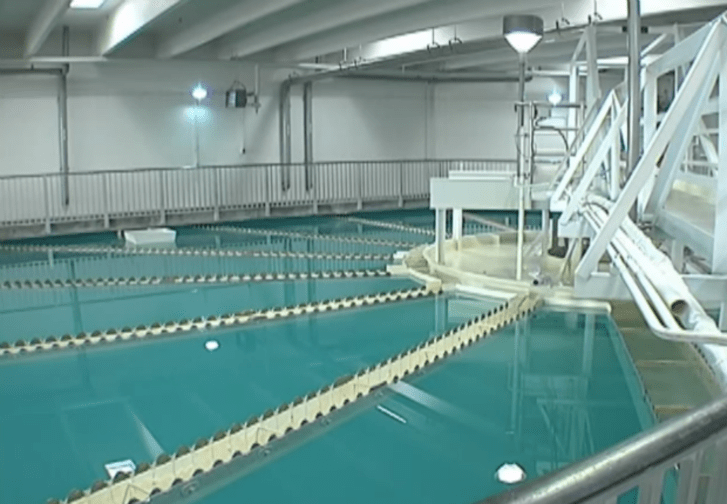
An accurate advance warning of flood levels can save lives and reduce disaster management costs.
As extreme flooding events are becoming increasingly common around the world, remote water level sensors are being used in sophisticated networks to monitor streams and rivers in areas prone to flooding.
This Water Level Solution, powered by DecentLab & WMW, is an ideal to monitor the water flow and its level remotely.
This tutorial provides you with the key steps to complete to get started with this solution.
Before you start...
In order to complete this tutorial, you will need at least :
- The “Water Level Kit” available on ThingPark Market. This kit contains the required HW and SW parts to implement the solution:
- 1 x DecentLab Ultrasonic and its accessories
- 1x three-month access to the light version of WMW-HUB application.
- A ThingPark Community account with an active LoRaWAN™ gateway. If you don’t have a gateway, you can purchase one on ThingPark Market, ready to be activated on ThingPark Community.
Step 1: Connect ThingPark Community to WMW application
Let's start with WMW:
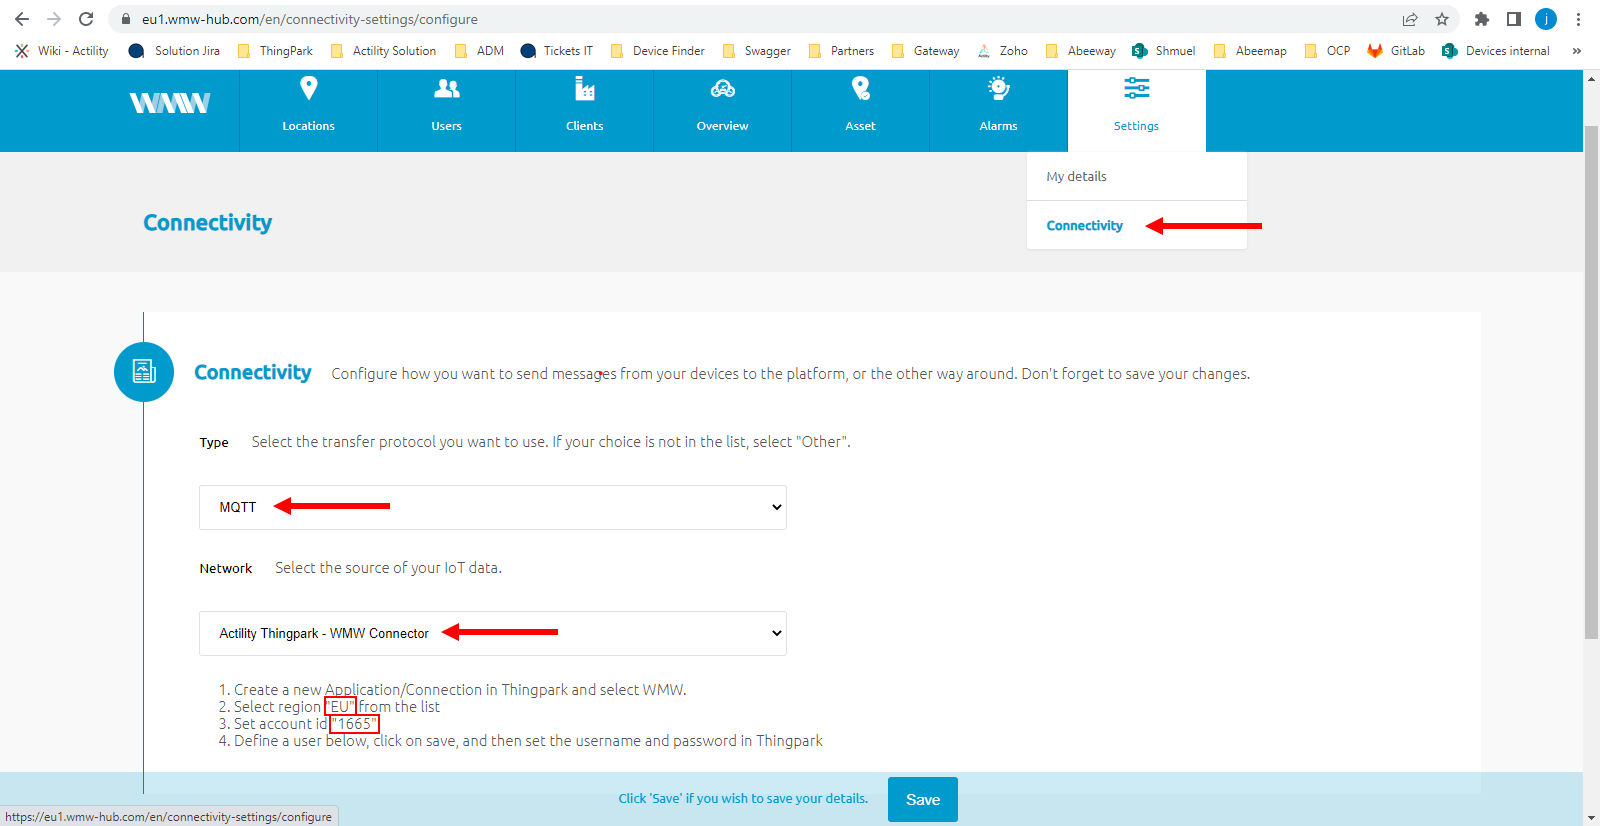
Connect to your WMW account on the URL https://eu1.wmw-hub.com/en/login. Once you are logged in, select "Connectivity" in the "Settings" tab, then MQTT as a type and Actility ThingPark as the network.
You'll find there the region and account id corresponding to your WMW account, keep it for later.
On the MQTT user line, click on the big green plus button on the left. It will give you two fields to set your MQTT login and MQTT password. You can choose whatever you want but be sure to keep it written for later.
Now that everything is set, you can click on the "Save" button.
Your ThingPark Community application are accessible through the following URL.
Once you log in, you should see a screen displaying the number of base stations and devices you’ve connected on this account as well as their status. No device or base station should be connected for now.
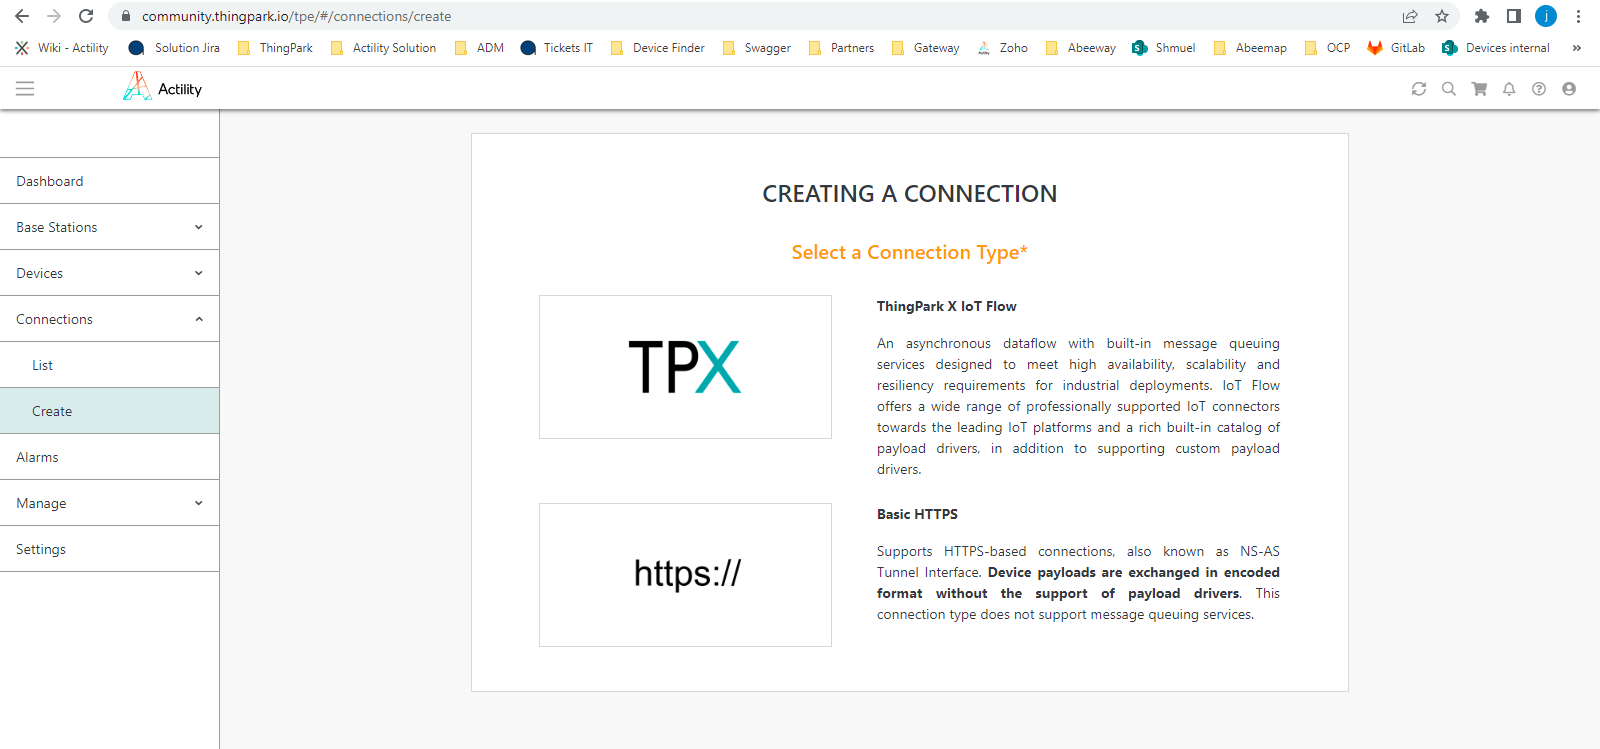
Select “Application > Create” on the list on the left to create your WMW application, it is mandatory in order to send the device’s messages to WMW; select the “TPX” option. It will load a page inside of which you'll find a WMW option. Select it.
A few fields are to be filled in order to complete this operation:
- Name: Name of your application displayed in ThingPark Community
- Region: you retrieved it on WMW
- Entreprise ID: this is the account ID you retrieved earlier
- Username & login: the MQTT username and logins you defined on WMW
Click on "Create" to finish the creation of this side of the connection and go in your list of application. The link between WMW and ThingPark is established !
Step 2: Activate your DecentLab Ultrasonic sensor on ThingPark Community
Now that you have your application, you can add your device on ThingPark too.
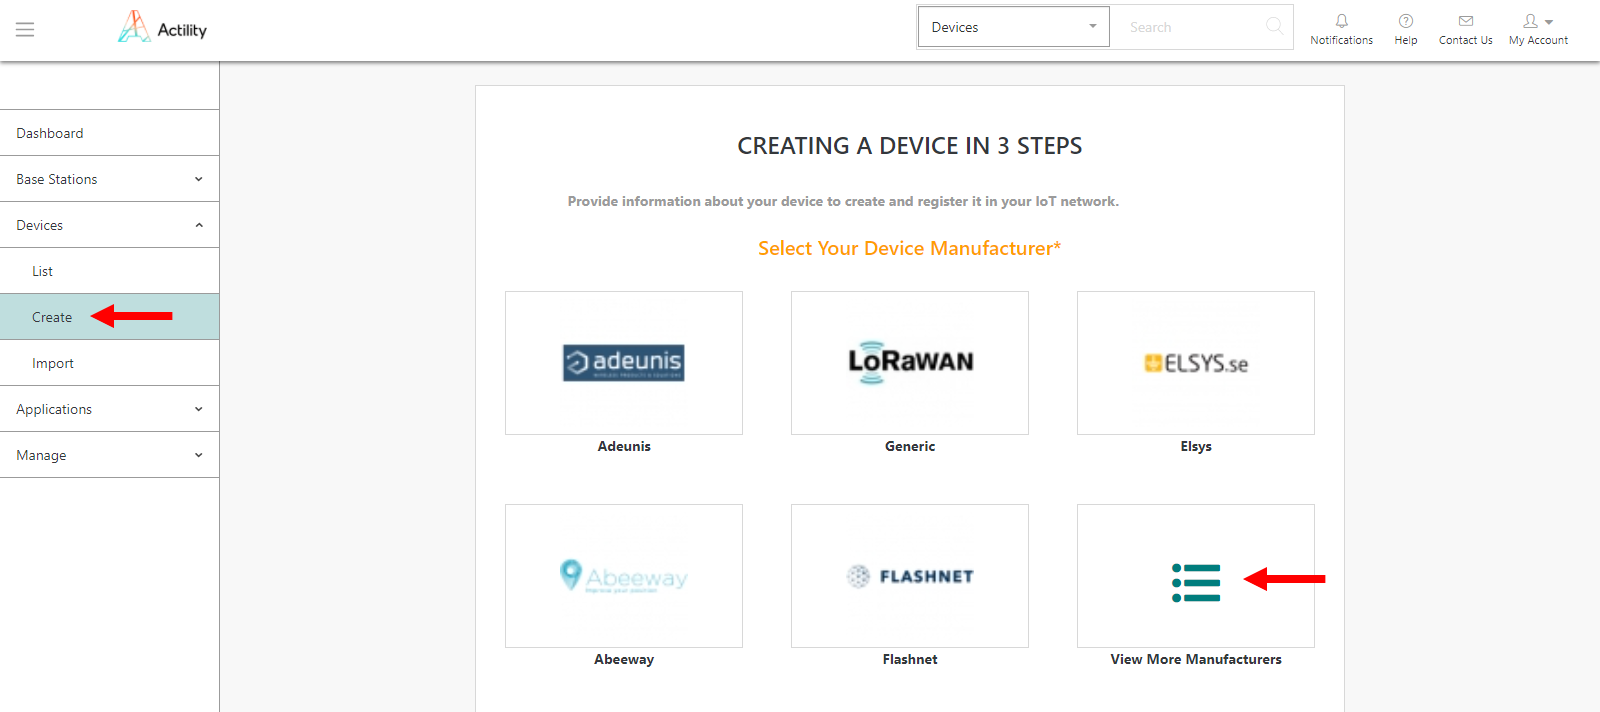
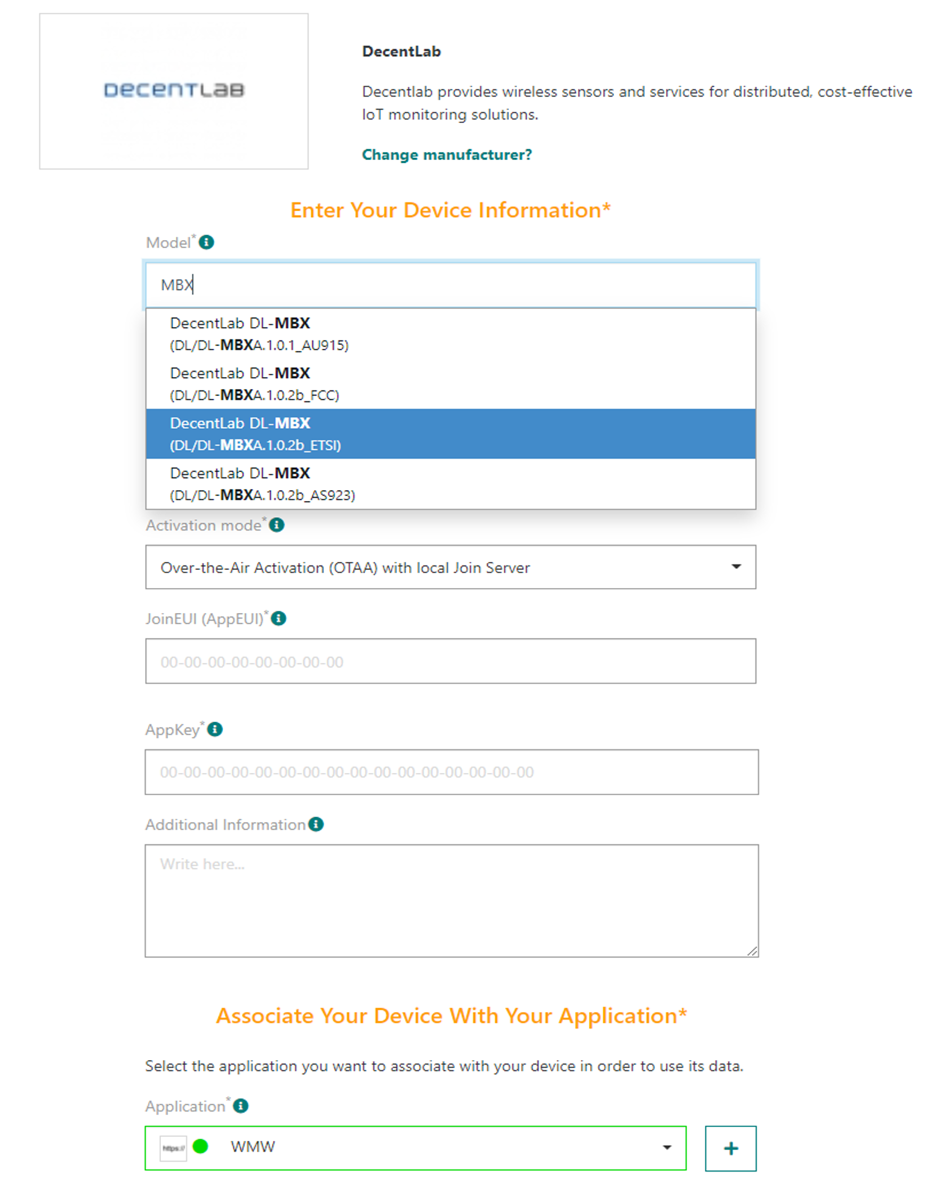
Go to “Device > Create” on the list on the left, if DecentLab is in the list of the device manufacturers, select it, if it’s not, select “View more manufacturers”.
Once again, you will have to fill field to create your device:
- Model: Choose the DecentLab DL-MBX corresponding to your region (AS923 correspond to Asia, AU is for Australia, ETSI is for Europe and FCC is for the United-States).
- Name: The name your device will have in ThingPark Community.
- DevEUI, AppEUI and AppKey: Codes you should have received with your device.
Select the application you created for WMW; it should have a green dot showing that it’s working well.
Leave the mode to “No location” and click on “Save” finalize the operation.
Step 3: Deploy your DecentLab Ultrasonic sensor in the field
DecentLaB Ultrasonic Sensor Overview
The device DL-MBX enables remote monitoring of water level, fill level of tanks and silos, fill level of waste containers, presence of objects or snow level. It measures the distance between the sensor head and the target (rangefinder). The measurement principle is based on ultrasonic waves which are transmitted by the sensor and reflected back from nearby objects. Using the time of flight of the sound waves and the speed of sound (temperature compensated), the sensor computes the traveling distance and thus the distance to the object.
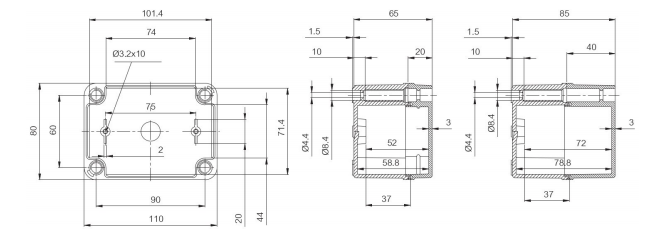
DecentLab Ultrasonic Dimensions
Switch-on your device
To start up the device, press and hold the button for three seconds until the LEDs blink and the device should join by itself if it is well provisioned.
To verify that your device is in its active mode, you just have to look at the green LED that will flash for each measurement.
Device default configuration
During the active mode, the device periodically reads the sensors with sampling period of 10 minutes, you can configure its parameters with a command line interface by following this guide.
Once your device is active, you should be able to see it on ThingPark. In “DEVICE STATUS” there should be a green “ACTIVE” written in the top right.
Device physical installation
For best radio performance, install the device upright with the sensor towards ground; ideally, in such a way that the device lid faces roughly in the direction of the next gateway. Also, the higher above ground, the better. Avoid metallic objects close to the device and avoid its exposition to rain and radiations. For more information, you can consult the user guide.
Step 4: Monitor water level with WMW application
Using the credentials you received through email, you can access to WMW-Light on the following URL:
https://demo.wmw-hub.com/en/login
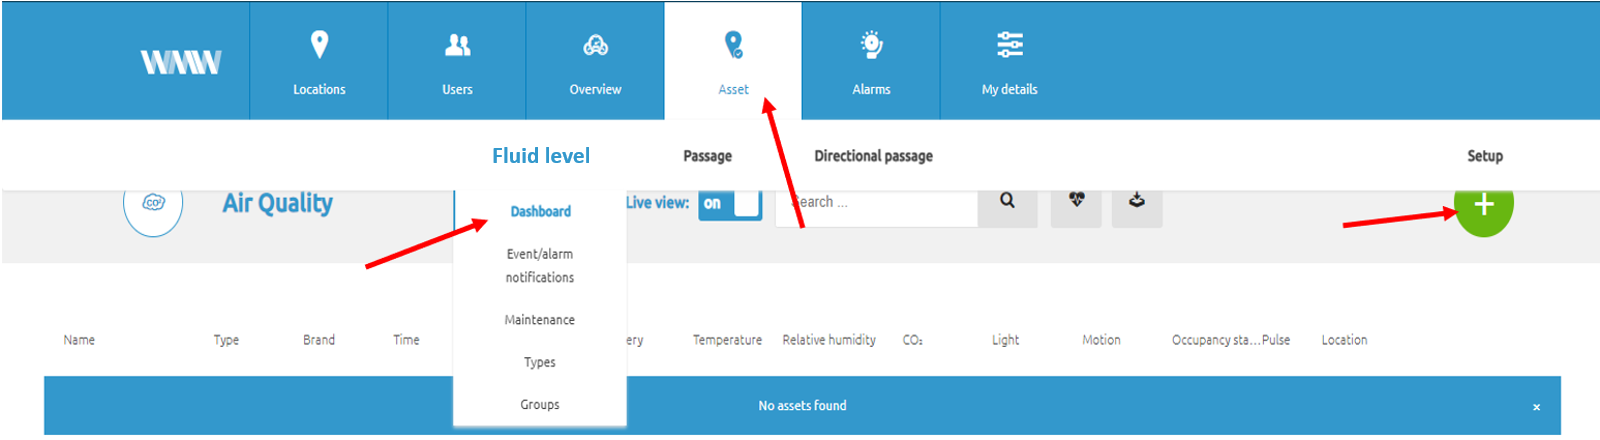
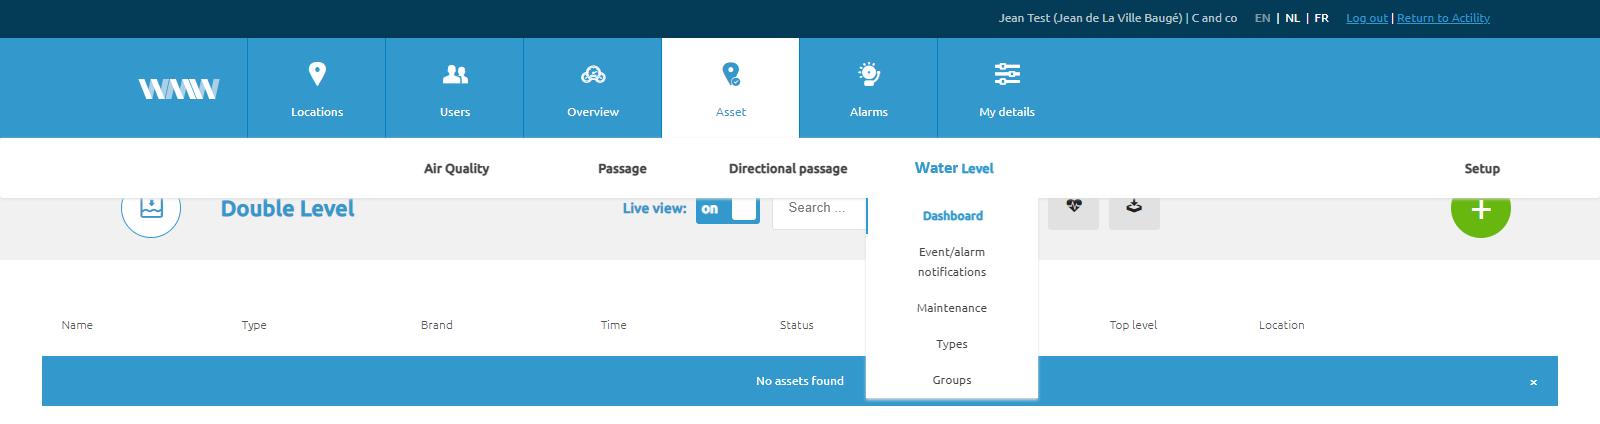
Since you already have provisioned your device on ThingPark Community, the main step that should be left will be to create the device on WMW. Click on “Asset” and then “Dashboard”, an empty page should appear since you have no device added yet. Click on the big green +.
If you possess devices on multiple applications, you may have to click on “Fluid level” before “Dashboard”.
In order to fill your device creation fields, you need:
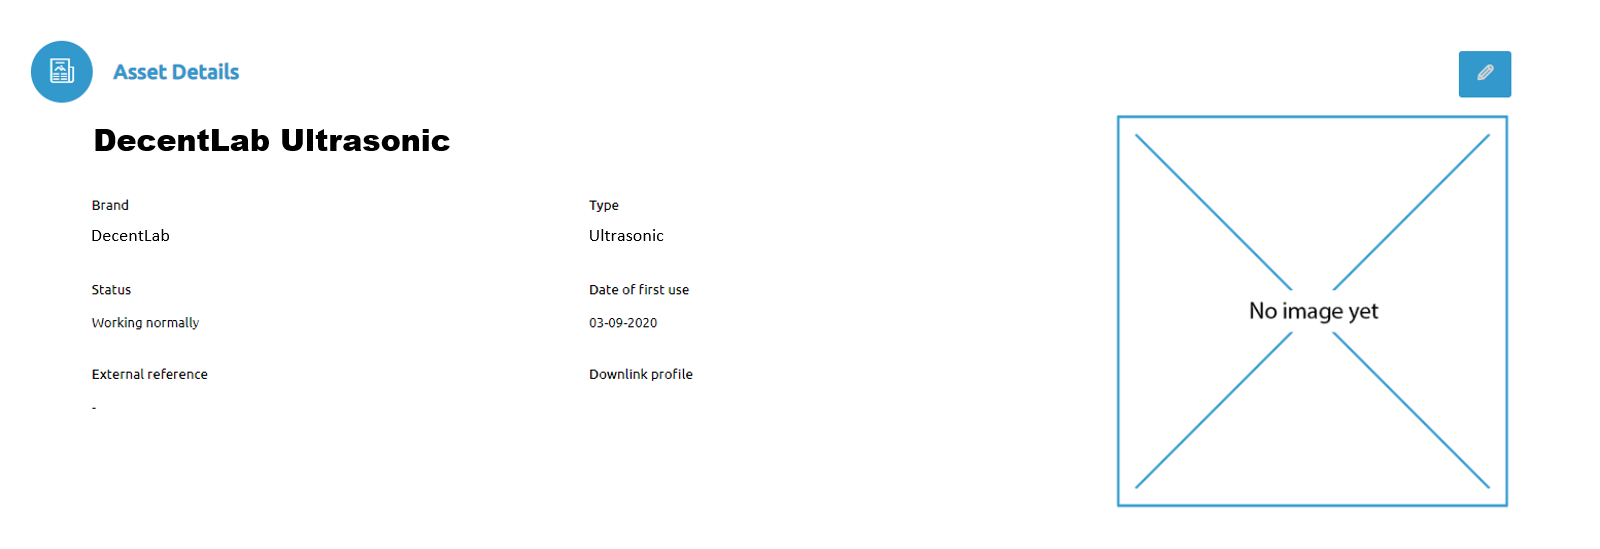
- A name that corresponds to your device: DecentLab Ultrasonic
- Its Unique device identifier also called DevEUI
- Device type:DecentLab Ultrasonic
You must select or create an asset type in order to create your device:
- For the brand, pick the brand of your device: DecentLab
- For the type, enter the type of space you will monitor water level in, a tank or silo for example.
- You can add a picture or a description of this type of asset
Once you are done, click on “Save” and your device should appear on the corresponding dashboard.
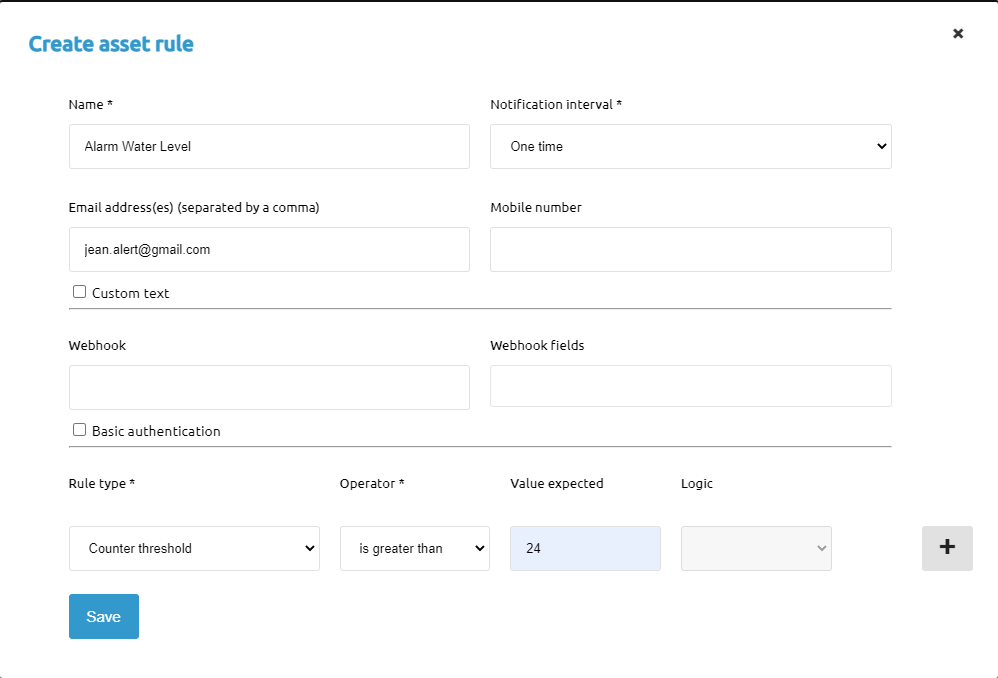
Add alarms to your device
You can pick its position manually since it does not return it by itself, and if everything goes well, the information of your device should appear as the payloads are transmitted.
If you want to add alarms to your device, return on the dashboard page and click on the arrow next to the device. Click on the small pen to edit your device, scroll down to find the “Rule” section, and click on the big green +. There you can add and edit your alarms to send emails or create webhooks depending on the measures your device transmits.
For example, if you want to configure alarms for water level threshholds in your tank, select your DecentLab Ultrasonic device and add a rule with mails to send the alert to, or phones or simply webhooks. The water level thresholds are up to you to determine. You can also put alarms on the other properties of your device such as its battery.
Monitor your device's information
You will find the information displayed by the tracker on the tracker on the dashboard on the corresponding application.
And if you want more extensive information, click on the arrow at the end of the line of the device, you will find the records of the water level.