Step 5 - Customize the Mobile Phone Application
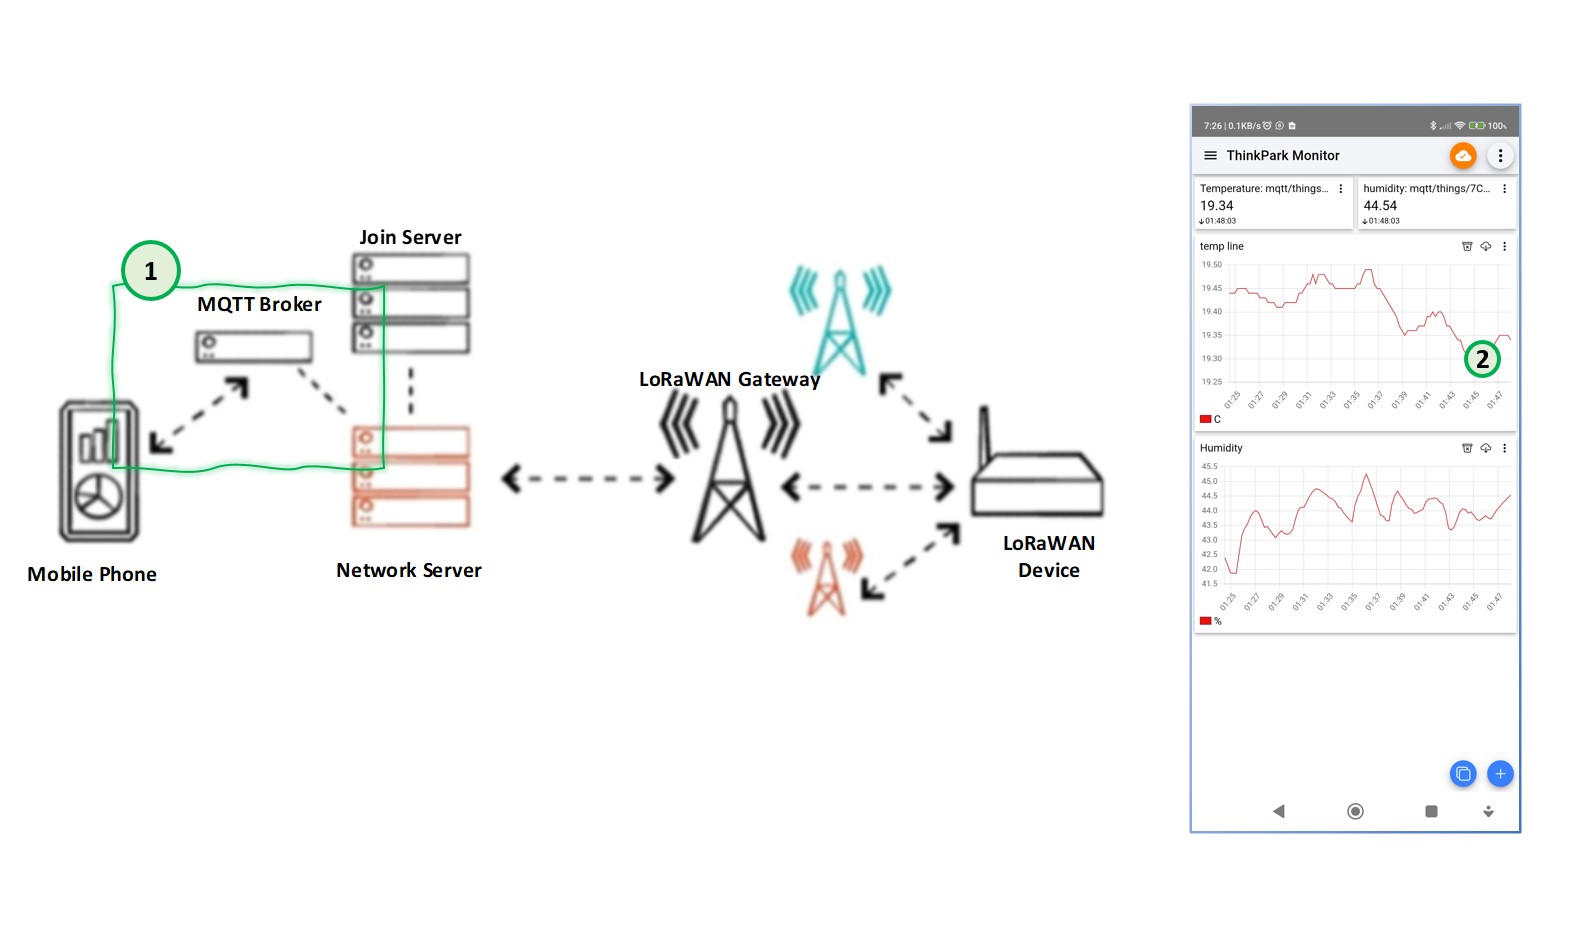
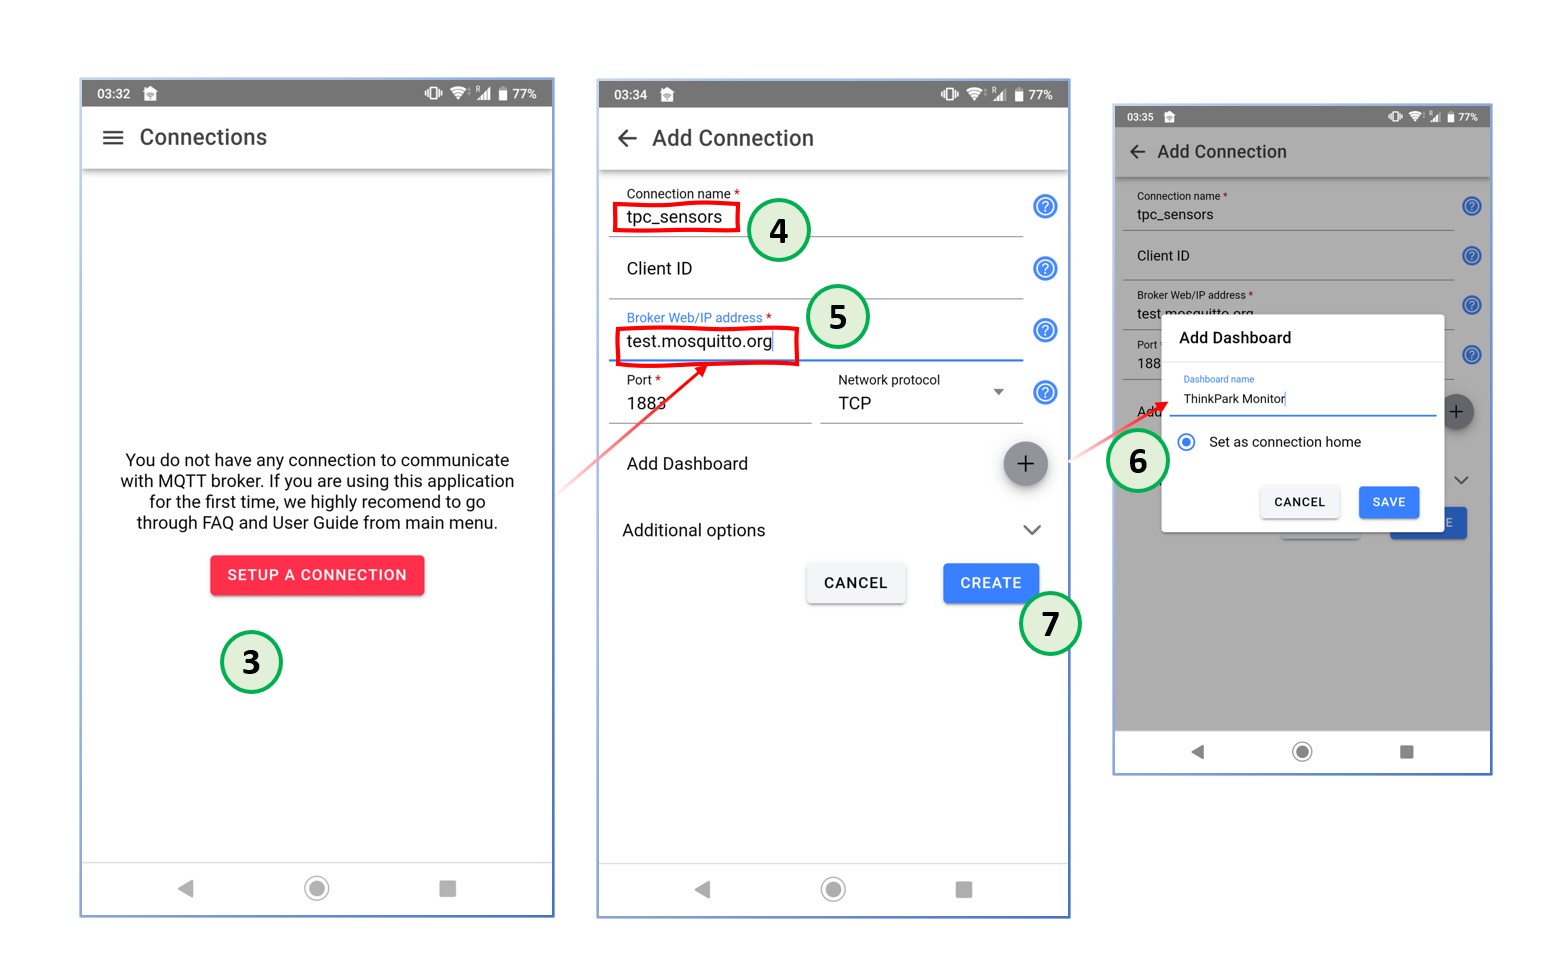
Customization of the mobile phone application involves two steps:

1

Define the MQTT Broker (i.e., the address and port) to which the application will connect and fetch the data.
2

Customize the GUI of the application to display the data fetched from the MQTT Broker.
3

Click on SETUP A CONNECTION to create connection to MQTT broker.
4

The name of the connection can be anything. In our example, we used tpc_sensors.
5

Enter tcp://test.mosquitto.org as address of the broker.
6

To proceed with the creation of the connection, you need to add a dashboard if you have not already done so. You can enter ThinkPark Monitor as the dashboard name and click on the SAVE icon.
7

Finally, click on the CREATE icon. The definitions will be saved, and the application will return to the main page again.

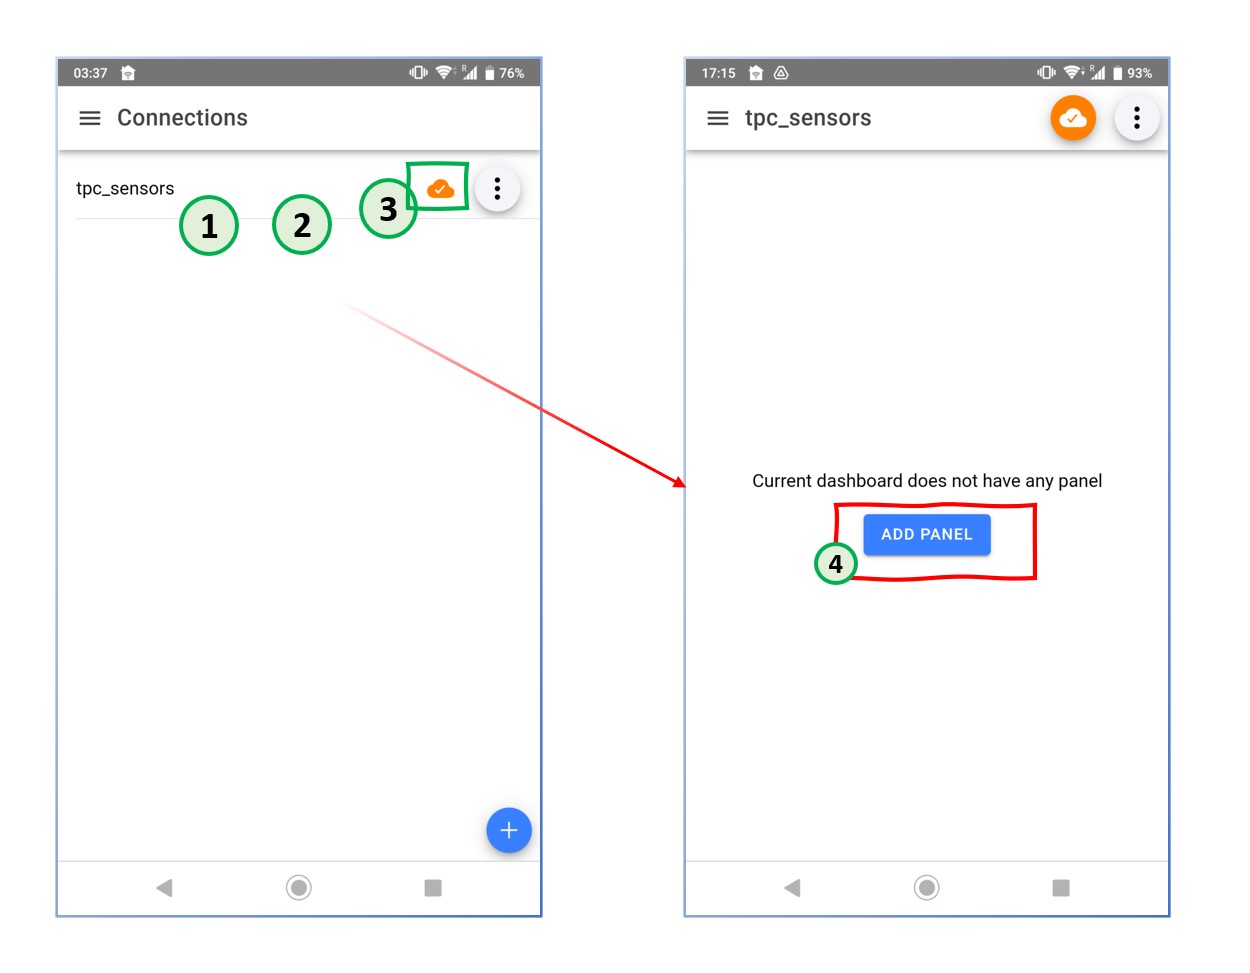
The application still requires more customization to display the data. Data is shown in panels, so you need to create a panel to display it.

1

Now, you can view the new connection that you recently created.
2

If you see check sign inside the icon, it means that you successfully connected to MQTT broker.
3

In order to show the data received from MQTT broker, you need to add panel. In order to create one, click on tpc_sensors.
4

Click on ADD PANEL to create a panel.

Another critical point to remember is the “topic name” that the TPX connection is going to publish to the MQTT broker

You may not have noticed that topic name when creating the TPX connection because we used the default topic name. But now that information will be used.

The device we use sends the data in the following format.

Which is decoded into JSON format by TPX, as shown below

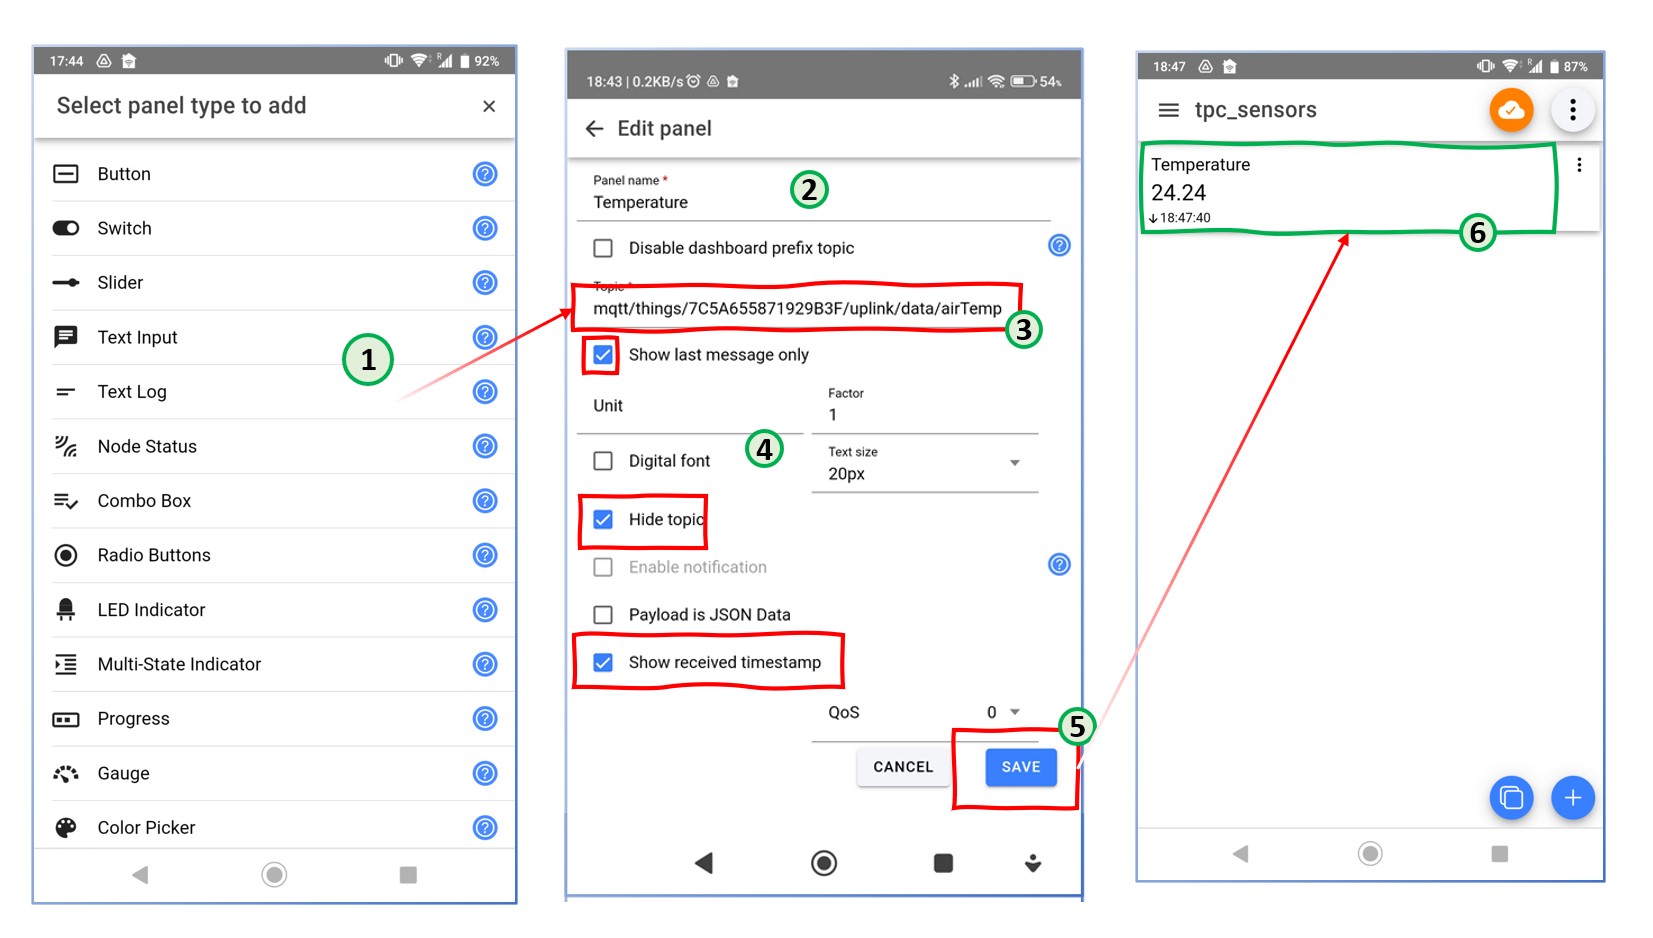
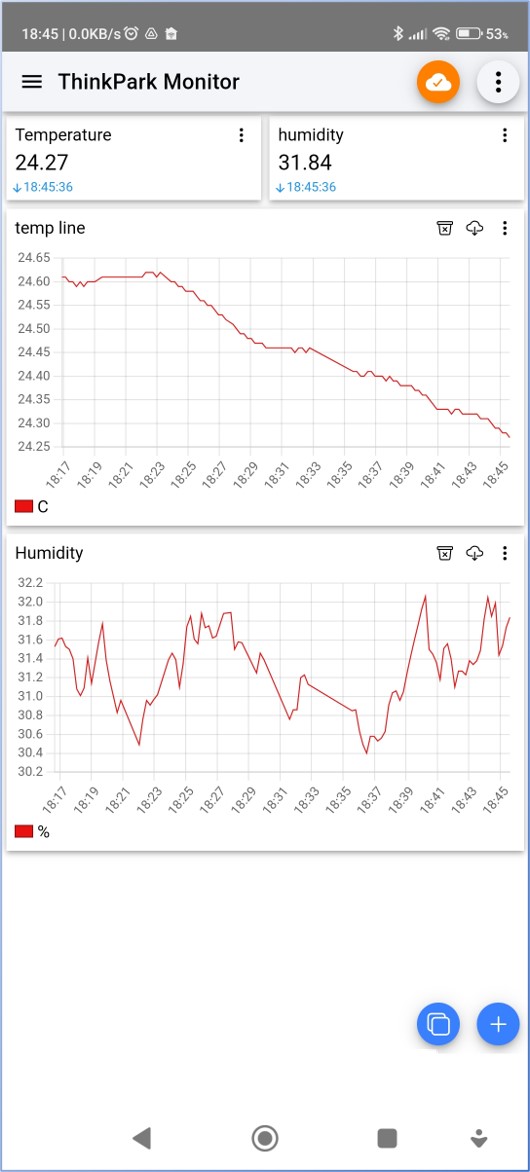
You need to use the Text Log type panel and customize it to show temperature reading.

1

Select Text Log panel to show the data received from MQTT broker.
2

Enter any arbitrary name to be shown at the Panel.
3

Enter the topic name together with DevEUI and data name (airTemp).
4

Check the shown options to have better presentation on the panel.
5

Click on SAVE to continue.
6

Now, received data will be shown in the panel.

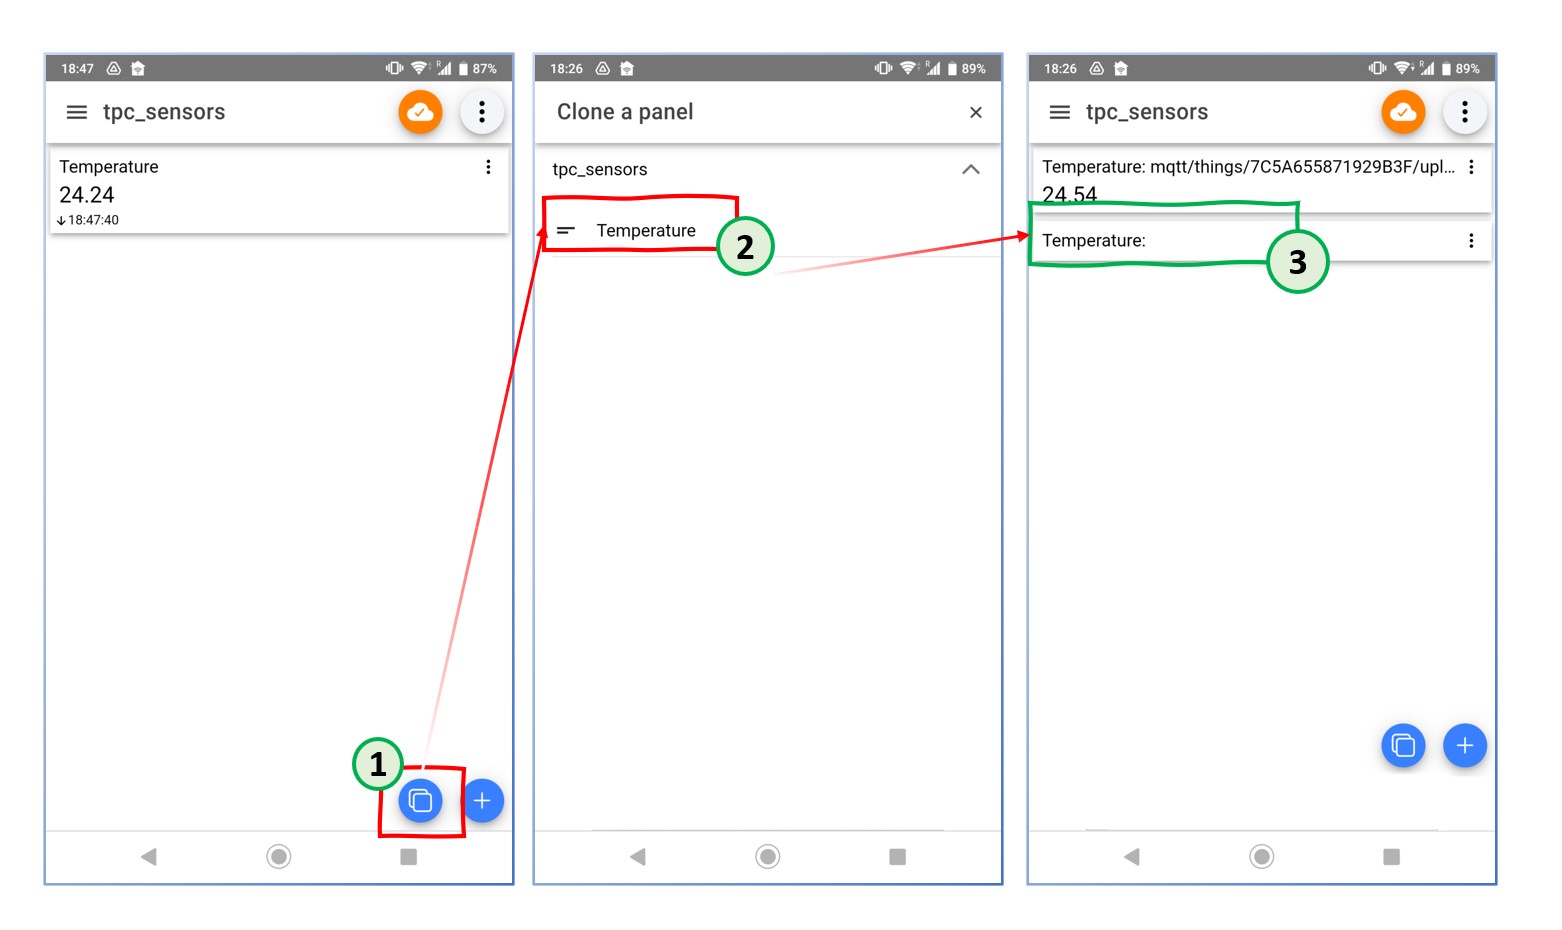
In order to show the humidity value, create a clone of the temperature panel.

1

Click on CLONE icon to clone of a panel.
2

Click on Temperature panel to create copy of Temperature panel.
3

Now you can see that a new copy of Temperature panel created.

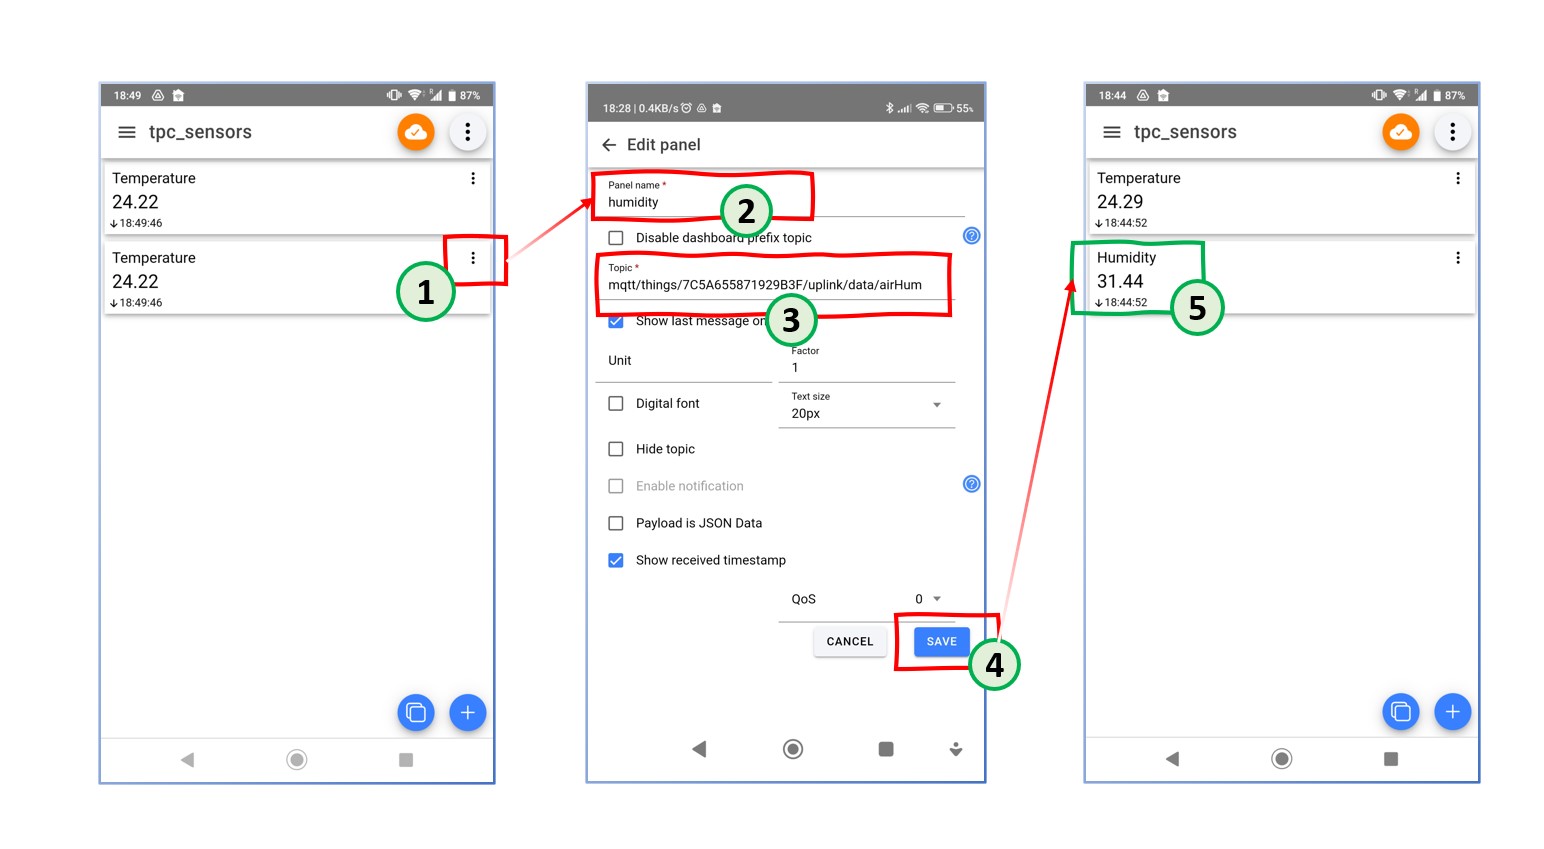
Now, update the cloned temperature panel to show the humidity readings.

1

Click on more options icon to select EDIT to customize the newly created panel.
2

Change Panel Name from Temperature to humidity.
3

Update the suffix of Topic field from airTemp to airHum.
4

Click on the SAVE button to save changes.
5

Now you can view that panel has been updated.

If you wish, you can use other types of panels to create views that suit your preferences.