To maintain a healthy and organized life at work, a clean desk is a must, especially during a pandemic.
This Clean desk solution, powered by Strips & WMW, is an ideal to keep your workspace clean or notify the right people when it’s not.
This tutorial provides you with the key steps to complete to get started with this solution.
Before you start...
In order to complete this tutorial, you will need at least :
- The “Clean Desk Evaluation Kit” available on ThingPark Market. This kit contains the required HW and SW parts to implement the solution:
- 1 x Strips presence and its switch
- 1x three-month access to the light version of WMW-HUB application.
- A ThingPark Community account with an active LoRaWAN™ gateway. If you don’t have a gateway, you can purchase one on ThingPark Market, ready to be activated on ThingPark Community.
Step 1: Connect ThingPark Community to WMW application
Let's start with WMW:
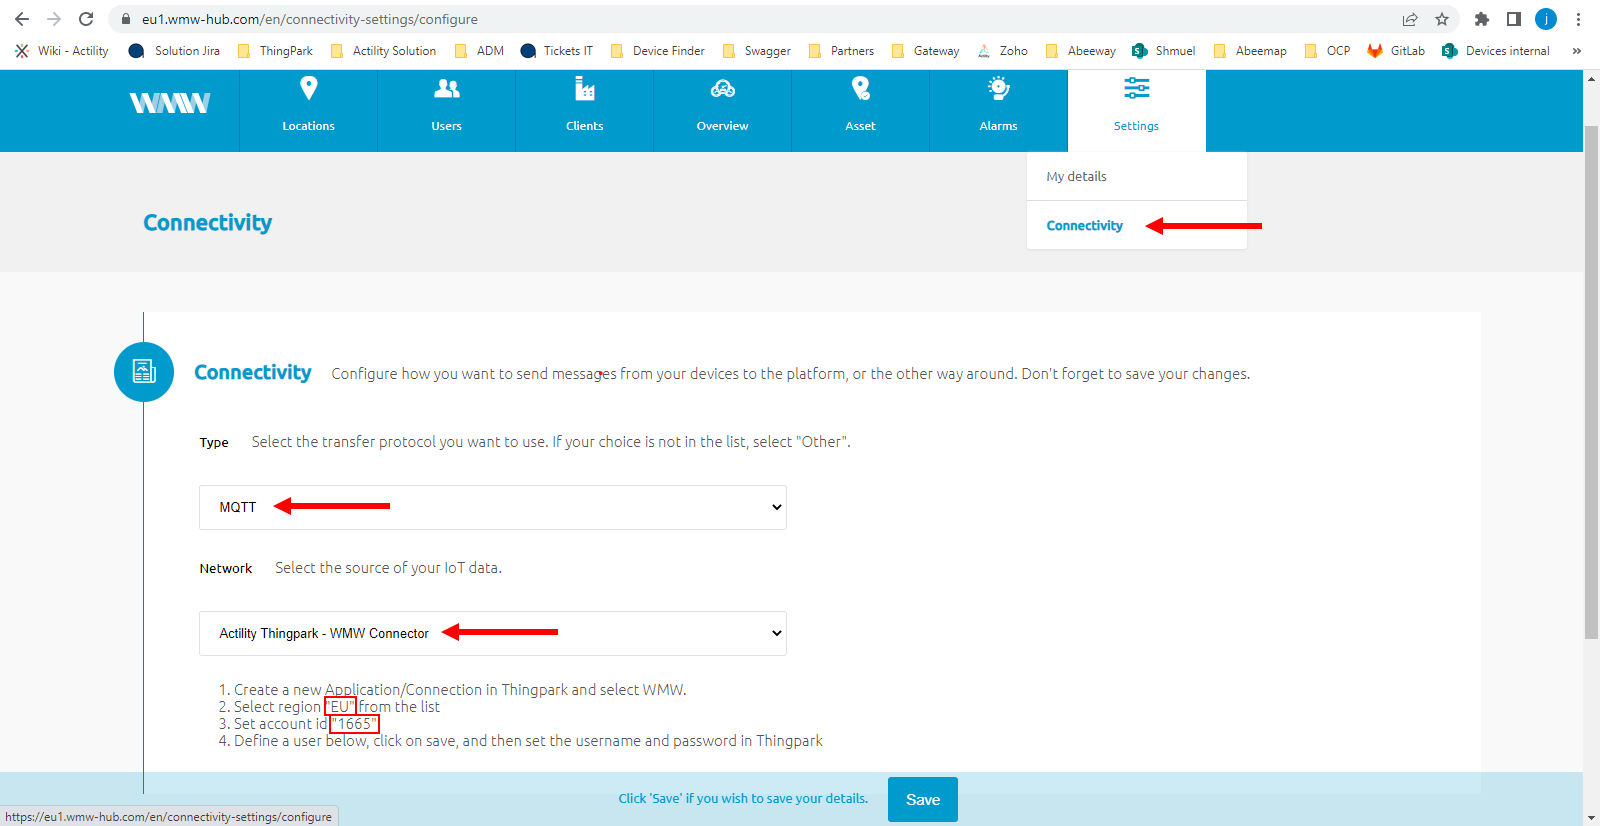
Connect to your WMW account on the URL https://eu1.wmw-hub.com/en/login. Once you are logged in, select "Connectivity" in the "Settings" tab, then MQTT as a type and Actility ThingPark as the network.
You'll find there the region and account id corresponding to your WMW account, keep it for later.
On the MQTT user line, click on the big green plus button on the left. It will give you two fields to set your MQTT login and MQTT password. You can choose whatever you want but be sure to keep it written for later.
Now that everything is set, you can click on the "Save" button.
Your ThingPark Community application are accessible through the following URL.
Once you log in, you should see a screen displaying the number of base stations and devices you’ve connected on this account as well as their status. No device or base station should be connected for now.
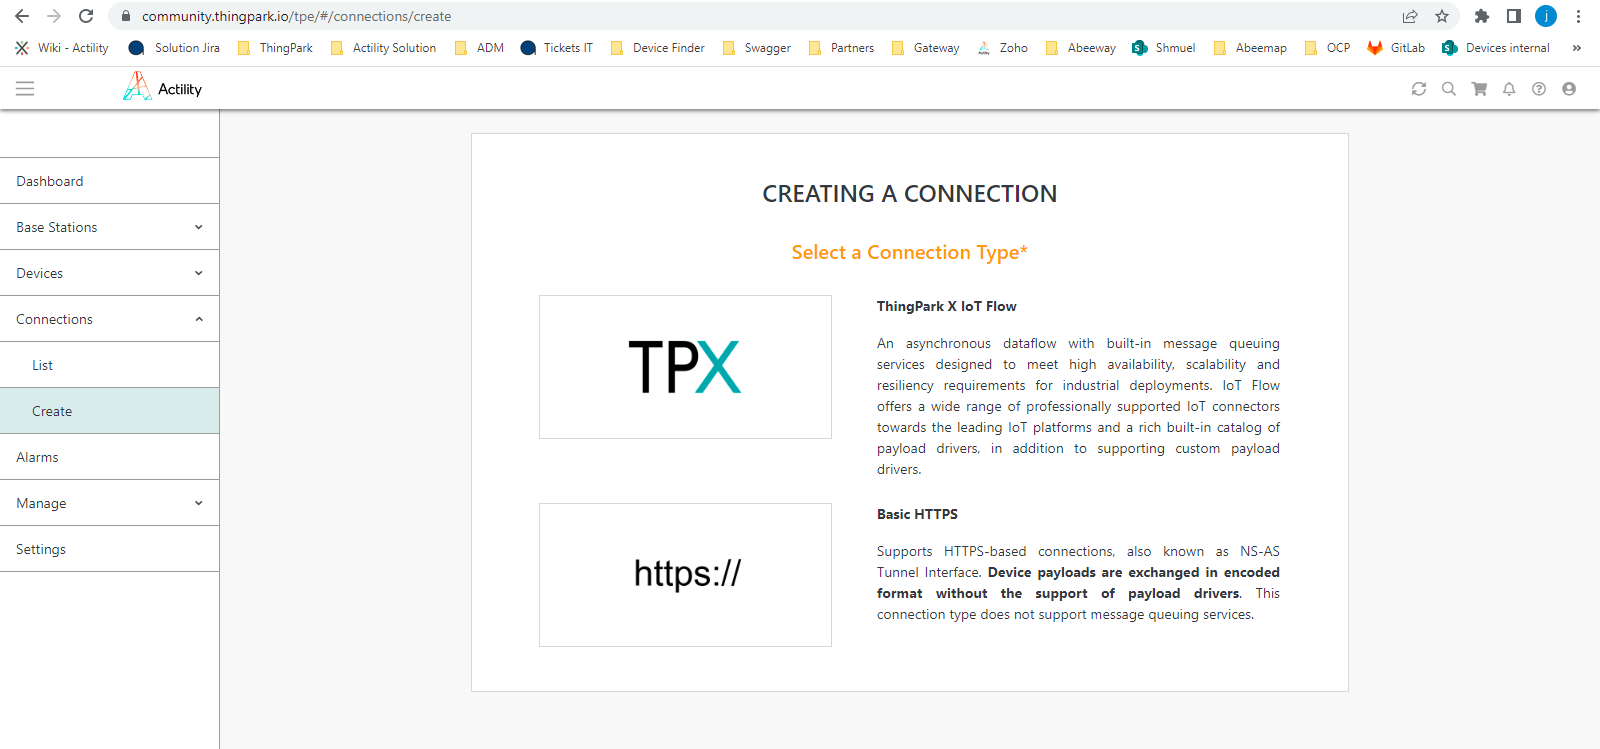
Select “Application > Create” on the list on the left to create your WMW application, it is mandatory in order to send the device’s messages to WMW; select the “TPX” option. It will load a page inside of which you'll find a WMW option. Select it.
A few fields are to be filled in order to complete this operation:
- Name: Name of your application displayed in ThingPark Community
- Region: you retrieved it on WMW
- Entreprise ID: this is the account ID you retrieved earlier
- Username & login: the MQTT username and logins you defined on WMW
Click on "Create" to finish the creation of this side of the connection and go in your list of application. The link between WMW and ThingPark is established !
Step 2: Activate your Sensative Presence sensor on ThingPark Community
Now that you have your application, you can add your device on ThingPark too.
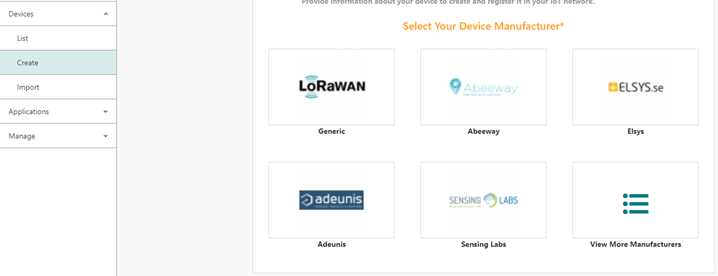
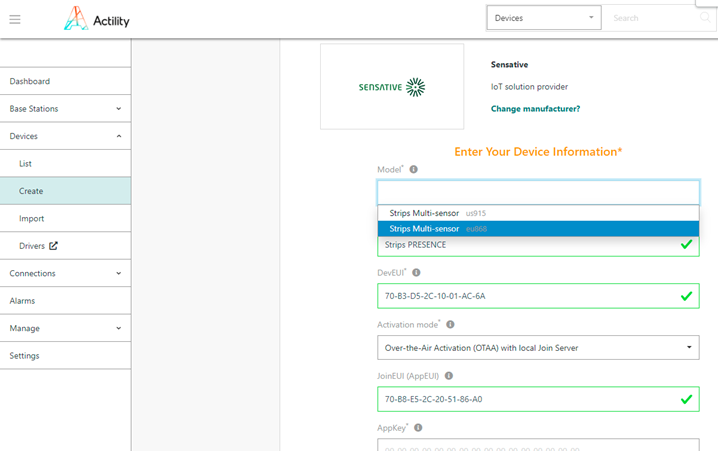
Go to “Device > Create” on the list on the left, if Sensative is in the list of the device manufacturers, select it, if it’s not, select “View more manufacturers”.
Once again, you will have to fill field to create your device:
- Model: Choose a Class A model that correspond to your region (AS923 correspond to Asia, AU is for Australia, ETSI is for Europe and FCC is for the United-States).
- Name: The name your device will have in ThingPark Community.
- DevEUI, AppEUI and AppKey: Codes you should have received with your device.
Select the application you created for WMW; it should have a green dot showing that it’s working well.
Leave the mode to “No location” and click on “Save” finalize the operation.
Step 3: Deploy your Presence sensor in the field
To start up the device you need to follow the magnet procedure indicated on the following page: strips manual. You just need to hold one of the magnets that is fixed on the device next to the round part of the device three times; you should see the LEDs blink in green indicating that it is working.
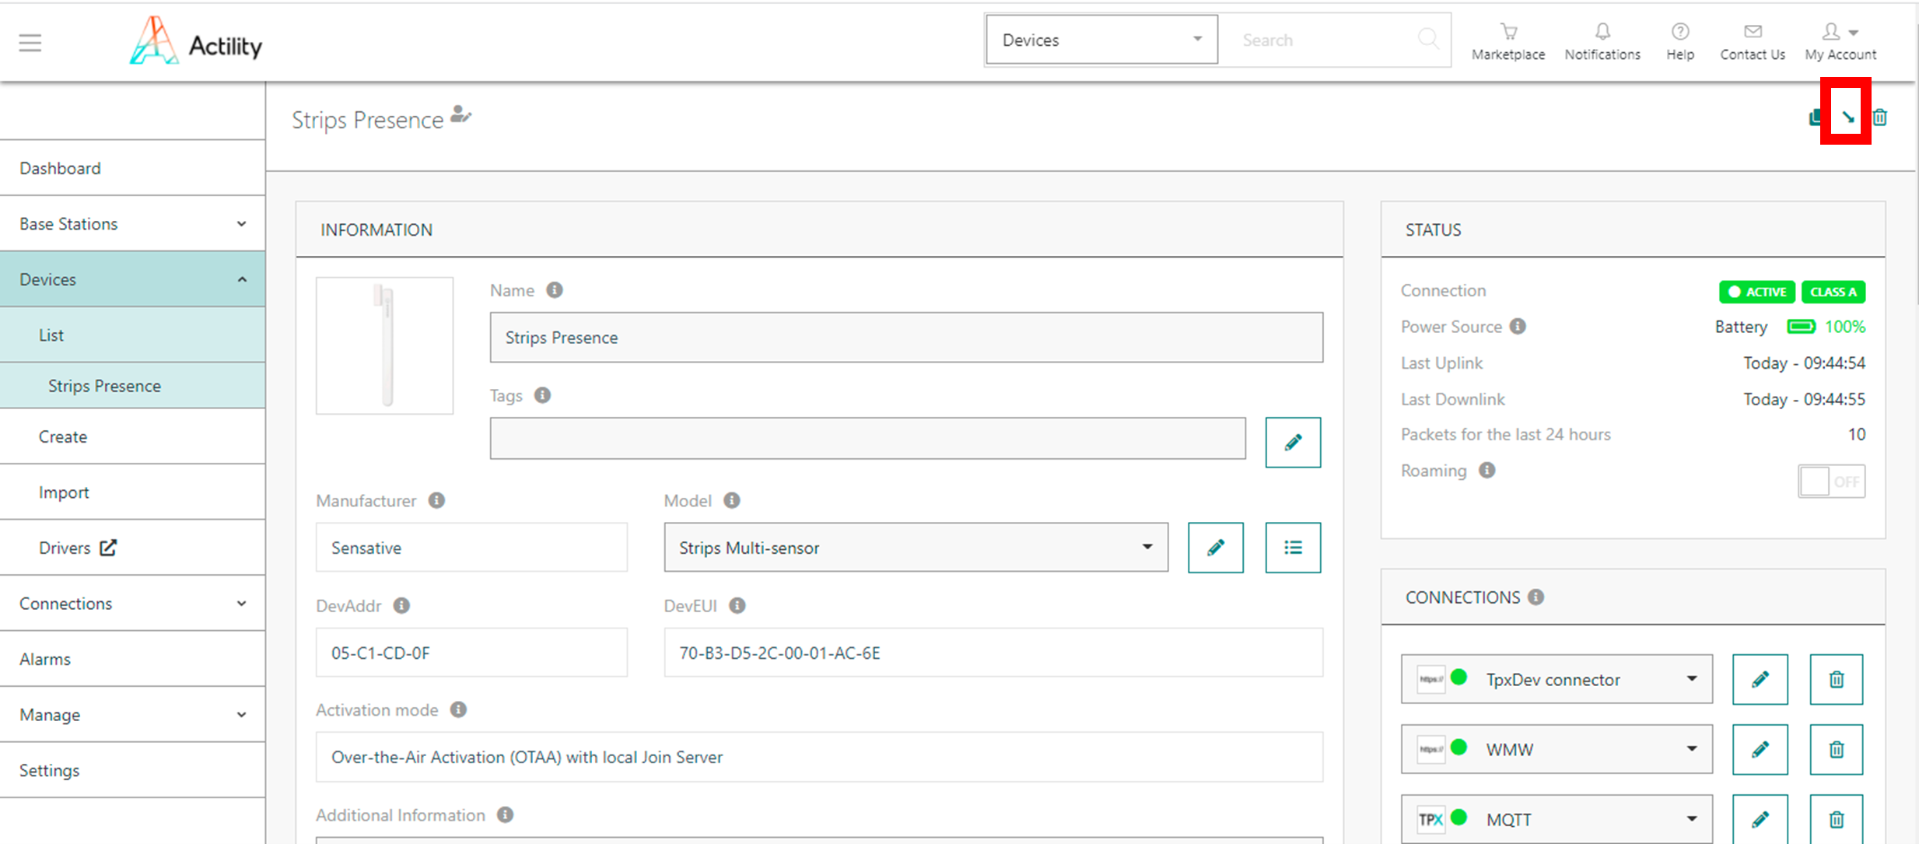
To configure your device, you can use the lora config tool that Strips developed for their devices. Once you have generated your payload, you can create a downlink to your device by clicking on the arrow on the top right of your device page on the ThingPark user interface.
Step 4: Monitor your desks with WMW application
Using the credentials you received through email, you can access to WMW-Light on the following URL:
https://demo.wmw-hub.com/en/login
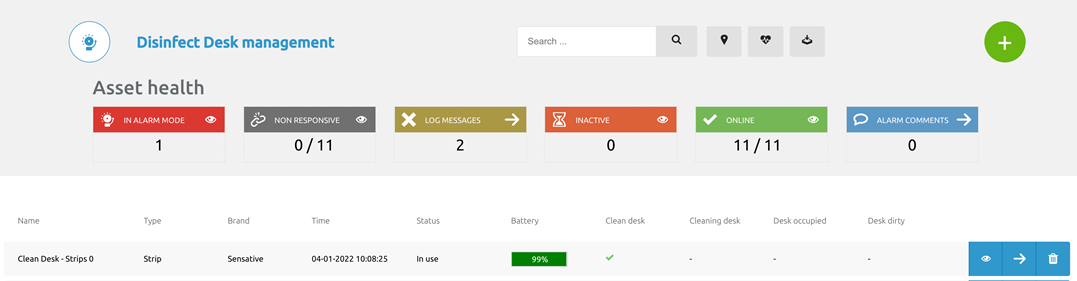
Since you already have provisioned your device on ThingPark Community, the main step that should be left will be to add the device on WMW. Click on “Asset” then “Disinfect Desk management” and then “Dashboard”. An empty page should appear since you have no device added yet. Click on the big green + to add an asset for your device.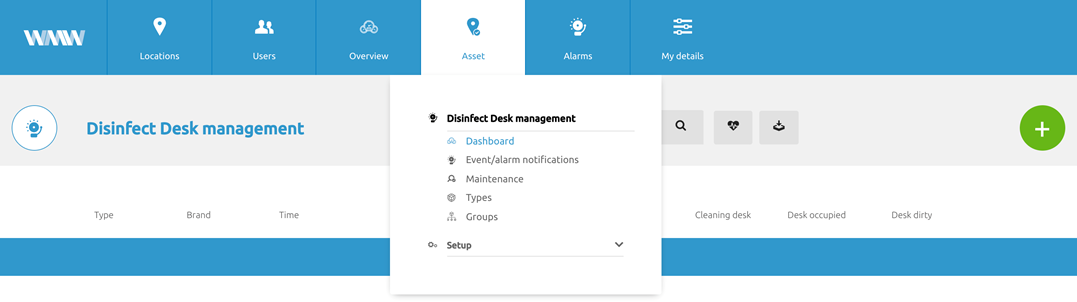
Give your asset a name and enter the device DevEUI in the field “Unique device identifier”. You must select or create an asset type in order to create your asset; once you are done, click on “Save” and your asset, with device should appear on the dashboard.
You can pick its position if it does not return it by itself, and if everything goes well, the information of your device should appear as the payloads are transmitted.
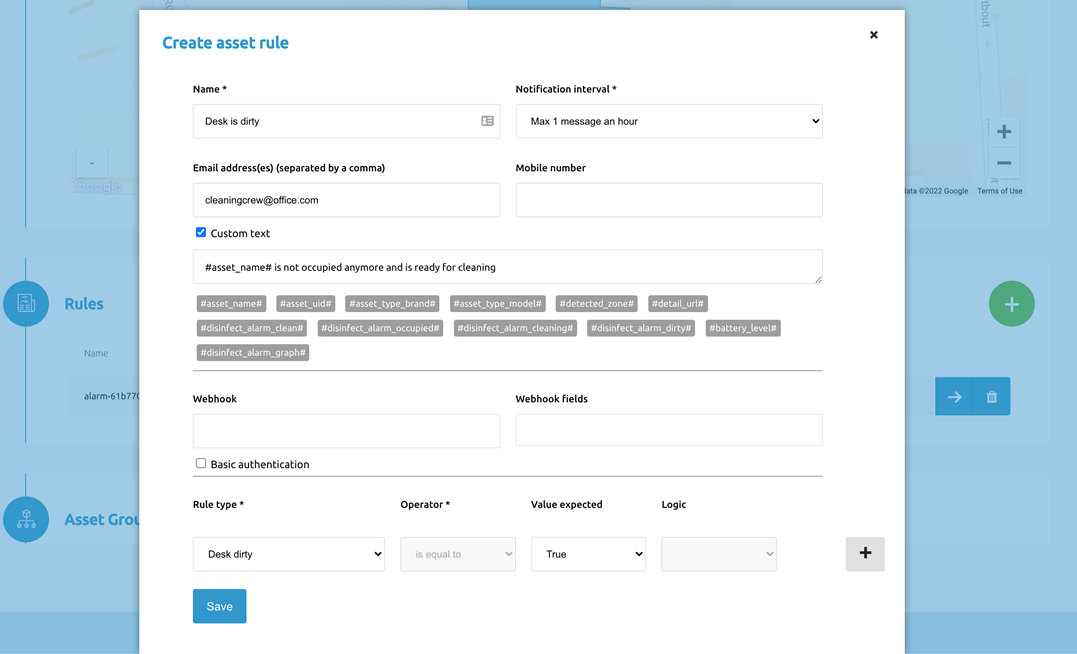
If you want to add alarms to your device, return to the dashboard page and click on the arrow next to the asset.

Click on the small pen in the top right corner to edit your device, scroll down to find the “Rule” section, and click on the big green +. There you can add and edit your alarms to send emails or create webhooks depending on the measures your device transmits.
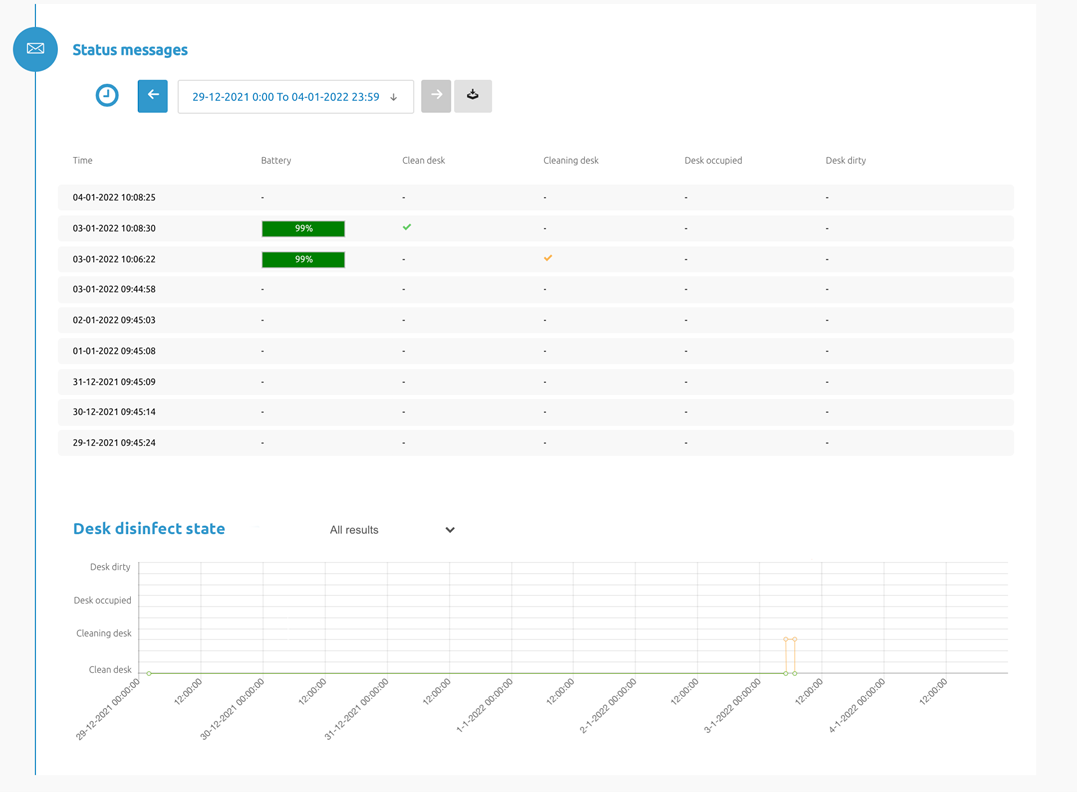
You will find the information displayed by the device on the dashboard of the corresponding application.
And if you want more extensive information, click on the arrow at the end of the line of the asset, this will bring you to the “Asset Details’ where you’ll be able to view more information.
Within the Asset Details you will first find a picture – if uploaded upon asset creation, the latest message received and the current location of the device (manually selected upon adding the asset, if a location has been created)
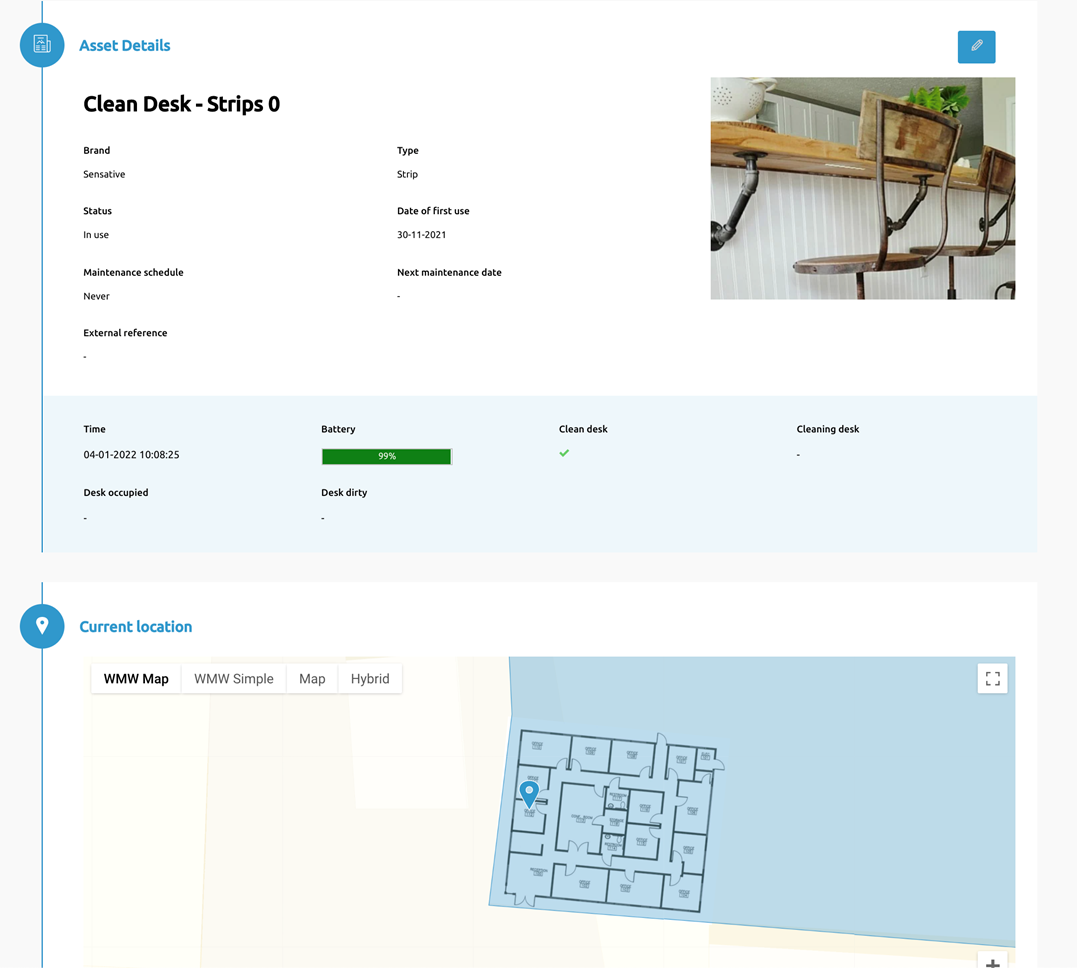
Below you can view historical messages received in a list with a date picker where you can select your range, and a historical graph of the states for that range – please note graph is not final and is subject to change.