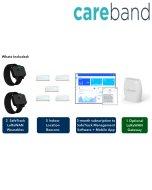
Start your LoRaWAN journey with ThingPark Enterprise & and BoB Predictive maintenance Solution
The BOB sensor is a technology for predictive maintenance and operational assistance by permanent monitoring of vibrations and recorded temperatures of isolated systems (pump, air conditioning, cooling unit, fan…)
WMW Hub platform gathers, processes and analyzes data collected from people and things. Review, predict and prevent situations and act accordingly! Optimize, increase and become more efficient!
Before you start...
What will you learn?
Carrying out the steps of this quick start guide, you will learn:
- How to set up your Sensor
- How to configure TPE to make the data flow to your application
- How to setup your WMW account
- How to retrieve your sensor’s data through the application interface
What do you need to get started?
To successfully complete this getting started guide, you will need:
- An Eolane BoB sensor with its provisioning keys available on ThingPark Marketplace
- WMW user account with server location URL
- A ThingPark Community account that you can create for free
- A ThingPark Community account with an active LoRaWAN™ gateway. If you don’t have a gateway, you can purchase one on ThingPark Market, ready to be activated on ThingPark Community
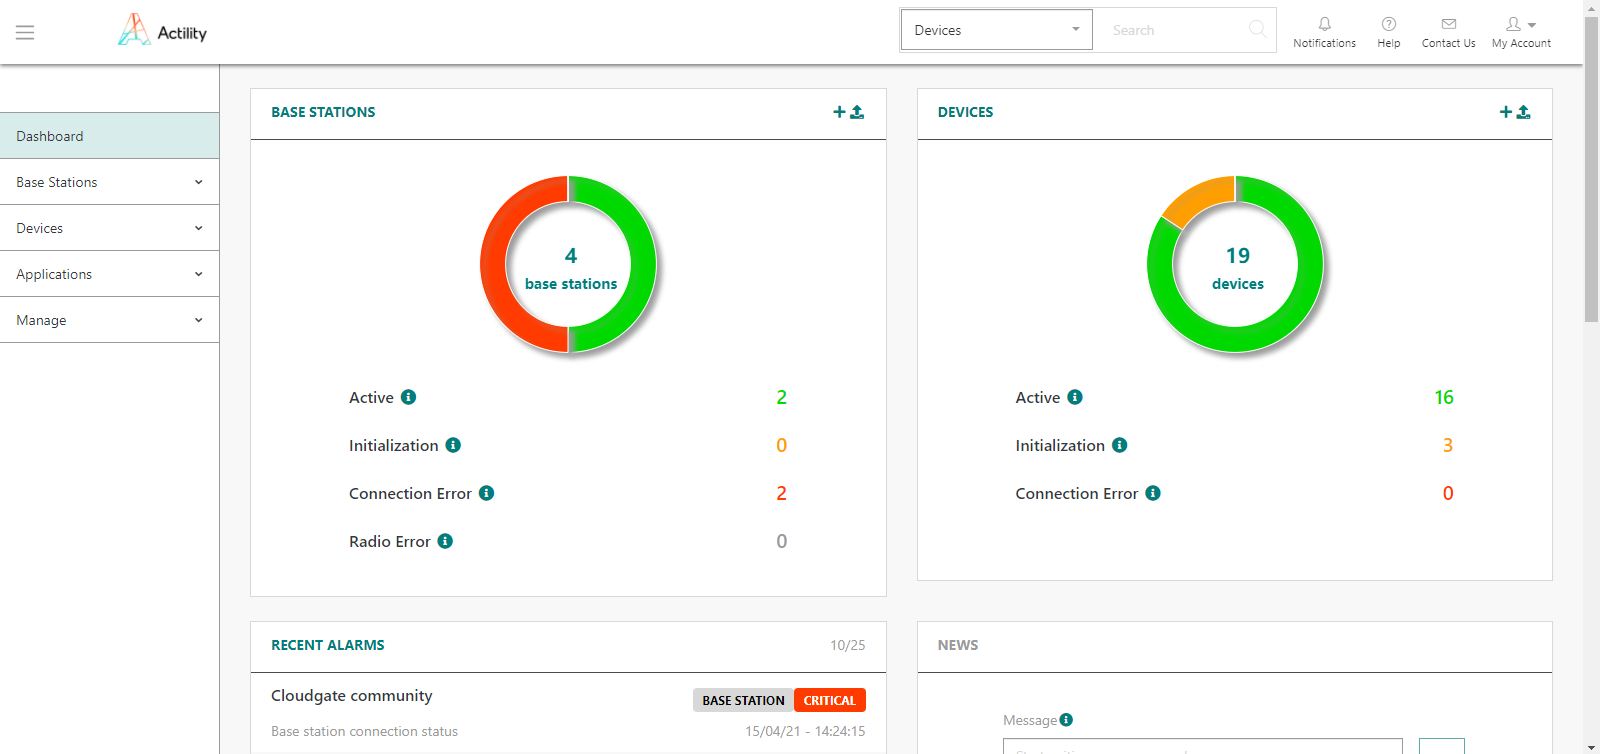
Step 1: Login to ThingPark Community and check your gateway
Login to ThingPark Community using your credentials.

You will land on a page looking like the following picture. If a gateway is connected and working, at least a part of the left circle will be green. You can also go to “Base Station”>”List” to check as well.
At least one Base Station (Gateway) should appear running and must be located in the same area than your BoB device.
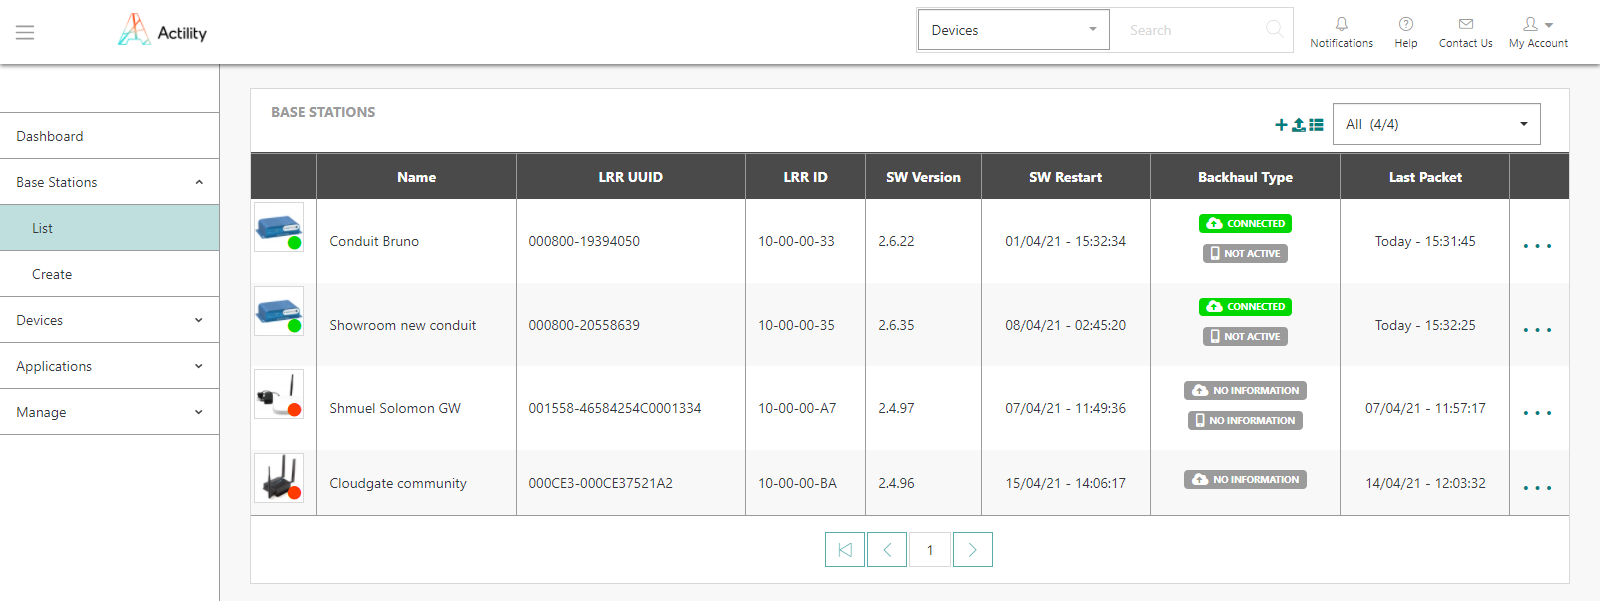
In case the base station is registered but not connected check if the gateway is powered on. Other issues can be checked in the following manual ressource.
More resources
- To find out which gateways ThingPark supports, you can go to this page
Step 2: Connect ThingPark Community to WMW application
Let's start with WMW:
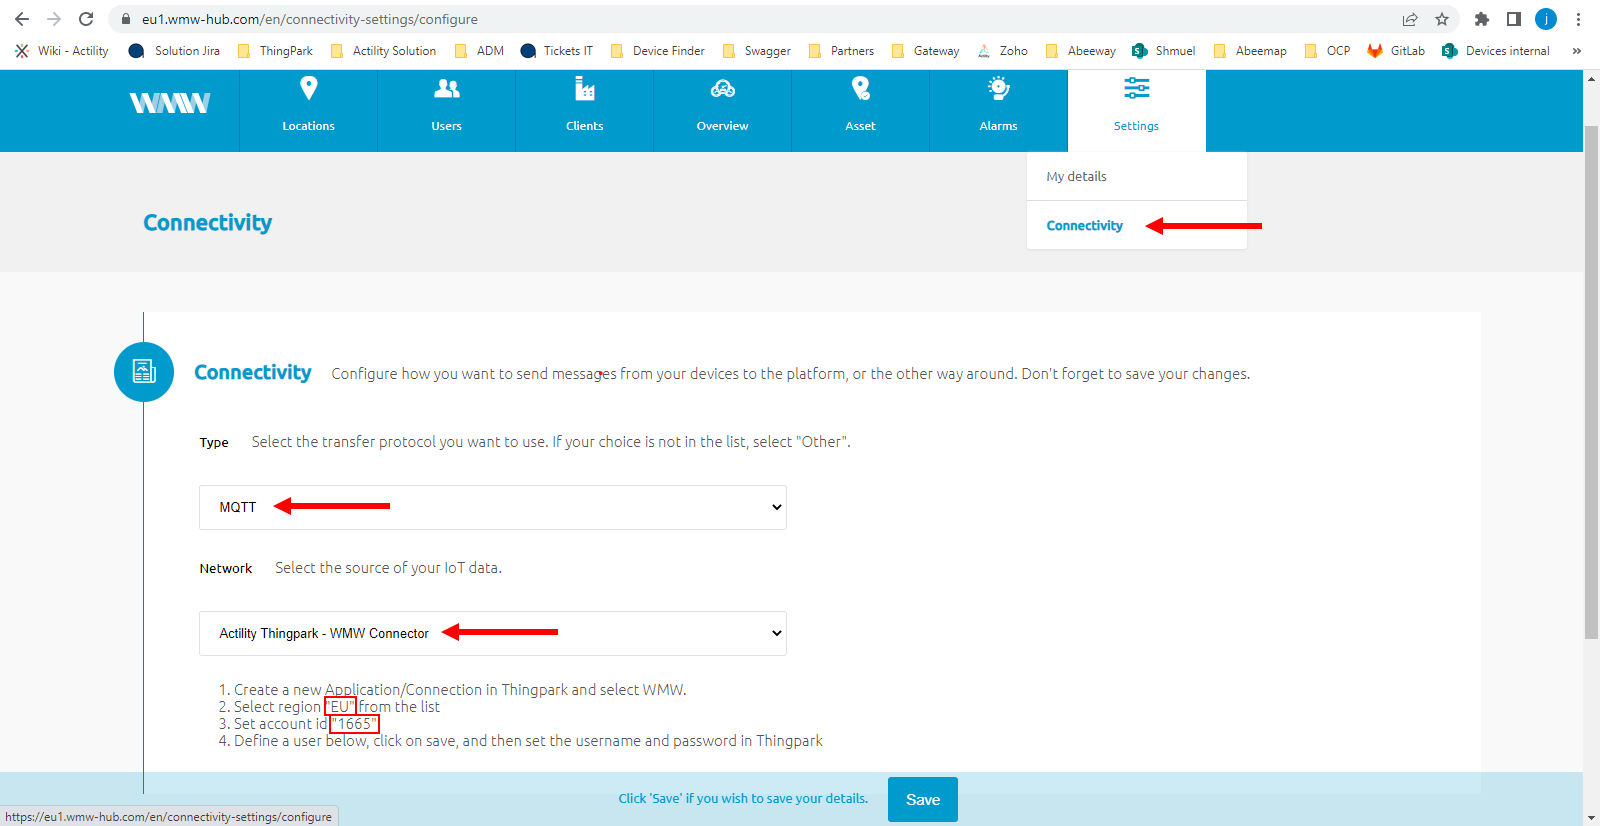
Connect to your WMW account on the URL https://eu1.wmw-hub.com/en/login. Once you are logged in, select "Connectivity" in the "Settings" tab, then MQTT as a type and Actility ThingPark as the network.
You'll find there the region and account id corresponding to your WMW account, keep it for later.
On the MQTT user line, click on the big green plus button on the left. It will give you two fields to set your MQTT login and MQTT password. You can choose whatever you want but be sure to keep it written for later.
Now that everything is set, you can click on the "Save" button.
Your ThingPark Community application are accessible through the following URL.
Once you log in, you should see a screen displaying the number of base stations and devices you’ve connected on this account as well as their status. No device or base station should be connected for now.
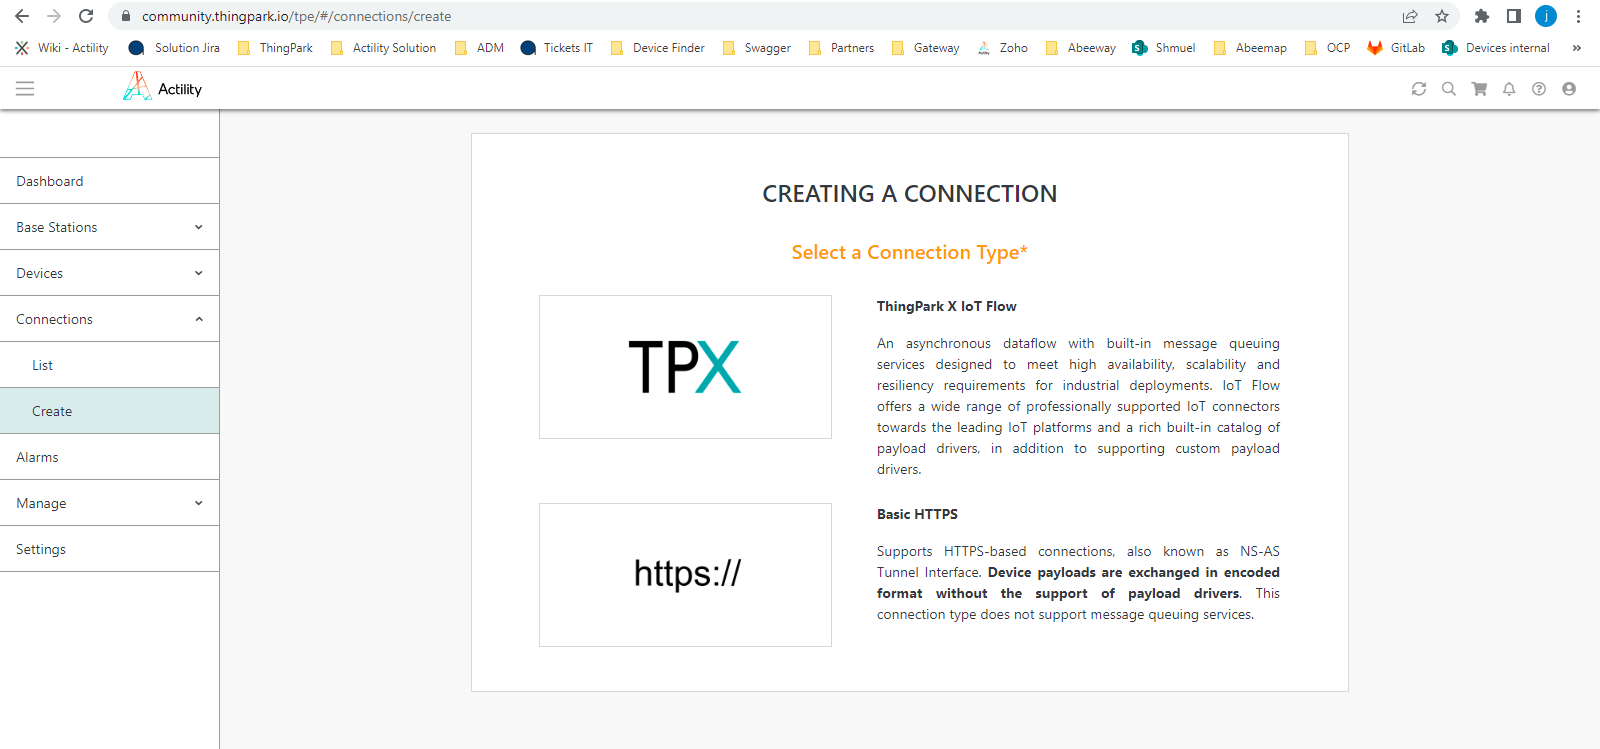
Select “Application > Create” on the list on the left to create your WMW application, it is mandatory in order to send the device’s messages to WMW; select the “TPX” option. It will load a page inside of which you'll find a WMW option. Select it.
A few fields are to be filled in order to complete this operation:
- Name: Name of your application displayed in ThingPark Community
- Region: you retrieved it on WMW
- Entreprise ID: this is the account ID you retrieved earlier
- Username & login: the MQTT username and logins you defined on WMW
Click on "Create" to finish the creation of this side of the connection and go in your list of application. The link between WMW and ThingPark is established !
Step 3: Create your BOB device on ThingPark
Now that you have your application, you can add your device on ThingPark too.
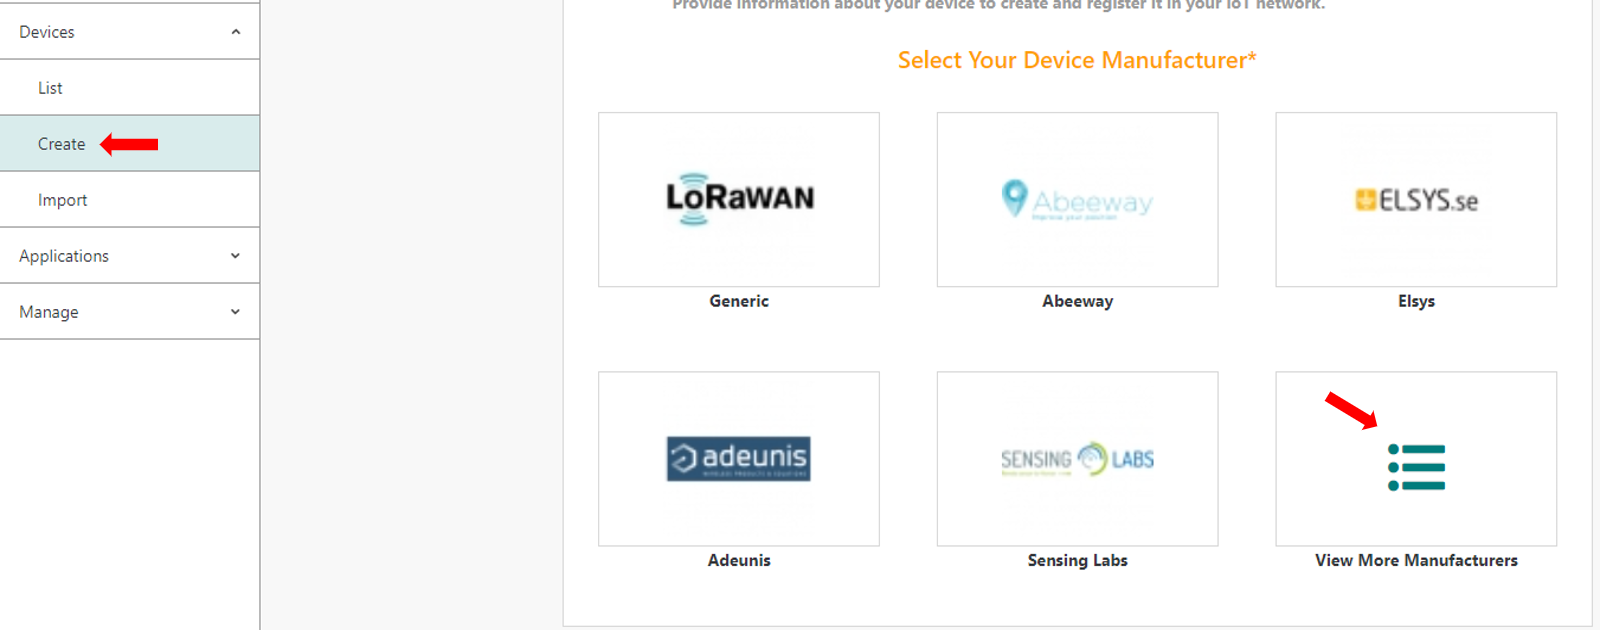
Go to “Device > Create” on the list on the left, if NKE Watteco is in the list of the device manufacturers, select it, if it’s not, select “View more manufacturers”.
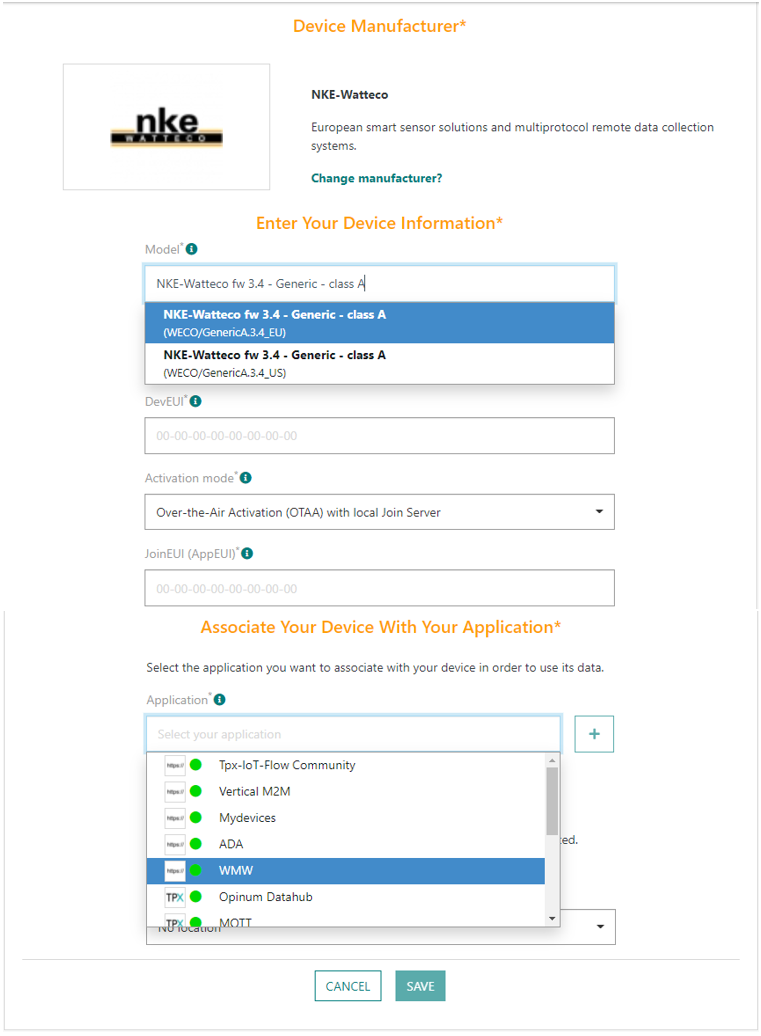
Once again, you will have to fill field to create your device:
- Model: Choose NKE-Watteco fw 3.4 – Generic - Class A (the first one is "EU" for Europe and the second one is "US" for United-States)
- Name: The name your device will have in ThingPark Community.
- DevEUI, AppEUI and AppKey: Codes you should have received with your device.
Select the application you created for WMW; it should have a green dot showing that it’s working well.
Leave the mode to “No location” and click on “Save” finalize the operation.
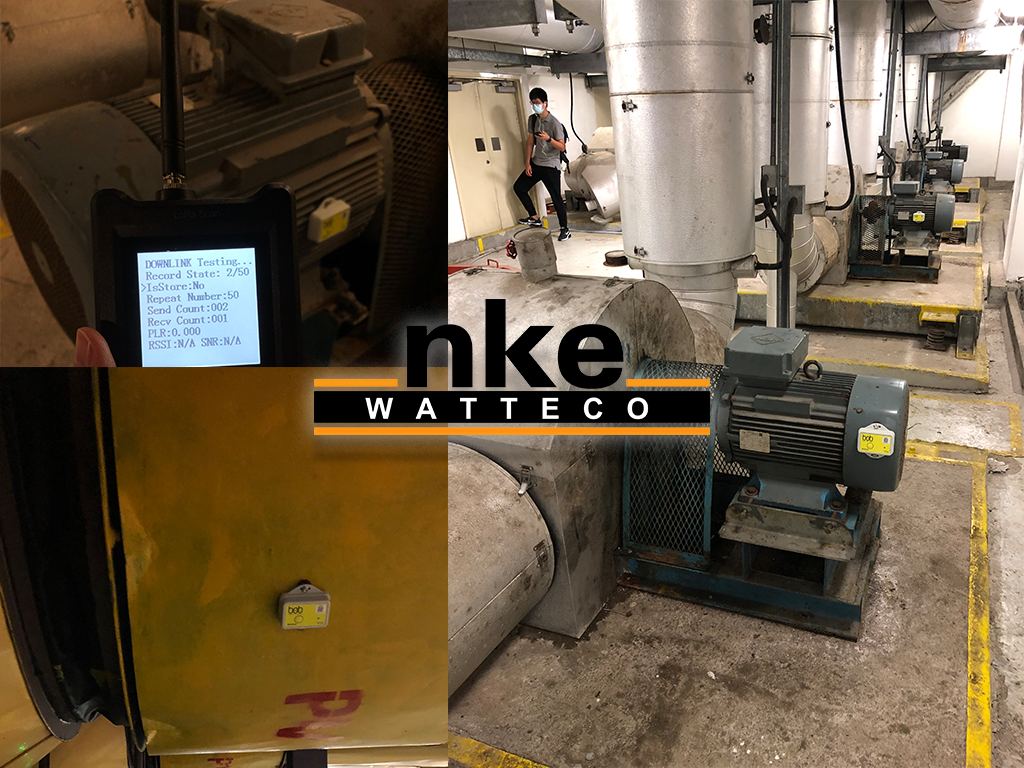
Step 4: Deploy your BOB sensor in the field
To start your BoB device, you must push its button more than 2 seconds. Its LEDs should blink twice in green. It will try to reach the LoRaWAN network and the vibration level ; during this period it will blink in blue and if everything is working as it should, the LEDs will blink five times in green.
Here are the behaviors your device could have if it has a problem:
- If your device blinks in red and purple, it means that the LoRaWAN network is unreachable. Check that your gateway is properly functioning.
- If your device blinks in red and blue, it means that the vibrations are too weak to be detected. Try to move your device to a different position.
- If your device blinks in red and yellow, it means that your device has a hardware problem. Contact the support team of NKE Watteco to get more information.
You can check the reference manual to see if it is behaving as it should or not in the subsection “2.2.1.2 Startup and troubleshooting”.
Step 5: Monitor your motor with WMW application
Add your device on WMW
Using the credentials you received through email, you can access to WMW-Light on the following URL:
https://demo.wmw-hub.com/en/login
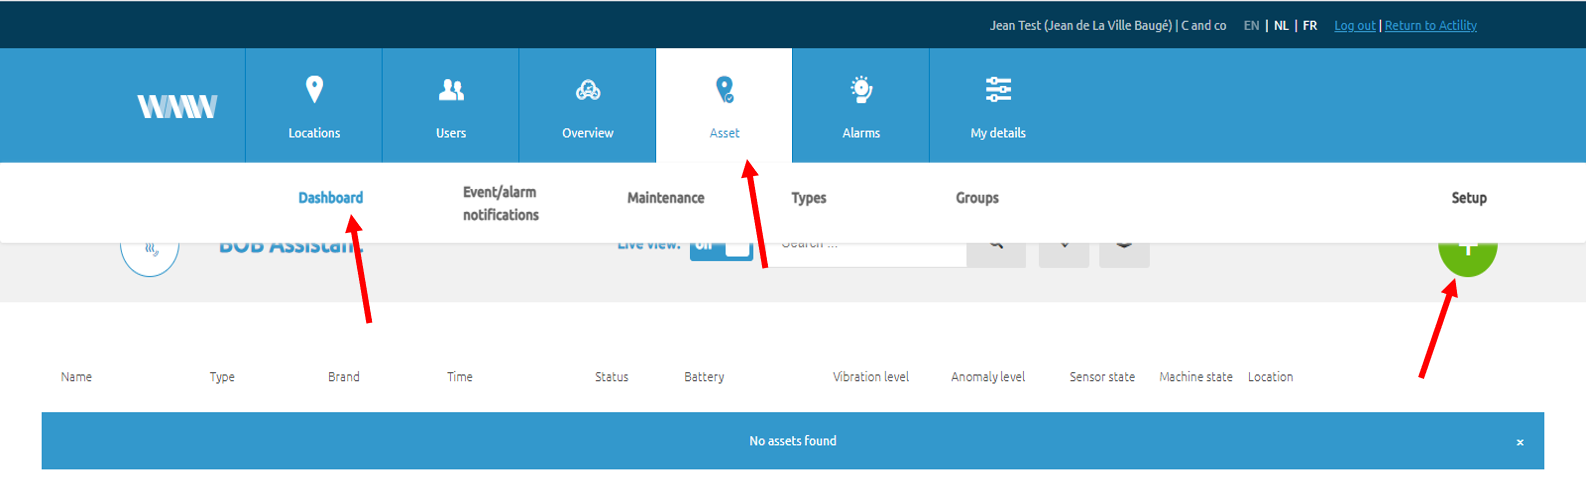
Since you already have provisioned your device on ThingPark Community and created the connector WMW, the only step left is to create your asset on WMW. Click on “Asset” and then “Dashboard” , an empty page should appear as you haven’t provisioned a device yet. Click on the big Green “+” button on the top right of your screen.
In order to fill your device creation fields, you need:
- A name that corresponds to your device: BOB Assistant
- Its Unique device identifier also called DevEUI
- Device type: NKE Watteco BOB
You must select or create an asset type in order to create your device:
- For the brand, pick the brand of your device: NKE Watteco
- For the type, enter the type of engine you’ll use the BOB on to monitor its vibrations such as a motor.
- You can add a picture or a description of this type of asset.
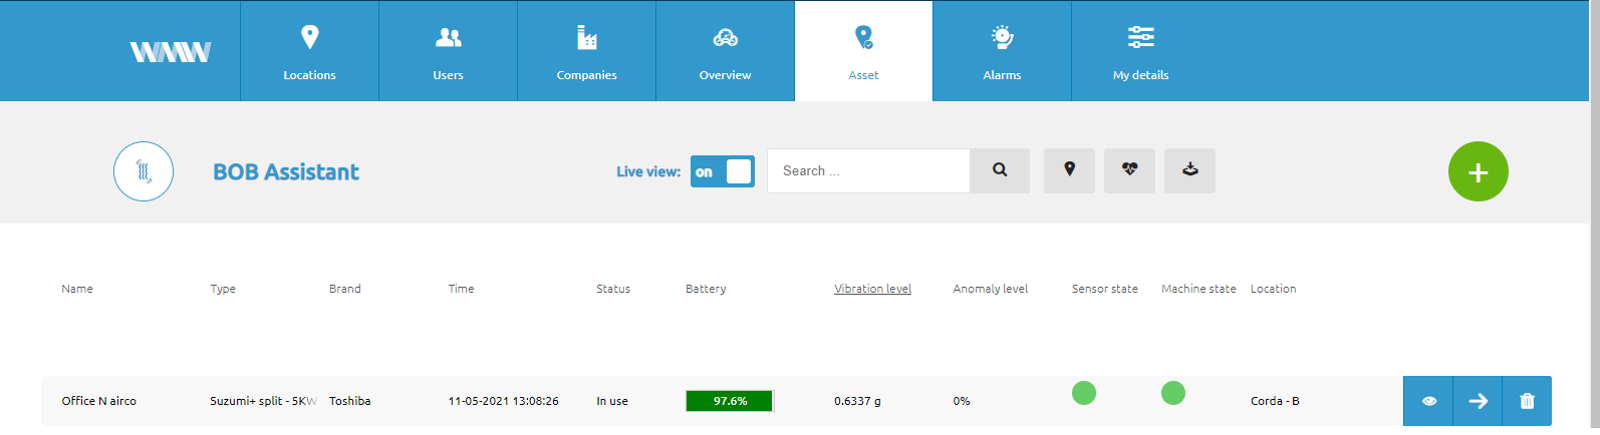
Once you are done, click on the “Save” button down your screen, your device should appear on the dashboard.
You can pick its position manually as the BOB doesn’t return it and if everything went well, you should see the information should appear as the payloads are transmitted.
Add alarms to your device
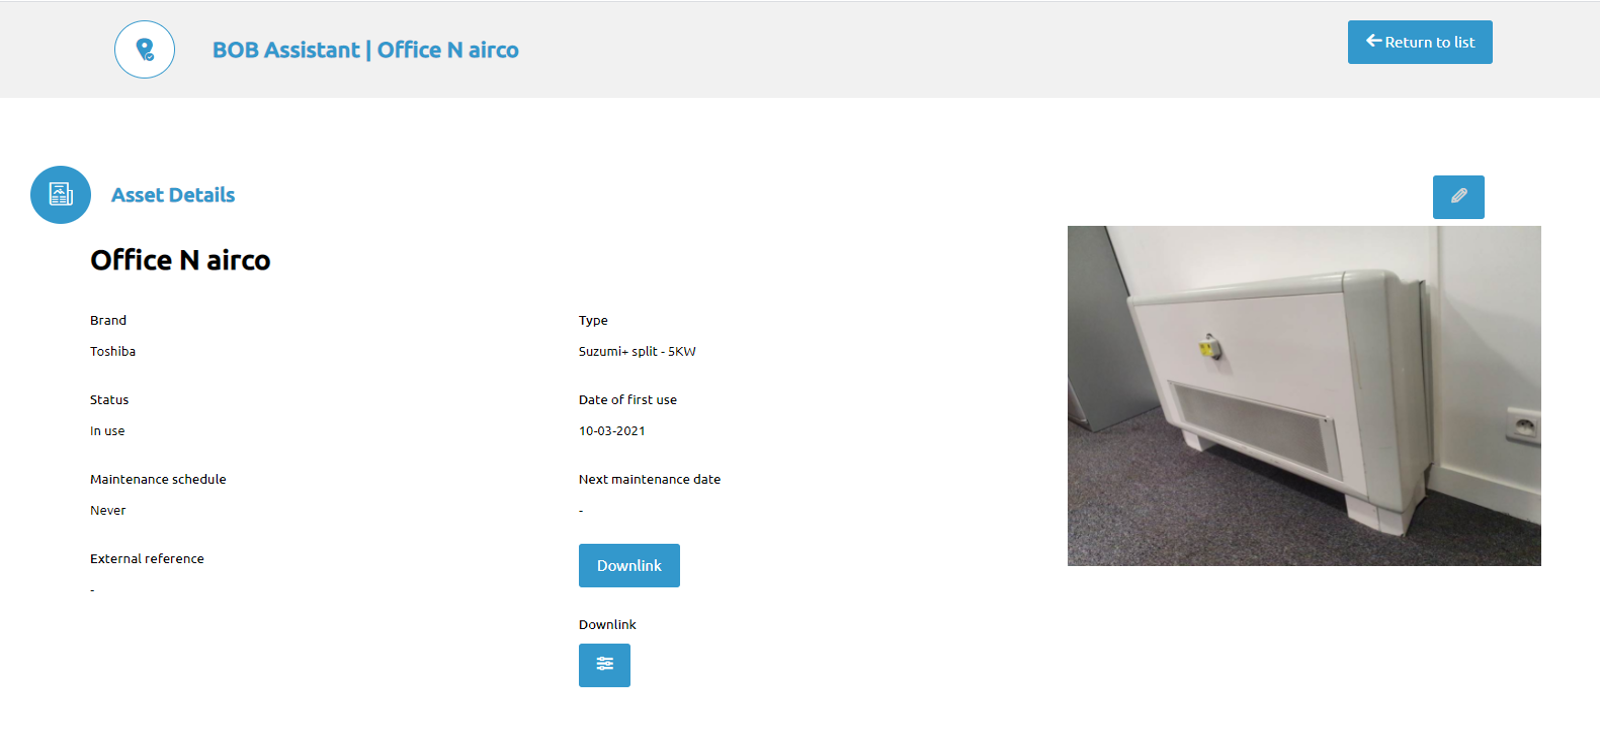
If you want to add alarms to your device, return to your dashboard and click on the arrow at the end of the line and click on it ; at the top of the image, you will find a pen, click on it.
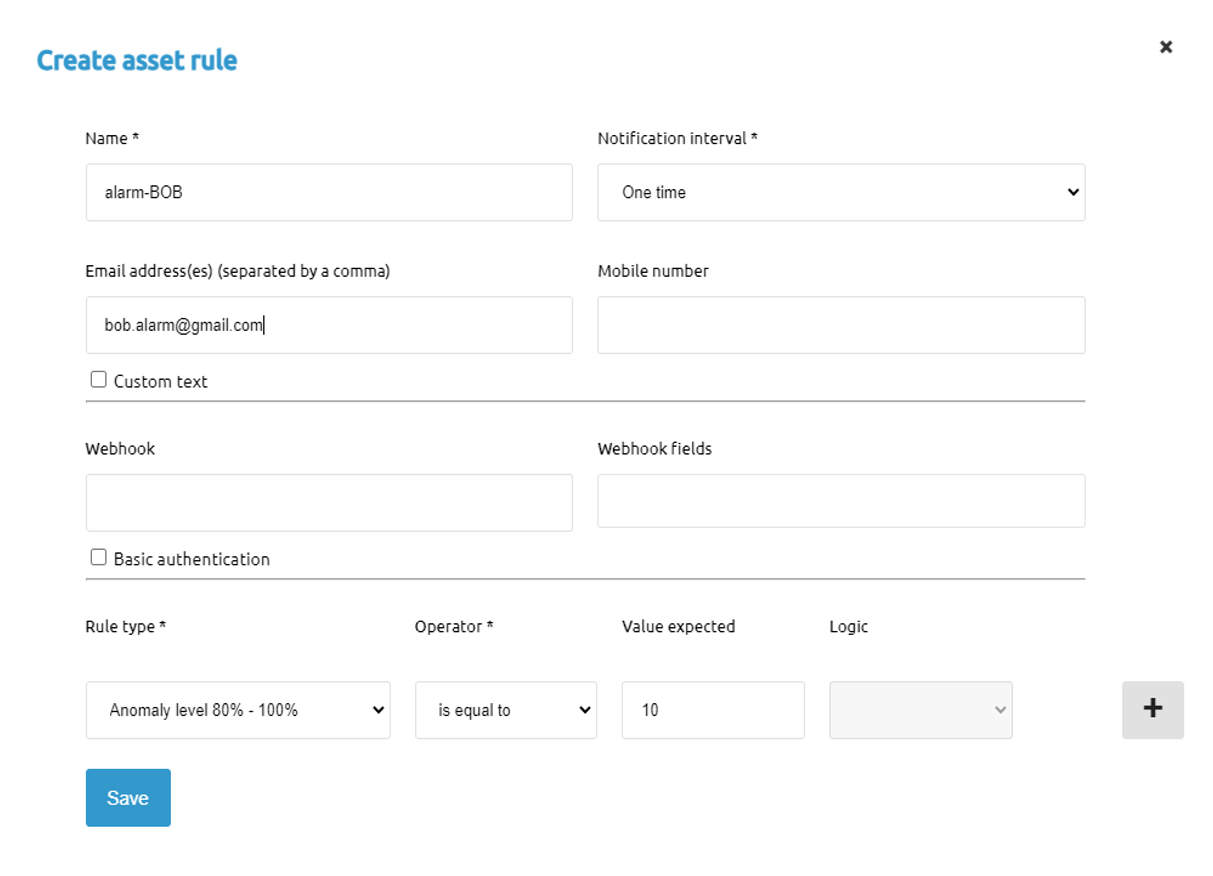
Scroll down to find the “Rule” section and click once again on the big green “+” button.
You will have to edit your alarm to parameter which measure will trigger the alarm and where the alarm will send notifications.
Monitor your device's information
You will find the information displayed by the tracker on the dashboard on the corresponding application.
And if you want more extensive information, click on the arrow at the end of the line of the device, you will find the anomaly level graph in "BOB Assistant" but also graphs of the temperature and alarm count, frequency and vibration level.