STEP – 2

WiFi Configuration of LoRaWAN® Gateway

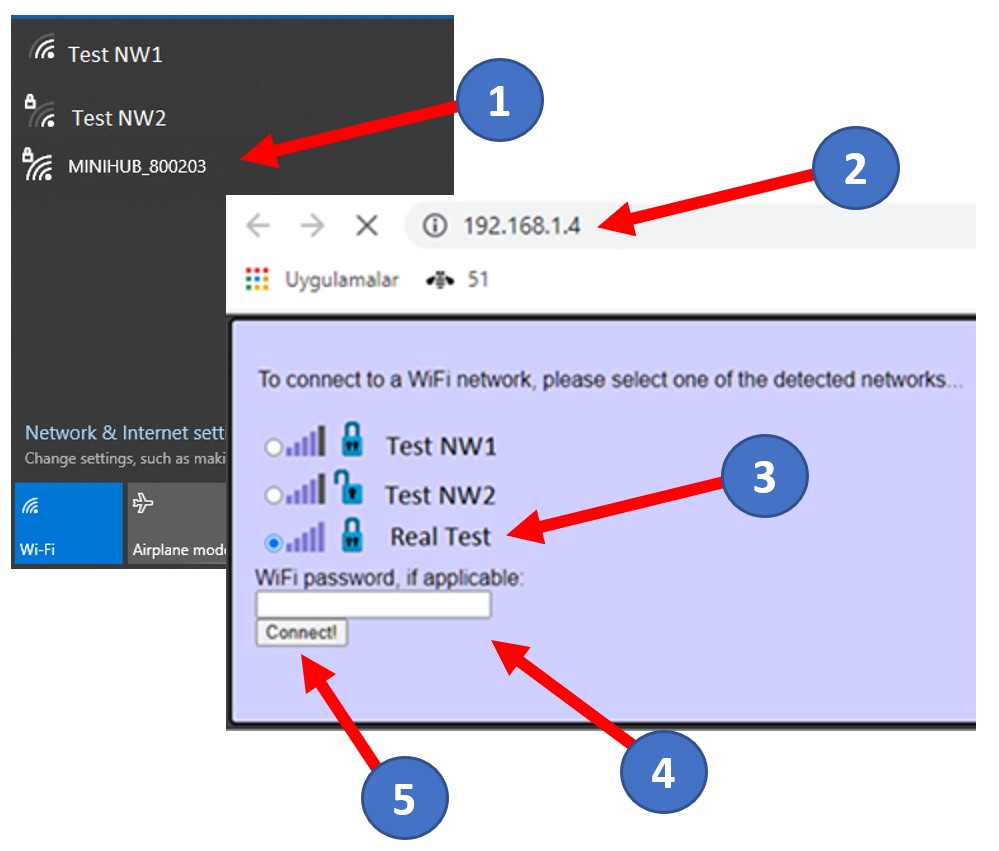
For the MiniHub LoRaWAN® Gateway to connect to the TPCP platform via the Internet, it needs to be connected to a WiFi network. To achieve this, follow these steps:

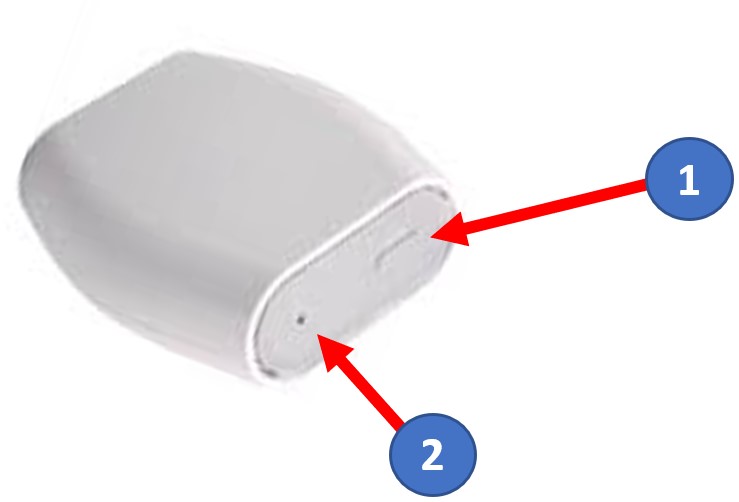
  1. Switch MiniHub into WiFi AP mode.
  2. Access to MiniHub and enter credentials (passcode).
  3. Select the WiFi Network to use in normal operation.
1

Press SETUP button for ~10secs.

2

You will notice that:

- Green LED will go off
- Red LED will blink slowly

When Mini Hub switch into AP mode, on your computer, you can see the Mini-Hub AP in available WiFi Network list. Please notice that in our case, AP name is MINIHUB_800203*

1

On your computer, select the SSID of the MiniHub and connect to it.

2

In your web browser, enter 192.168.1.4 to access the gateway.

3

Select the WiFi AP that you want to use.

4

Enter the password of the selected WiFi AP.

5

Click Connect! to connect your gateway to the selected WiFi Network.

* Please notice that last 6 digits of the WiFi Network name are the Serial number of your MiniHub.

When the gateway is successfully connected to the WiFi Network you selected, the following screen displays and the MiniHub gateway reboots automatically.

Note You will not be able to access the gateway via web browser again.

Accessing the gateway is only possible on AP mode (Config mode).

1

If the connection to the selected WiFi AP is successful, the gateway’s IP address is displayed.

2

The LoRaWAN® gateway reboots automatically and its Green LED blinks.

3

LoRaWAN® gateway is not displayed in the WiFi AP list anymore.

Leave a comment